
Save Photos For Email Or The Web In Photoshop CS5
In this Photoshop tutorial, we'll learn how to resize, optimize and save photos for uploading to a website or emailing to family or friends using a combination of the Image Size and Save For Web & Devices commands in Photoshop CS5! This tutorial is also fully compatible with Photoshop CS4.
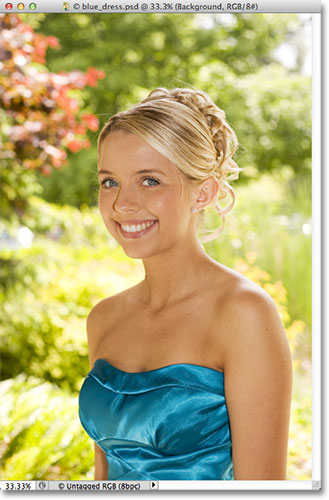
Here's a photo I currently have open on my screen that I need to optimize for the web:
If we look in my Layers panel, we see that I've done a little bit of retouching work on this image, with a few layers and adjustment layers added above the original image on the Background layer:
Step 1: Duplicate The Image
To prepare this photo for emailing or uploading to a website, I'll need to flatten the document down to a single layer and then resize the image to make it smaller, but I first want to make sure I don't lose any of the work I've done or make any permanent changes to the size of the original photo. To play it safe, before I do anything else, I'm going to make a duplicate copy of my image by going up to the Image menu in the Menu Bar along the top of the screen and choosing Duplicate:
Photoshop will pop open the Duplicate Image dialog box asking you to name the copy. You can just accept the default name that Photoshop has already entered (in my case, it's "blue_dress copy") because we can easily rename the image when we go to save it later. Click OK in the top right corner of the dialog box to accept the default name and close out of it:

Photoshop will open an identical copy of the image, including any and all layers you added to the original version, in a separate document window:

Step 2: Flatten The Image
Next, let's flatten the copy of our image down to a single layer, which can help give us better results when we go to resize it, as we'll be doing in a moment. Go up to the Layer menu at the top of the screen and choose Flatten Image:

If we look again in my Layers panel, we see that all of my layers have now been flattened down to a single Background layer:

Step 3: Resize The Image
Now that our image has been flattened, let's resize it to something more suitable for email or for displaying on a website. Go up to the Image menu at the top of the screen and choose Image Size:

This opens the Image Size dialog box. As we'll see shortly, Photoshop's Save For Web & Devices dialog box also gives us the option to resize the image, but you'll get better results if you resize your image beforehand using the Image Size command.
If we look at the top of the dialog box, in the Pixel Dimensions section, we see that my photo is currently 1571 pixels wide by 2356 pixels tall. That's too big for most people to be able to fit the entire image on their screen if I was to email the photo to them, and it's certainly too big to display on most websites:

Generally speaking, for email and web viewing, you want to limit the dimensions of your photo to no larger than 800 pixels by 600 pixels, meaning that the width should not exceed 800 pixels and the height should not exceed 600 pixels. If you're uploading the photo to a website, the website may have other, specific dimensions you need to stick to, but typically, keeping the size within 800 px by 600 px will allow most people to view the image on their screen comfortably.
Before you enter your new pixel dimensions, though, first make sure that all three options at the bottom of the dialog box - Scale Styles, Constrain Proportions and Resample Image - are all checked. Technically, with the image flattened, we don't need to worry about the first option, Scale Styles, because we don't have any layer styles applied to the image, but it's easier just to make sure all three options are checked. Then, set the Image Interpolation option at the very bottom of the dialog box to Bicubic Sharper (best for reduction). It doesn't say "Image Interpolation" anywhere but that's what this bottom option is, and it controls how Photoshop handles the pixels during the resampling process. Setting it to Bicubic Sharper will give us the best results when downsizing an image for viewing onscreen:

Then, go back up to the Pixel Dimensions section at the top of the dialog box and enter in your new dimensions. Since my photo is in portrait mode, meaning it's taller than it is wide, and I don't want the height to exceed 600 pixels, I'll enter 600 pixels into the Height option. With the Constrain Proportions option selected at the bottom of the dialog box, Photoshop will automatically enter a new width value for me to keep the width-to-height ratio of the image the same as it was originally. In my case, Photoshop entered 400 pixels for the Width:
Notice that I made no changes to the Resolution value in the Document Size section of the dialog box. That's because resolution determines how large an image will print on paper and has nothing to do with viewing an image on a computer screen. All we need to focus on when resizing an image for display onscreen is the actual pixel dimensions of the image, found in the appropriately-named Pixel Dimensions section at the top of the dialog box.
Once you've entered your new dimensions, click OK in the top right corner of the dialog box to close out of it, at which point Photoshop will downsample the image to its new smaller size.
Step 4: Save For Web
We've duplicated, flattened and resized our image. Now it's time to optimize and save it. Go up to the File menu at the top of the screen and choose Save For Web & Devices:

This opens Photoshop's very large Save For Web & Devices dialog box, with a large preview area taking up most of the space. If you look just above the top left corner of the preview area, you'll see a series of four tabs. By default, the Optimized tab is selected, which means you're not seeing the original image. Instead, you're seeing a live preview of what the image looks like with the current optimization settings applied (which we'll look at in a moment):

You can leave the view mode set to Optimized, or, to view a side by side comparison of the original and optimized versions of the image, switch to the 2-Up view mode by clicking on its tab:

With 2-Up selected, we can now see the original version of the image on the left and the optimized version on the right (if your image is in landscape mode, meaning it's wider than it is tall, you'll see a vertical preview with the original version on top and the optimized version below it):

File Format
On the right side of the dialog box are the various optimization options (if you're not seeing any options listed, make sure you have the optimized version of the image selected in the preview area). The first thing we need to do here is choose the correct file format for our image. If this is the first time you're using the Save For Web & Devices dialog box, you'll see the GIF file format chosen at the top (directly below the word "Preset"). GIF is a great format to use for saving web graphics, but for photos, we want to use the JPEG format, so change the option from GIF to JPEG if it isn't set to JPEG already:

Image Quality
Directly below the file format option are the image quality options. We can choose from a preset quality setting (Low, Medium, High, Very High, and Maximum) on the left or we can dial in a specific value into the Quality option on the right. While it may be tempting to choose the highest quality settings for our photos so everyone can see how truly awesome they are, optimizing them for email or the web means we need to keep the file size as small as possible, and that means finding a middle ground between image quality and file size. The High quality preset is almost always the best choice, giving us the best of both worlds - acceptable image quality and relatively small file sizes. Choosing the High preset will automatically set the Quality setting to 60:

Once you've chosen the quality setting, make sure the Optimized option is selected, which can help reduce the file size a little more. Leave the Progressive option unchecked, and leave Embed Color Profile unchecked as well, since most web browsers don't support color profiles anyway:

Color Space
Finally, select the Convert to sRGB option if it isn't checked already. This will make sure the photo is saved in the sRGB color space, which, long story short, means the colors in your photo will display correctly on the web or when someone views the image in an email:

Image Size
I mentioned earlier when we looked at how to resize the photo using the Image Size command that the Save For Web & Devices dialog box also gives us the option to resize the image. You'll find the Image Size options in the bottom right corner of the dialog box. In my case here, the dialog box is showing that my photo is 400 pixels wide by 600 pixels tall since that's what I resized it to earlier. While it may seem convenient to be able to resize the image while you're setting all of the other web optimization options, you'll get better resizing results if you ignore these options here and stick with the actual Image Size command:

File Size Comparison
At this point, we've done everything we need to do, but before we close out of the Save For Web & Devices dialog box and actually save the image, let's take a quick look below the two versions of the photo in the preview area to compare the file size of the original version with the size of the optimized version. In my case, the original photo (on the left) was a whopping 703 Kb, much too large for the web, especially for people with slower internet speeds, while the optimized version (on the right), which looks almost as good as the original, is only 58.41 Kb:

Step 5: Save The Image
To save the optimized version of your photo, click the Save button at the bottom of the dialog box. Photoshop will pop open the Save Optimized As dialog box, which lets you rename the image if you need to, as well as navigate to the directory on your hard drive where you want to save it. I'm going to rename my photo "blue-dress.jpg" and I'll save it to a "web photos" folder on my desktop. When you're done, click Save to save the image and close out of the dialog box:
And there we have it! The photo is now resized and fully optimized, ready to be emailed to friends and family members or uploaded to the web, thanks to the Image Size and Save For Web & Devices commands in Photoshop CS5!