
Creating Photo Borders With Photoshop Brushes
In this Photoshop photo effects tutorial, we'll learn how to create interesting photo border effects using Photoshop's brushes. Photoshop ships with so many great brushes that the possibilities for different border effects are virtually endless, especially since we can combine multiple brush strokes and different brush tools, like the Eraser Tool, for even more variety!
In this tutorial, we'll focus on the brushes that Photoshop installs for us, but if you know how to create your own custom brushes as well, then there really is no limit to what you can come up with.
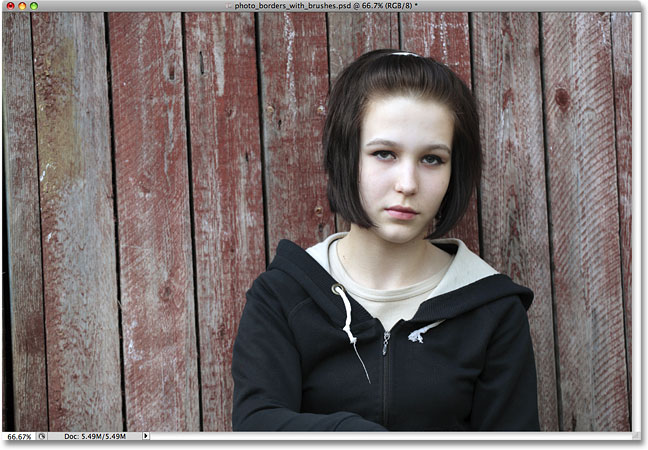
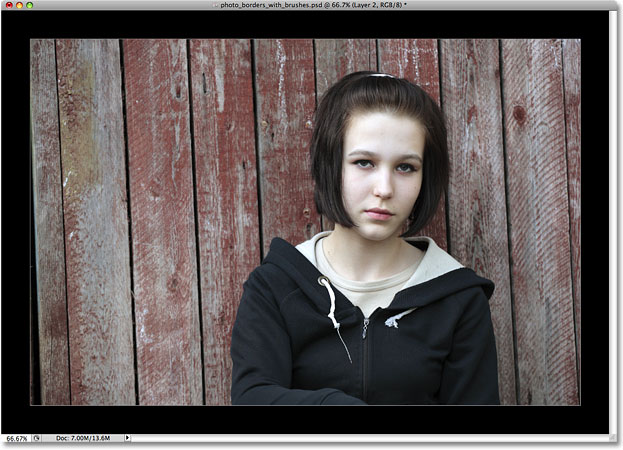
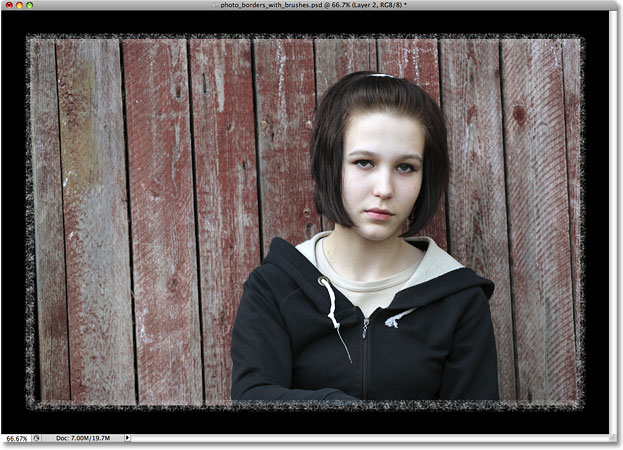
Here's the photo I'll be using in this tutorial:
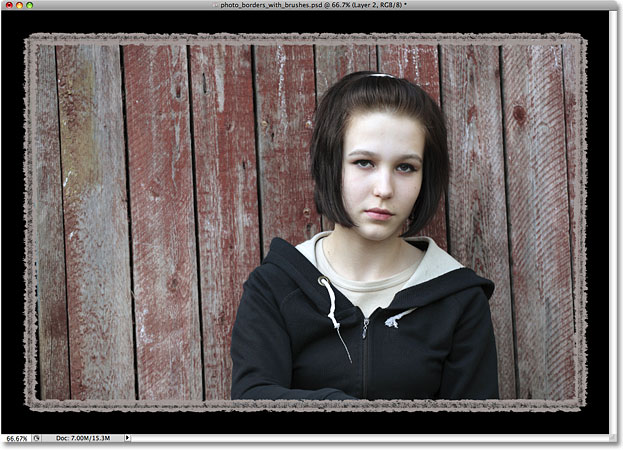
Here's an example of the sort of photo border effect we'll be creating. Since the purpose of this tutorial is not to create this exact border but to learn how to create your own border designs with brushes, your results may look very different:
How To Create Photo Borders With Brushes In Photoshop
Step 1: Duplicate The Background Layer
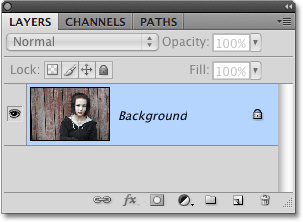
The first thing we need to do is create a copy of our original photo. With my image newly opened in Photoshop, my document currently contains only one layer, the Background layer, which is the layer that holds my image:
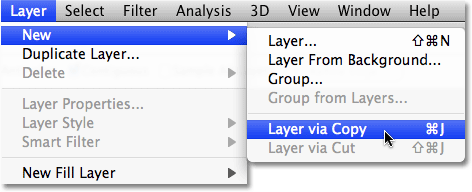
To make a copy of this layer, go up to the Layer menu at the top of the screen, choose New, and then choose Layer via Copy. Or, for a faster way, use the keyboard shortcut Ctrl+J (Win) / Command+J (Mac):
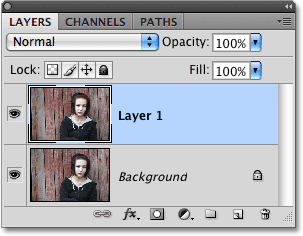
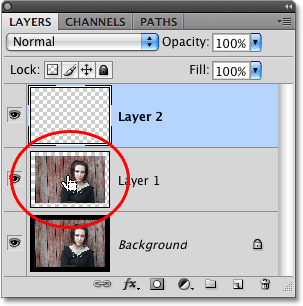
If we look again in the Layers panel, you should now see two layers - the original Background layer on the bottom and a copy of the layer, which Photoshop has automatically named "Layer 1", sitting above it:
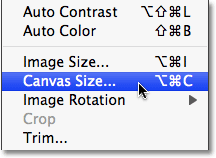
Step 2: Add Extra Canvas Space Around The Image
Before we add our photo border effect, let's add some extra canvas space around the edges of the photo. To do that, go up to the Image menu at the top of the screen and choose Canvas Size:
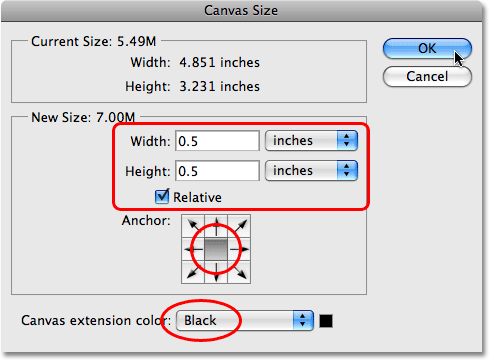
This brings up Photoshop's Canvas Size dialog box. I'm going to add half an inch of canvas space around my photo by entering a value of 0.5 inches for both the Width and Height options. Make sure your measurement type is set to inches and not pixels or some other type. Also, make sure the Relative option below the Width and Height options is checked.
In the lower half of the dialog box, make sure the center square in the Anchor grid is selected. This will place the extra canvas space around the entire image. Finally, choose Black for the color at the very bottom of the dialog box:
Click OK in the top right corner of the dialog box when you're done to exit out of it. If we look in the document window, we can see that we now have extra canvas around the image, and the extra space is filled with black:

Step 3: Add A New Blank Layer Above "Layer 1"
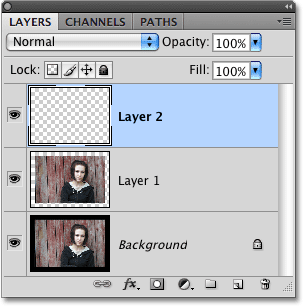
Back in the Layers panel, you should see "Layer 1" highlighted in blue. This means the layer is currently selected. If it's not highlighted in blue, click on it to select it. We're going to place our photo border on its own layer above the image, which means we need to add a new blank layer. To do that, click on the New Layer icon at the bottom of the Layers panel. You'll find it directly to the left of the Trash Bin on the far right of the row of icons:
Nothing will appear to have happened in the document window since the new layer is blank, but we can see in the Layers panel that a new layer has been added above "Layer 1", which Photoshop has predictably named "Layer 2":
Step 4: Add A Selection Outline Around The Original Image
Next, we need to place a selection outline around our original image (as in, the image before we added the extra canvas space). Our original photo, without the extra canvas space, is sitting on "Layer 1". To quickly place a selection outline around it, hold down your Ctrl (Win) / Command (Mac) key and click on the preview thumbnail for "Layer 1" in the Layers panel. There's no need to select the layer first. Simply hold down Ctrl / Command and click on the preview thumbnail:
This places a selection outline, also known as "marching ants", around the photo in the document window:

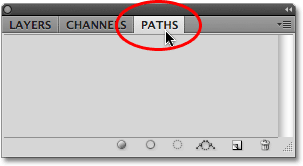
Step 5: Convert The Selection Outline To A Path
We need to convert the selection outline into a path. Once we have our path, we'll create our photo border effect by applying some brush strokes to it. To convert the selection outline into a path, switch over to your Paths panel. You'll find it grouped in with the Layers panel. Click on the name tab at the top to switch from the Layers panel to the Paths panel:
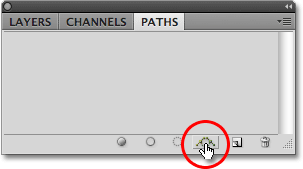
With the Paths panel now open, click on the Make work path from selection icon at the bottom of the Paths panel (third icon from the right):
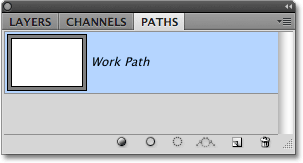
You'll see a new path named "Work Path" appear in the Paths panel. The term "Work Path" simply means that the path is temporary. We could make the path permanent if we wanted to by dragging it down on to the New Path icon at the bottom of the Paths panel (the icon directly to the left of the Trash Bin), but there's no need to do that for the effect we're creating:
If we look back at our photo in the document window, we see that our selection outline has been replaced by a thin line. The line is our path, and in a moment, we're going to use it to create our photo border:
Step 6: Select The Brush Tool
Since we're going to be applying brush strokes to our newly created path, we'll first need to select the Brush Tool. Click on the Brush Tool in the Tools panel to select it, or press the letter B on your keyboard to select it with the shortcut:
Step 7: Set Your Foreground Color To White
Photoshop paints with the Brush Tool using the current Foreground color, so before we go choosing a brush, let's set our Foreground color to white. We'll start off using white as our border color, but we'll see how to easily change the color at the end of the tutorial.
The easiest way to set your Foreground color to white is to first press the letter D on your keyboard. This will reset your Foreground and Background colors to their defaults, with black as the Foreground color and white as the Background color. Then, to swap them so white becomes the Foreground color, press the letter X on your keyboard. You'll find the Foreground and Background color swatches near the bottom of the Tools panel. The swatch in the top left (Foreground color) should now be white:
Step 8: Open The Brushes Panel
With the Brush Tool now selected and white as your Foreground color, click on the Brushes panel toggle icon in the Options Bar at the top of the screen. As its name implies, this icon toggles the Brushes panel open and closed:
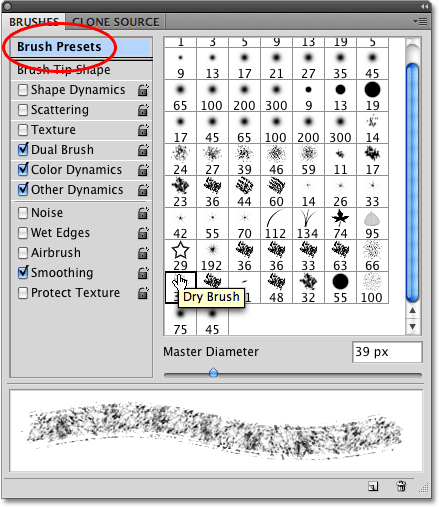
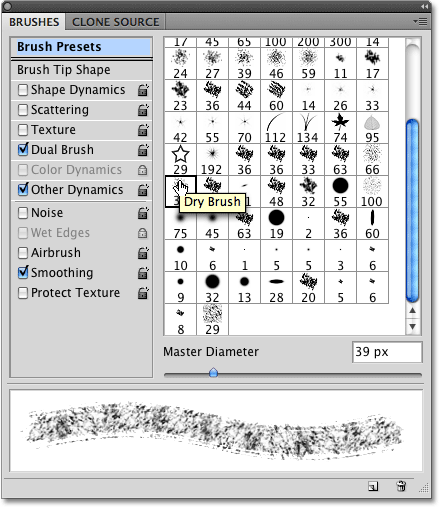
Step 9: Choose A Brush Preset
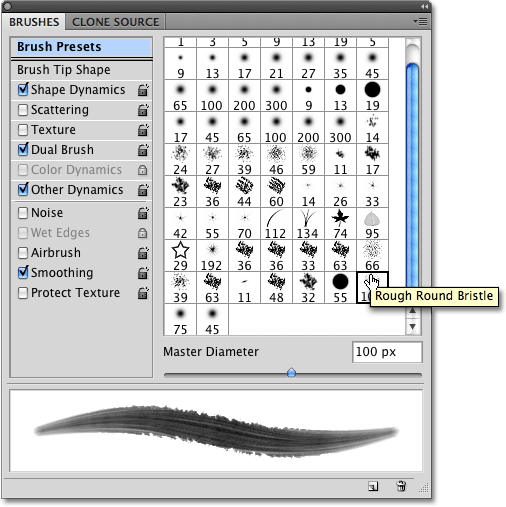
This opens Photoshop's Brushes panel, where we can choose from any of the preset brushes that were installed with Photoshop. Make sure the Brush Presets option is selected at the very top of the left column so we can see a preview on the right of all the brushes that are available to us. To choose any of the brushes, simply click on its preview icon. If you have the Show Tool Tips option enabled in Photoshop's Preferences, you'll see the name of the brush appear as you hover your mouse cursor over each icon.
It's not always easy to tell what a brush will look like simply from its little icon, but when you see a brush that looks like it might be interesting, click on it to select it and you'll see a preview appear at the bottom of the panel that gives you a much better idea of how the brush stroke will look. For example, here I've clicked on the Dry Brush 39 px brush, and judging from the preview at the bottom of the panel, it could make an interesting photo border:
Step 10: Stroke The Path With The Brush
Let's see how this brush looks as a photo border. To hide the Brushes panel from view so you can see your document window more easily, click once again on the toggle icon in the Options Bar. Or, for a faster way to open and close the Brushes panel, press the F5 key on your keyboard.
To stroke the path with the brush, make sure the Work Path is selected and highlighted in blue in the Paths panel, since the path has to be active for this to work, otherwise the icons at the bottom of the panel will appear grayed out and unavailable. Then click on the Stroke Path With Brush icon at the bottom of the Paths panel (second icon from the left):

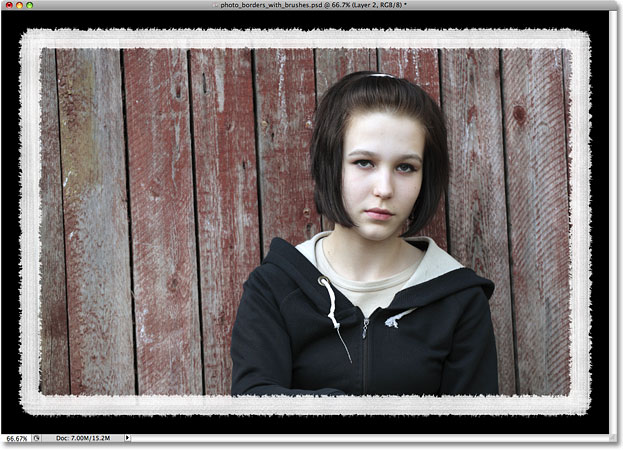
As soon as you click the icon, Photoshop applies the brush stroke all around the edge of the image along the path. To get a better idea of how the border looks, hide the path temporarily by clicking in the Paths panel on any blank gray area below the Work Path. Here's what my first photo border attempt looks like:
Not bad, but let's see what else we can come up with. Much of the process of creating photo borders with brushes involves experimenting, so if you're not happy with the result and want to try again, simply press Ctrl+Z (Win) / Command+Z (Mac) to undo the brush stroke, then open the Brushes panel again by either clicking on the toggle icon in the Options Bar or by pressing the F5 key on your keyboard. This time, I'll try the Rough Round Bristle 100 px brush by clicking on it to select it:
To try again with the new brush, first click on the Work Path in the Paths panel to select it and make it active. Then click once again on the Stroke Path With Brush icon. Click anywhere on a blank gray area below the Work Path in the Paths panel to temporarily hide the path from view, then judge the results in the document window. This time, I get a completely different looking photo border:
If you find that the brush stroke is either too thick or too narrow, undo the brush stroke with Ctrl+Z (Win) / Command+Z (Mac), then change the size of the brush using the left and right bracket keys on your keyboard. Press the left bracket key ( [ ) repeatedly to make the brush smaller, or the right bracket key ( ] ) to make it larger, then click on the Stroke Path With Brush icon to try again. Remember, you'll need to click on the Work Path in the Paths panel first to make the path active before you can click on the icon.
Step 11: Load Additional Brush Sets For More Variety
Photoshop comes with lots of brushes for us to use, but by default, only a small number of them are loaded and available. To load any of the additional brush sets, click on the menu icon in the top right corner of the Brushes panel. Depending on the version of Photoshop you're using, your menu icon may appear as it does in the screenshot below (Photoshop CS4) or it may appear as a small arrow:
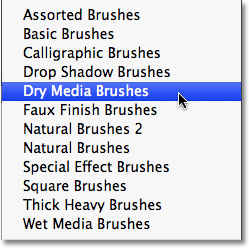
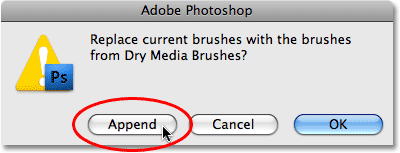
This opens a menu showing various options for the Brushes panel, as well as a list of other brush sets ready and waiting to be loaded in. To load a different brush set, simply click on the name of the set in the list. I'm going to load the Dry Media Brushes set:
Photoshop will pop up a dialog box asking if you want to replace the current set of brushes with the new set or if you want to append the new set to the end of the set that's currently loaded. Click the Append button:
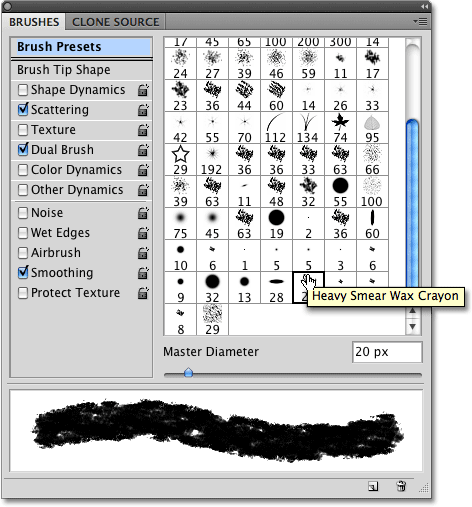
The new brushes will appear below the original ones in the Brushes panel. You'll probably need to scroll down the list to view them. Choose any of the newly added brushes by clicking on their icons. A preview of the brush stroke appears at the bottom of the panel just as with the original brushes. I'm going to click on the Heavy Smear Wax Crayon 20 px brush from the Dry Media Brushes set to select it:
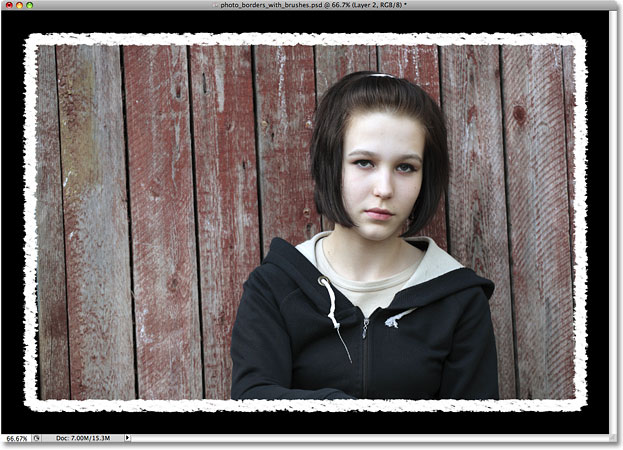
Once again, I'll click on the Stroke Path With Brush icon at the bottom of the Paths panel, and here's my photo border result:
There's lots of great brushes to be found in the additional brush sets, so be sure to load them all and try them out!
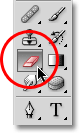
Step 12: Select The Eraser Tool
One of the most interesting aspects of Photoshop's brushes is that they work with any brush tool, not just the official Brush Tool. For example, you may not think of the Eraser Tool as a brush, but it is, and all of the brushes we've been using with the Brush Tool can be used with the Eraser Tool. The only difference is that instead of painting a new brush stroke, the Eraser Tool can be used to erase part of an existing stroke, adding even more creative potential to your photo borders!
I'm going to leave my current photo border in place, and I'll select the Eraser Tool from the Tools panel. You can also select it by pressing the letter E on your keyboard:
Step 13: Stroke The Path With The Eraser Tool To Erase Part Of The Border
With the Eraser Tool selected, you can now choose from any of the brushes in the Brushes panel just as we've been doing with the Brush Tool. For example, I'll select the same brush I chose initially, the Dry Brush 39 px brush. This time, though, I'll be using it with the Eraser Tool, not the Brush Tool, which means I'll be using it to erase part of my existing photo border:
Step 14: Stroke The Path With The Eraser Tool To Erase Part Of The Border
I'm going to make the brush a little smaller than its default size by pressing the left bracket key on my keyboard a couple of times. Then, I'll stroke the path with the Eraser Tool by clicking on the Stroke Path With Brush icon at the bottom of the Paths panel. This time, rather than painting a completely new border, I've erased part of the existing border along the path, giving my photo border a whole new look:
You can spend a lot of time playing around and experimenting with the various brushes, the Brush Tool and the Eraser Tool, and I highly encourage you to do so since there's no limit to the photo borders you can create. To finish things up, let's see how to change the color of our photo border. We'll do that next!
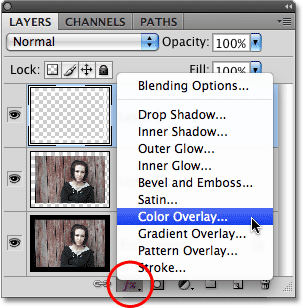
Step 15: Add A Color Overlay Layer Style To "Layer 2"
To change the color of your photo border to something other than white, first switch back over to your Layers panel. Make sure "Layer 2" is selected and highlighted in blue, then click on the Layer Styles icon at the bottom of the Layers panel and select Color Overlay from the list that appears:
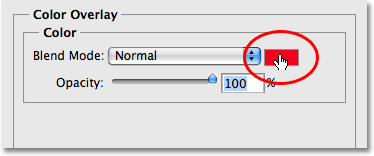
This brings up Photoshop's Layer Style dialog box set to the Color Overlay options in the center column. To change the color, click on the color swatch:
This brings up Photoshop' Color Picker:

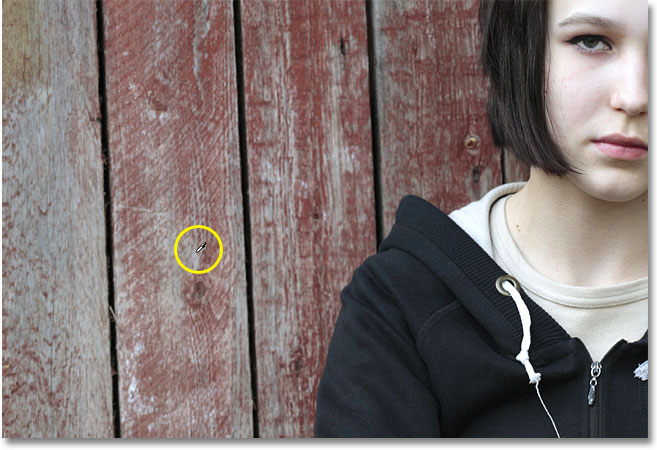
You can choose a color from the Color Picker, but what I prefer to do with photo borders is sample a color directly from the photo itself, which allows the border to blend in more naturally. To sample a color from the photo, leave the Color Picker open and move your mouse cursor over the image. You'll see the cursor change to an eyedropper icon. Click on the color you want to sample and you'll see the color of the photo border instantly change to that color. I'm going to sample a grayish-red color from the fence:
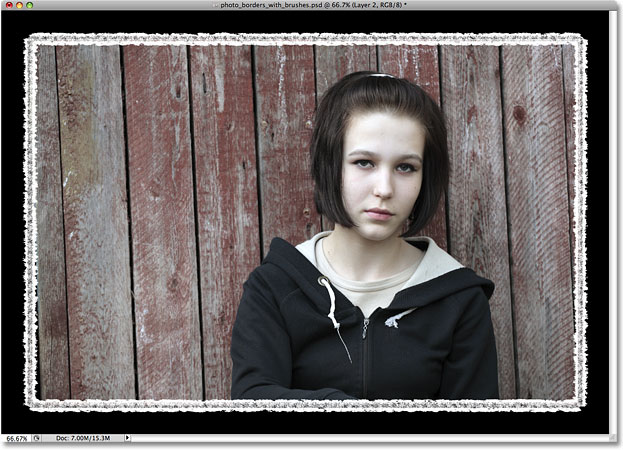
Once you've chosen your color, click OK to exit out of the Color Picker, then click OK to exit out of the Layer Style dialog box, and you're done! Here's my photo border after stroking the path initially with the Brush Tool, erasing part of it with the Eraser Tool, and finally, changing the color of the border with a Color Overlay layer style: