
Multiple Text Strokes With Smart Objects In Photoshop
Version Note: Using Photoshop CC 2020 or later? Check out my all new Add Multiple Strokes to Text with Layer Effects tutorial.
In a previous tutorial, we learned how to add multiple strokes around text in Photoshop simply by making multiple copies of our Type layer and adding a Stroke layer effect to each copy, with each stroke set to a different size. In this tutorial, we'll learn a more interesting way to create a similar multi-outline text effect, this time using the power of Photoshop's Smart Objects! Adobe first introduced Smart Objects back in Photoshop CS2, which means you'll need CS2 or higher to follow along. I'll be using Photoshop CS5 here, but any version from CS2 on up will do.
Here's the final result I'll be working towards. Of course, the stroke colors and sizes you'll need for your design may be completely different, but the steps for creating the effect will be the same:
Let's get started!
Step 1: Add An Initial Stroke To The Text
Here's the Photoshop document I'm starting with, made up of a single Type layer containing the word "style" (since we'll be using layer styles to add the strokes) in front of a black background:
If we look in my Layers panel, we see the Type layer above the Background layer. The Type layer is currently active (highlighted in blue):
To add an initial stroke around the letters, I'll click on the Layer Effects icon at the bottom of the Layers panel:
Then I'll choose Stroke from the bottom of the list of layer effects that appears:
This opens Photoshop's Layer Style dialog box, with the options for the Stroke appearing in the middle column. First, I'll choose a color for my stroke by clicking on the color swatch at the bottom of the options:

This opens Photoshop's Color Picker. Since my text is a fairly dark shade of blue, I'll choose a lighter shade of blue for the stroke. Of course, you can pick any color you need for your design:
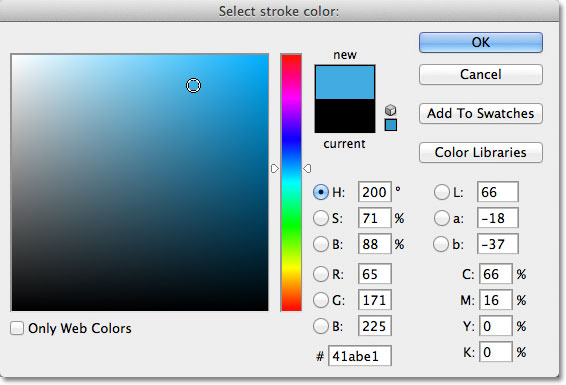
With my color chosen, I'll click OK to close out of the Color Picker. I want a thick stroke around the letters, so I'll increase my stroke Size value to 21 px:
When you're happy with appearance of your stroke, click OK to close out of the Layer Style dialog box. Here's what my text looks like with the initial stroke added:
Step 2: Convert The Type Layer Into A Smart Object
I now want to add a second stroke around the initial stroke, but that becomes an interesting problem. By default, Photoshop only allows us to add one Stroke effect at a time to a layer. If I was to click again on the Layer Effects icon at the bottom of the Layers panel and again choose Stroke from the list, Photoshop would re-open the Layer Style dialog box set to the Stroke options, but all I'd be able to do is edit the options for the stroke I just added, changing its color, size, or any of the other options, but I couldn't add a second stroke.
At least, I couldn't add a second stroke around the text itself. But what if we could somehow place the text inside a container, and then add a new stroke around the container? As it turns out, that's exactly what we can do using Photoshop's Smart Objects! A Smart Object is essentially a virtual container for the contents of a layer, and all we need to do is convert our Type layer into a Smart Object, at which point we can add a second stroke around the Smart Object!
To do that, click on the menu icon in the top right corner of the Layers panel. This will open a list of various options:
Choose Convert to Smart Object from the list of menu choices:
Nothing will seem to have changed in the document window, but if we look in the Layers panel, we see that the Type layer has been converted into a Smart Object. A Smart Object icon is displayed in the lower right corner of the preview thumbnail:
Step 3: Add A Stroke Around The Smart Object
With the text now inside a Smart Object, click on the Layer Effects icon at the bottom of the Layers panel and once again choose Stroke from the bottom of the list:
Photoshop will again open the Layer Style dialog box set to the Stroke options. To change the stroke's color, I'll click on the color swatch as I did before and when the Color Picker appears, I'll choose the same darker shade of blue as my text. I'll leave the new stroke's Size option set to the default value of 10px, which will make the second stroke thinner than the initial one:
When you're done, click OK to close out of the Layer Style dialog box. If we look at my text in the document window, we see that the second stroke now appears around the initial one. Even though it looks like the new stroke is around the text, it's actually around the Smart Object that's holding the text:
Step 4: Repeat Steps 2 And 3 To Add More Strokes (Optional)
Photoshop allows us to nest Smart Objects inside other Smart Objects, which means we can use this technique to add even more strokes if we like! All we need to do is repeat Steps 2 and 3. First convert the current Smart Object into a new Smart Object by clicking on the menu icon in the top right corner of the Layers panel and choosing Convert to Smart Object from the list. This will place the current Smart Object inside a new one. Then, add a stroke around the new Smart Object by clicking on the Layer Effects icon at the bottom of the Layers panel and choosing Stroke from the list.
I'll add a third stroke around my text, this time set to the same lighter shade of blue as the initial stroke. I'll leave its Size set to the same default value of 10px:
I'll click OK to close out of the Layer Style dialog box, and I now have three strokes around my text! As we've learned though, it only looks like I have three strokes around the text. In reality, only the inner stroke is around the text itself. The middle stroke is around the Smart Object containing the text, and the outer stroke is around a new Smart Object containing the original Smart Object (which is containing the text):
Where to go next...
And there we have it! That's how to quickly and easily add multiple strokes around text in Photoshop using Smart Objects! Check out our Text Effects or Photo Effects sections for more Photoshop effects tutorials!