
Straighten And Crop Images In Photoshop CS5
In this Photoshop tutorial, we look at one of the smaller yet very welcome new features in Photoshop CS5 - the ability to both straighten and crop images with a single click! In previous versions of Photoshop, learning how to straighten a crooked image was a bit of a challenge. In fact, if you didn't have someone to show you how to do it, there's a good chance you may never have figured it out. That's because the process was in no way intuitive. You would think that after years of updates to the world's most popular and powerful image editor, Adobe would have included a simple "Straighten" button somewhere, but sadly, that wasn't the case. At least until now!
Here's the image I'll be working with in this tutorial. It's the same image I used in the previous How To Straighten Crooked Photos tutorial where I explained the old way of straightening and cropping images so we can get a better sense of how much faster and easier it is in Photoshop CS5:
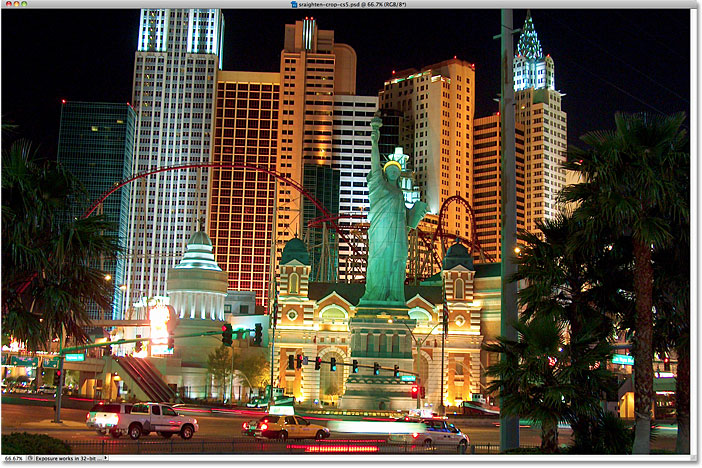
The photo above of the New York, New York Hotel and Casino was taken while walking around Las Vegas one night and ended up being a little crooked. The Statue of Liberty and the buildings behind her are all leaning a little to the right. I won't get into the details here of how to straighten and crop the image in Photoshop CS4 and earlier since I already covered them in the previous tutorial, but be sure to check it out if you're not familiar with the steps involved so you can compare it with how much faster Photoshop CS5 is about to be.
Step 1: Select The Ruler Tool
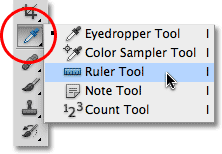
The first couple of steps for straightening images are the same in Photoshop CS5 as they were in previous versions. Select the Ruler Tool from the Tools panel. By default, it's hiding behind the Eyedropper Tool, so click on the Eyedropper Tool and hold your mouse button down for a second or two until a fly-out menu appears, then select the Ruler Tool from the list:
Step 2: Click And Drag Along Something That Should Be Straight
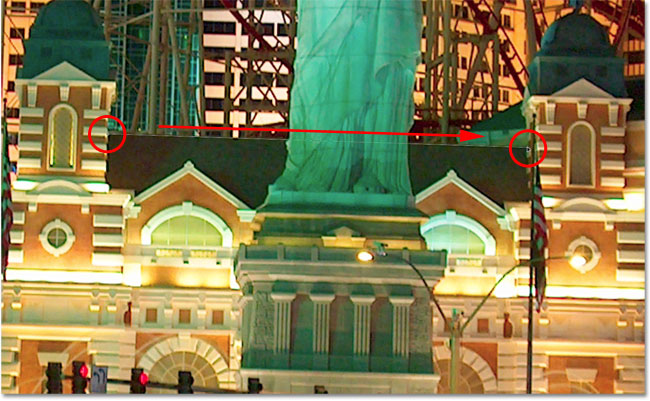
Look for something in your image that should be straight, either horizontally or vertically, and with the Ruler Tool selected, click and drag along its edge. In my case, the roof of the building behind the Statue of Liberty should be straight horizontally, so I'll click on the left side of the roof and, with my mouse button held down, drag over to the right side. As you drag, you'll see a thin line appearing between the start and end points. Photoshop will use the angle of this line to determine how much the image needs to be rotated in order to straighten it:
Step 3: Click The Straighten Button
Here's where the similarity between Photoshop CS5 and previous versions of Photoshop ends. Once you've dragged a line across something in the image that should be straight, click on the new Straighten button in the Options Bar at the top of the screen:

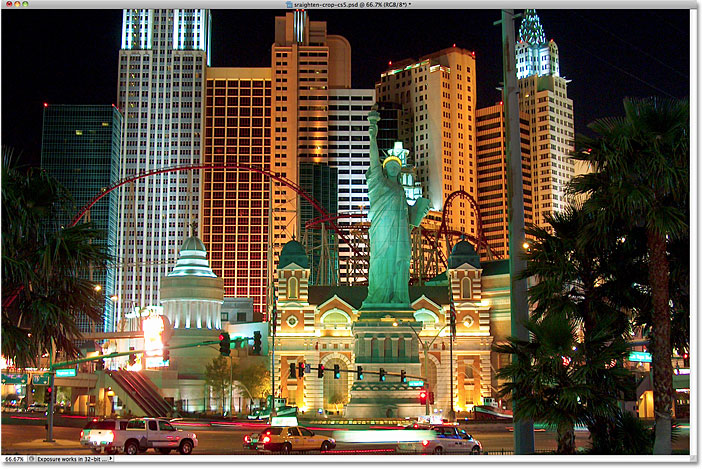
As soon as you click the button, Photoshop instantly straightens the image for you based on the angle of the line you just drew with the Ruler Tool. It's that simple:
Straightening And Cropping With A Single Click
The new Straighten button should really be called the "Straighten and Crop" button, and here's why. I'll switch over to my History panel for a moment, which shows us a list of all the editing steps we've taken so far with the image, and notice that it's telling us the image was cropped right after it was rotated:
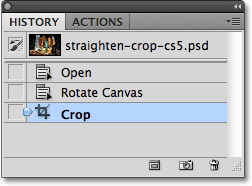
That's because Photoshop CS5 automatically cropped the image for me after straightening it! Why did it need to crop the image? I'll press Ctrl+Z (Win) / Command+Z (Mac) on my keyboard to undo the last step so we're now looking at the image immediately after it was rotated. I could also click on the Rotate Canvas step in the History panel to select it. Either way does the same thing. If we look at the image now in the document window, we see lots of white space around its edges:
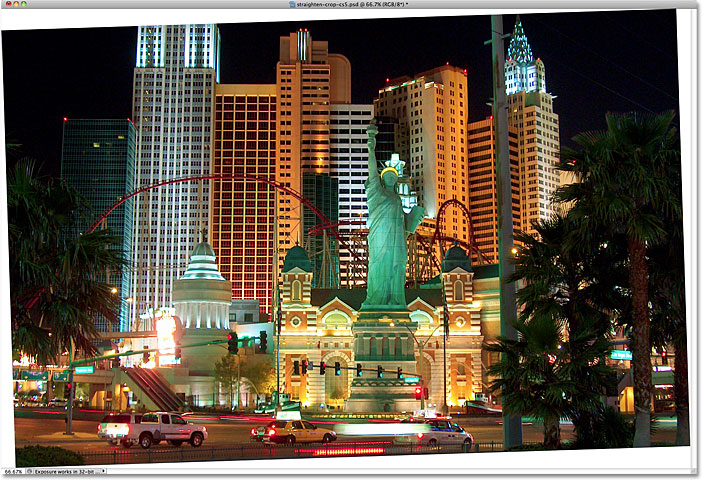
The white space is the canvas behind the image. Since the photo has been rotated, it no longer fits properly inside the dimensions of the document window and we end up seeing the canvas behind it. In Photoshop CS4 and earlier, we would need to manually crop away the white space with the Crop Tool, which added a whole other step to the straightening process. There's no need to do that in Photoshop CS5, though. With a single click of the new Straighten button in the Options Bar, Photoshop takes care of the straightening and cropping for us!
If, for some reason, you'd rather crop away the white space yourself after Photoshop straightens the image, hold down your Alt (Win) / Option (Mac) key while clicking the Straighten button in the Options Bar. This tells Photoshop to only rotate the photo, leaving the cropping up to you.
And there we have it! That's how fast and easy it is to straighten and crop images in Photoshop CS5! Check out our Photo Retouching section for more Photoshop image editing tutorials!