
Photoshop Sparkle Brush And Motion Trail Effect
Learn how to create a custom sparkle brush in Photoshop. Then, learn how to use the brush to add a magical sparkle trail to a photo!
Photoshop makes creating sparkle brushes and sparkle trails extremely easy. In the first part of this tutorial, we'll create our sparkle brush from scratch using a few of Photoshop's built-in brushes to add a variety of sparkles to our design. Then, once we've created the sparkle brush, we'll turn it into a sparkle trail using Photoshop's powerful dynamic brush options to control the behavior of the brush as we paint. Finally, we'll add a blurring effect to the sparkle trail and give it a colorful glow to help it look more magical.
There's quite a few steps involved but they're all very simple, and as always, I'll be explaining each step as we go so everyone can follow along.
This version of the tutorial has been updated and expanded for Photoshop CC but is fully compatible with Photoshop CS6. If you're using CS5 or earlier, you'll want to follow along with the original version of this tutorial.
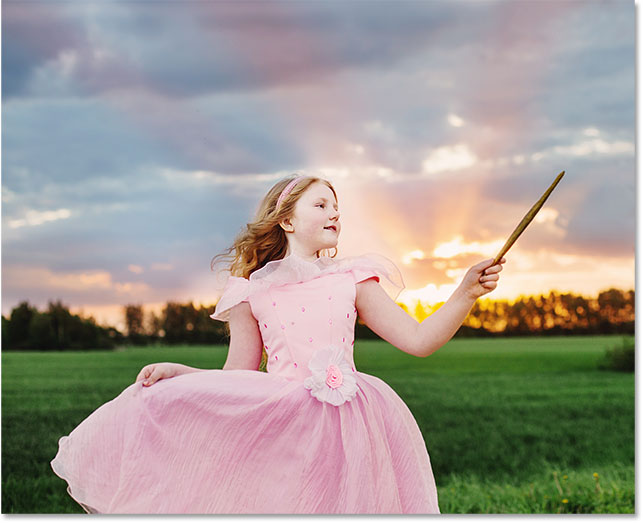
Here's the photo I'll be using for this tutorial. I downloaded this one from Adobe Stock:
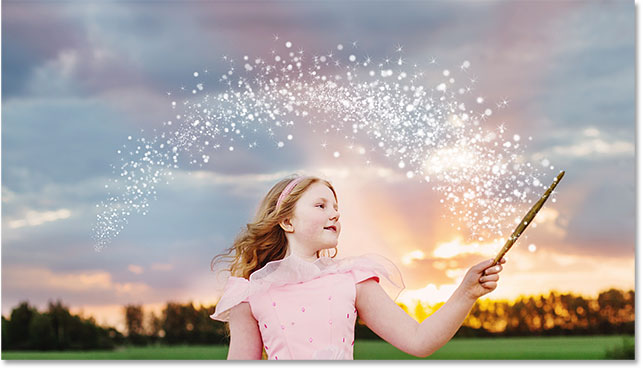
And here's how it will look when we're done:
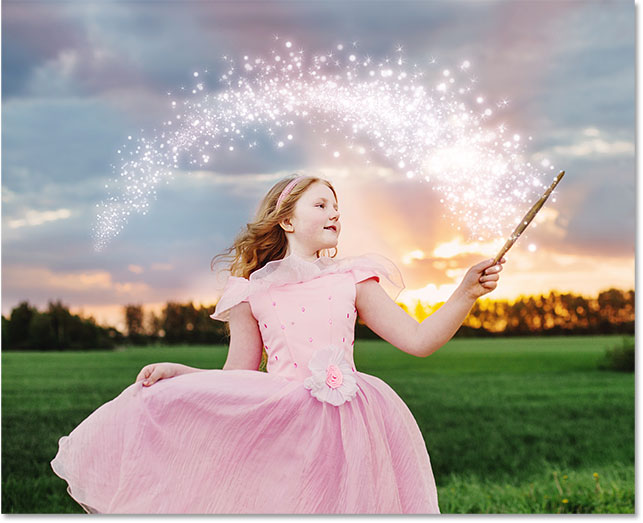
Creating A Sparkle Brush
Step 1: Create A New Photoshop Document
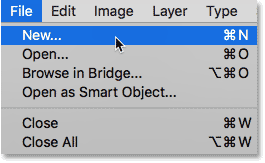
As I mentioned, we'll be adding our sparkle trail using a custom-made "sparkle" brush, so the first thing we need to do is create our brush. For that, we'll need to create a new Photoshop document. Go up to the File menu in the Menu Bar along the top of the screen and choose New:
This opens the New Document dialog box. In Photoshop CC 2017, Adobe completely redesigned the New Document dialog box, so which version of it you see depends on which version of Photoshop you're using. If you're using Photoshop CC as I am here (and your copy of CC is up to date), you'll see the redesigned version. If you're using Photoshop CS6, you'll see the older, traditional version. We'll look at the redesigned version first. Then, to keep this tutorial compatible with CS6 as well, we'll look at the traditional version. Don't worry, this only takes a minute.
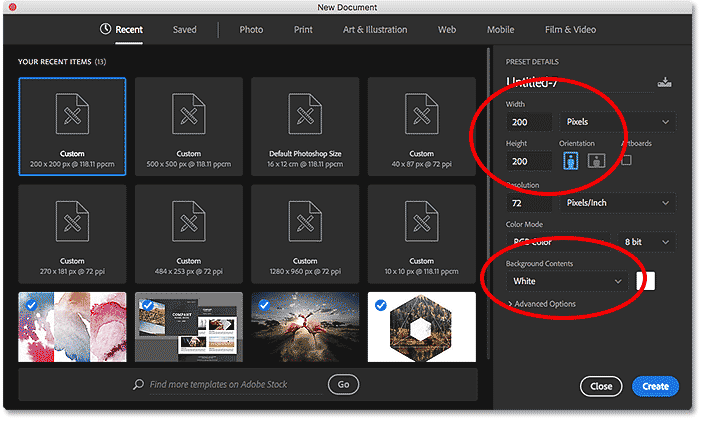
First, in Photoshop CC, the redesigned New Document dialog box will appear on your screen. Most of the dialog box is taken up by a large area showing thumbnails of both your recently-opened documents and your recently-used document sizes. You can ignore this area. What we want is the Preset Details panel along the right. This is where we enter our own custom document settings.
We'll want to create a square document for our brush, so set both your Width and Height values to 200 and change the measurement type to Pixels. Ignore the Resolution value since it only applies to print and has no effect on what we see on the screen. The only other option we need to worry about here is to make sure that Background Contents is set to White. When you're done, click the Create button in the bottom right corner to close out of the dialog box and create your document:
If you're using Photoshop CS6, you'll see the older style New Document dialog box, but the settings we need to enter are the same. Set both your Width and Height values to 200 Pixels and make sure Background Contents is set to White. Click OK when you're done to close out of the dialog box and create your new document:
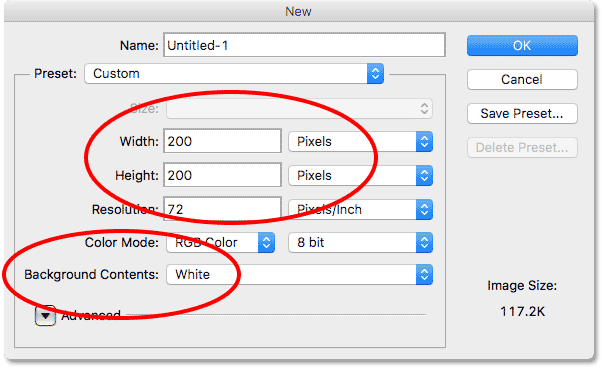
A new 200 x 200 pixel document, filled with white, will appear on your screen:

Step 2: Select The Brush Tool
With our new document created, select the Brush Tool from the Toolbar along the left of the screen. You can also select the Brush Tool by pressing the letter B on your keyboard. Either way works:

Step 3: Set Your Foreground Color To Black
Next, we need to set our brush color to black. Photoshop uses our current Foreground color as the brush color, so the quickest way to set your Foreground color to black is by pressing the letter D on your keyboard. This resets your Foreground and Background colors to their defaults, making your Foreground color black (and your Background color white).
We can see our current Foreground and Background colors in the two color swatches near the bottom of the Toolbar. The Foreground color (upper left swatch) should now be showing black:

Step 4: Select the "Star 70 Pixels" Brush
The "sparkle" brush we're creating is really just a mix of several brushes that ship with Photoshop, and you can experiment with different brush combinations to create your own unique sparkle brush since there's quite a few that would work well for this effect. Or, you can just use the one we'll be creating here.
To choose our first brush, with the Brush Tool active, click the Brush panel toggle icon in the Options Bar along the top of the screen:

This opens Photoshop's main Brush panel. To view the list of preset brushes that are included with Photoshop, click the Brush Presets button:
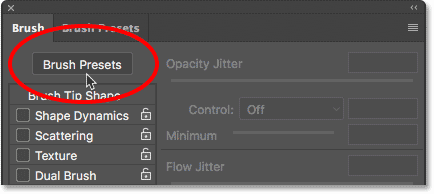
This switches us from the Brush panel to the Brush Presets panel where we see small thumbnails of the brushes that are currently loaded into Photoshop. To make it easier for us to select specific brushes from the list, let's switch from the thumbnail view to a list view. Click on the menu icon in the upper right corner of the Brush Presets panel:
Then choose either Small List or Large List from the menu. I'll choose Large List just to make things easier for us to see:
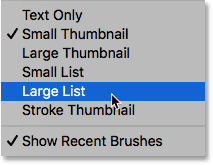
Now that we can see the names of the brush presets, scroll down the list until you find the Star 70 Pixels brush. Click on it to select it:
Step 5: Click In A Few Random Spots With The Brush
With the "Star 70 Pixels" brush selected, click in a few random spots to add your first few "sparkles". Three or four clicks should do the trick:
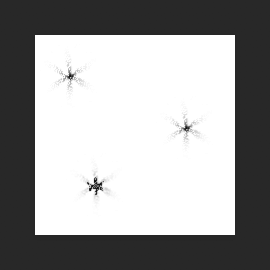
Step 6: Load The "Round Brushes with Size" Set
The second brush we'll use isn't found in Photoshop's default brushes so we'll need to load in one of the other brush sets that are included with Photoshop. Click once again on the menu icon in the upper right of the Brush Presets panel:
In the bottom half of the menu, you'll see a list of the other brush sets we can choose from. Select the Round Brushes with Size set by clicking on it:
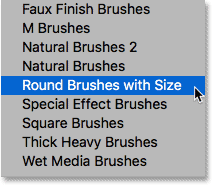
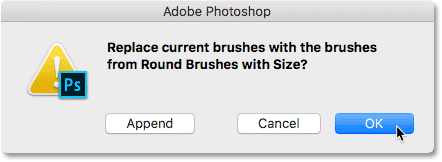
Photoshop will ask if you want to replace your current brushes with the brushes from the "Round Brushes with Size" set. Click OK. You can easily restore Photoshop's default brushes at any time by coming back to this same menu and choosing Reset Brushes:
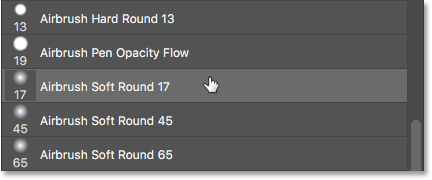
Step 7: Select the "Airbrush Soft Round 17" Brush
With the new brush set loaded, scroll down the list until you find Airbrush Soft Round 17. Click on it to select it:
Step 8: Click In A Few Random Spots With The New Brush
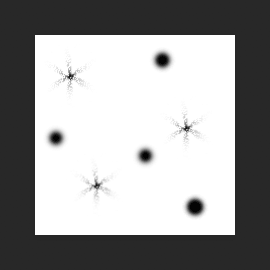
Just as we did with the previous brush a moment ago, click in three or four random spots to add more sparkles. Since this is an airbrush, the longer you hold down your mouse button after you click, the more the brush shape will "fill in" towards it edges. So for even more variety, vary the amount of time you hold your mouse button after you click.
If you don't like where you clicked, press Ctrl+Z (Win) / Command+Z (Mac) on your keyboard to undo your last click, then try again:
Step 9: Load The "Assorted Brushes" Set
Let's switch to a third brush. Again, we'll need to load a different brush set into Photoshop, so click once again on the menu icon in the upper right of the Brush Presets panel:
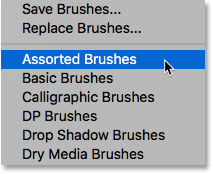
This time, choose the Assorted Brushes set from the top of the list:
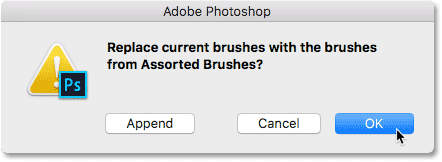
Photoshop will again ask if you want to replace the existing brushes with the new brushes. Click OK:
Step 10: Select The "Starburst - Small" Brush
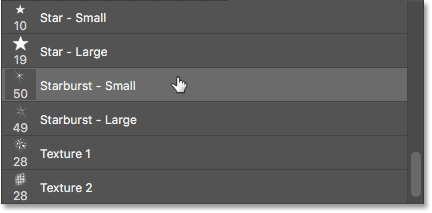
With the Assorted Brushes loaded, scroll down the list in the Brush Presets panel until you find the Starbust - Small brush. Click on it to select it:
Step 11: Click In A Few More Random Spots
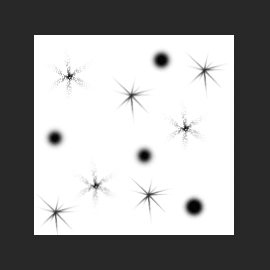
Click in a few more random spots to add our third and final type of sparkle to the design:
Step 12: Define A New Brush Preset
We've added our sparkles. All we need to do now is save our design as a brush. To do that, go up to the Edit menu at the top of the screen and choose Define Brush Preset:
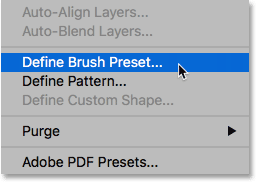
Photoshop will pop open a dialog where we can give our new brush a name. Name it "Sparkle Brush":

Click OK when you're done, and your new sparkle brush is created! You can close out of the document at this point since we no longer need to have it open. There's also no need to save the document when Photoshop asks since the brush is already created.
Step 13: Open Your Photo
Now that we've created our brush, we're ready to add our sparkle trail to a photo. Open the photo you want to use. Again, here's the image I'm using:

Step 14: Add A New Blank Layer
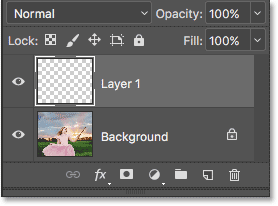
We want to keep the sparkle trail separate from the photo (so we don't make any permanent changes to the original), so we'll place the sparkle trail on its own layer. To add a new layer, click the New Layer icon at the bottom of the Layers panel:
Photoshop creates a new blank layer, names it "Layer 1" and places it above the image on the Background layer:
Step 15: Select The Brush Tool
Select your Brush Tool from the Toolbar if it isn't already selected:

Step 16: Set Your Foreground Color To White
Our sparkle trail wouldn't look very impressive it we painted it with black, so let's switch our Foreground color to white. First, press the letter D on your keyboard to make sure your Foreground and Background colors are set to their defaults, with black as your Foreground color and white as your Background color. Then, press the letter X on your keyboard to swap them, making your Foreground color white:

Step 17: Select the Sparkle Brush
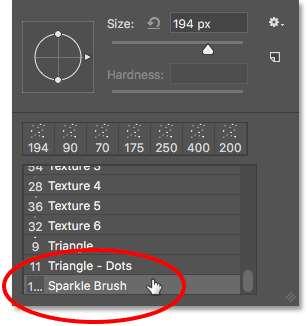
With your Brush Tool selected, right-click (Win) / Control-click (Mac) anywhere inside the image to quickly open Photoshop's Brush Preset picker and choose your "Sparkle Brush" from the list:
Step 18: Open The Brush Panel
Before we paint with our brush, we first need to set some of Photoshop's dynamic brush controls. Open the Brush panel by clicking on the Brush panel toggle icon in the Options Bar:
Step 19: Clear Your Brush Controls
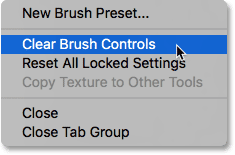
Let's clear away any brush controls that may already be active by clicking on the menu icon in the upper right of the Brush panel:
Then, choose Clear Brush Controls from the list:
Step 20: Select The "Shape Dynamics" Category
The brush controls are divided into categories, and you'll find the categories listed along the left of the Brush panel. First, let's open up the Shape Dynamics category by selecting it at the top of the list. As we select different categories, make sure you click directly on the category name itself, not inside the checkbox, otherwise you'll turn the category on but you won't have access to any of its options:
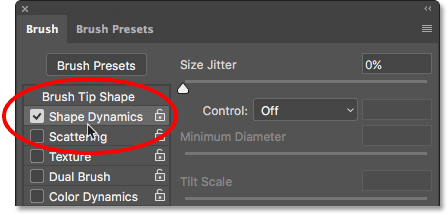
Step 21: Set The "Control" And "Angle" Options
With Shape Dynamics selected, you'll see a Size Jitter slider at the top of the options, and directly below that, you'll see a Control option. It's not entirely obvious, but this Control option is technically the "Size Control" option. It allows us to choose what, if anything, will control the size of the brush as we paint. Change the Control option to Fade. You can leave the value set to its default of 25 for now, but remember where to find it because you may want to come back and change it later:
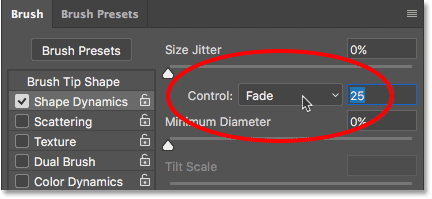
By setting the Size Control option to "Fade", Photoshop will gradually lower our brush size down to zero as we paint a brush stroke, and it will do so using the number of "steps" we've specified, which in this case is 25. You might need to experiment with the number of steps to get your sparkle trail to fade out properly with your image (which is why I mentioned that you should remember where to find this value), but 25 is a good place to start.
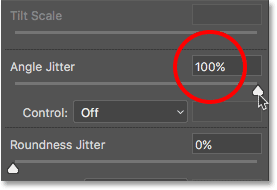
Also in the Shape Dynamic section, increase the Angle Jitter to 100%. This will let Photoshop rotate the angle of the brush as we paint, helping our sparkles to look more random and less like a repeating pattern:
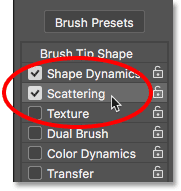
Step 22: Select The "Scattering" Category
Next, select the Scattering category, directly below Shape Dynamics:
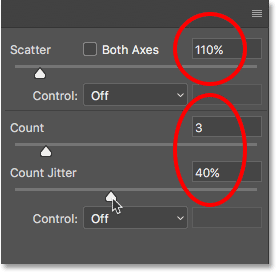
Step 23: Set The "Scatter" And "Count" Options
Increase the Scatter amount to 110%, then increase the Count value to 3 and Count Jitter to around 40%:
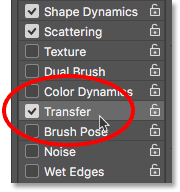
Step 24: Select The "Transfer" Category
Let's open up one more category, this time Transfer:
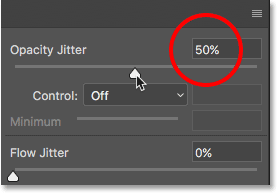
Step 25: Increase "Opacity Jitter" to 50%
Increase the Opacity Jitter value to 50%. This will add random levels of transparency to our sparkles:
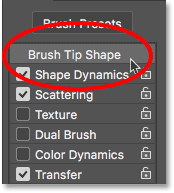
Step 26: Click On "Brush Tip Shape"
Finally, lets switch to the general brush options by clicking Brush Tip Shape, directly above the Shape Dynamics category:
Step 27: Increase "Spacing" To 50%
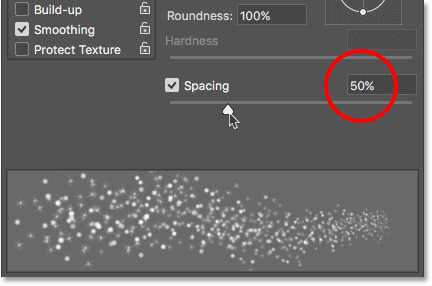
Down at the bottom of the options, increase the Spacing value to 50%. Spacing determines the maximum length of our brush stroke (our sparkle trail). As with the Fade value we looked at earlier in th Shape Dynamics category, you may need to experiment a little bit with Spacing to get the length of the sparkle trail just right.
At the very bottom of the Brush panel, below the Spacing slider, you'll see a preview of what the sparkle trail will look like with all of our brush options applied:
Adding A Motion Trail
Step 28: Paint Your Sparkle Trail
We've created our sparkle brush, and we've set all of our brush control options in the Brush panel. We've also added a new blank layer to hold our sparkle trail, and we've set our Foreground color to white. Now for the fun part. We finally get to paint our sparkle trail!
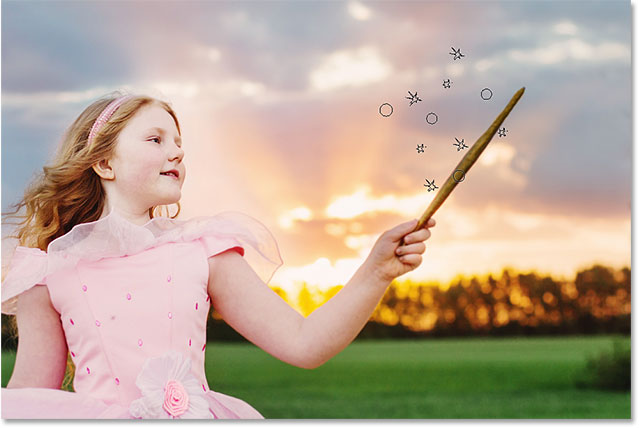
Position your brush cursor on, or just to the right or left, of the source of the sparkle trail. In my case, the source is the girl's magic wand so I'll position my cursor just to the left of it. You'll want to match the size of your brush cursor with the size of the object, which means you'll most likely need to resize your brush. The easiest way to do that if from the keyboard. Press the left bracket key ( [ ) repeatedly to make the brush smaller or the right bracket key ( ] ) to make it larger.
Here we can see my brush cursor, with all of its little sparkles, positioned mostly to the left of the wand but also overlapping it a little bit:
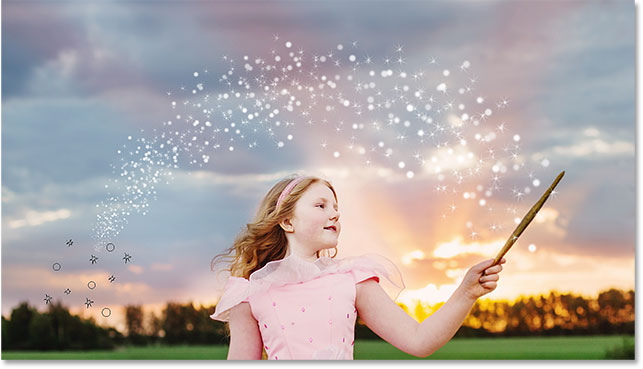
To paint the sparkle trail, press and hold your mouse button, then simply drag in the direction that you want the sparkle trail to flow. In my case, I'll drag over the girl's head and down the other side of her, as if she created the sparkle trail by waving her wand through the air.
Notice how Photoshop fades the size of the brush (and the sparkle trail) as you drag further from the source point, until eventually the brush fades away completely. That's the result of the Fade option we set in the Shape Dynamics section of the Brush panel:
Don't worry about getting the sparkle trail exactly right the first time. If you're not happy with it, simply press Ctrl+Z (Win) / Command+Z (Mac) on your keyboard to undo it and then try again.
If the trail is fading out too quickly (or not quickly enough), again press Ctrl+Z (Win) / Command+Z (Mac) on your keyboard to undo it. Then, go back to the Brush panel and try a different Fade value in the Shape Dynamics category (Step 21). You can also try adjusting the Spacing value to change the maximum length of the trail (Step 27). There's no rush, so feel free to experiment until you're happy with the result.
Step 29: Paint Additional Trails To Add More Sparkles (Optional)
If you find that there isn't enough "sparkle" in the trail, simply paint a second trail over top of the first one to bulk it up. In my case, I'm first going to reduce the size of my brush by pressing the left bracket key ( [ ) on my keyboard. Then, I'll again position my brush cursor just to the left of the wand and I'll paint a second, slightly smaller sparkle trail through the middle of the first one:
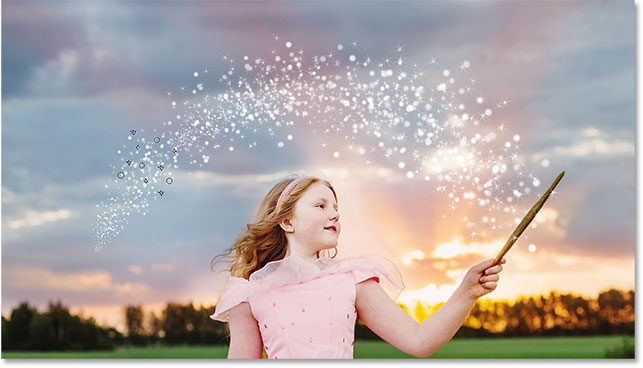
To add even more sparkles closer to the wand itself, I'll reduce the size of my brush once again by pressing the left bracket key ( [ ) a couple of times. Then, I'll drag out a couple of smaller trails, one from closer to the bottom of the wand and one from closer to the top. I'll even click on the wand itself a couple of times just to add a few extra sparkles at the source. Here's my result:
Step 30: Duplicate "Layer 1"
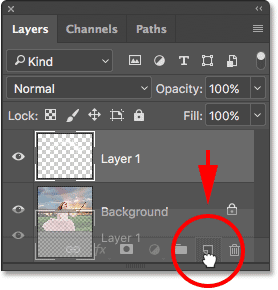
Our sparkle trail is sitting on "Layer 1" above the image. Let's make a copy of the layer by clicking on "Layer 1" and dragging it down onto the New Layer icon at the bottom of the Layers panel:
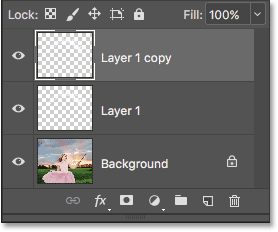
Photoshop makes a copy of the layer, names it "Layer 1 copy" and places it above the original. Normally we'd want to rename our layers and give them names that are more descriptive, but since we only need a few layers for this effect, it's not really needed:
Step 31: Apply The Gaussian Blur Filter
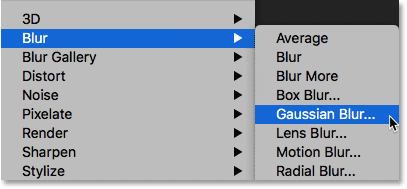
Let's add a glow to our sparkles by adding a slight blurring effect to the duplicate layer we just created. We'll do that using Photoshop's Gaussian Blur filter. Go up to the Filter menu at the top of the screen, choose Blur, and then choose Gaussian Blur:
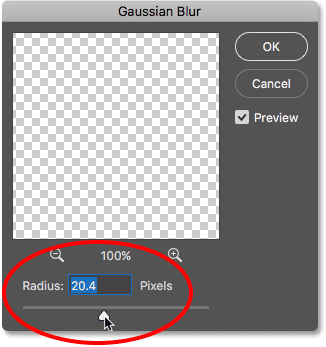
This opens the Gaussian Blur dialog box where you'll find the Radius slider along the bottom. The Radius value controls the amount of blurring that's applied. Keep an eye on your image as you drag the slider towards the right. The further you drag, the more blurring you'll apply, creating a soft glow around the sparkles.
The exact value you need will depend on the size of your image. For a larger image like the one I'm using, a Radius value of between 15 to 20 pixels works well. For smaller images, you'll want to use a smaller value:
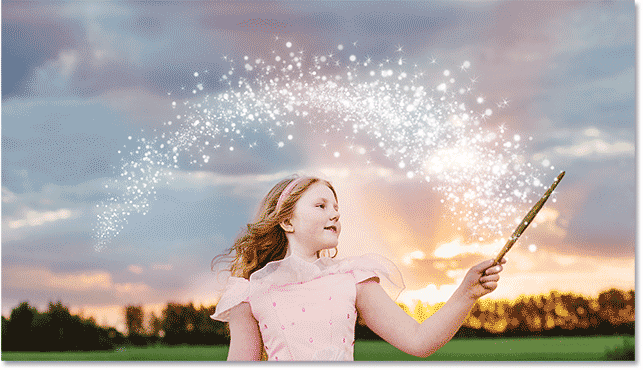
Click OK to close out of the Gaussian Blur dialog box, and here's my result. The sparkle trail is definitely starting to look more "magical":
Step 32: Duplicate The "Layer 1 copy" Layer
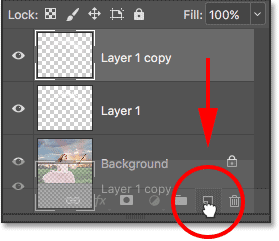
Let's make a copy of the blurred layer by clicking on "Layer 1 copy" and dragging it down onto the New Layer icon at the bottom of the Layers panel. When you release your mouse button, Photoshop will place a copy of it, named "Layer 1 copy 2", above the other layers:
Step 33: Add An "Outer Glow" Layer Style
To finish off the effect, let's add a bit of color to the glow around the sparkles. For that, we'll use an Outer Glow layer style. Click on the Layer Styles icon (the "fx" icon) at the bottom of the Layers panel:
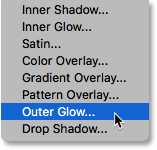
Then choose Outer Glow from the list:
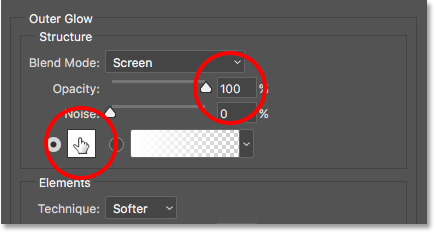
This opens the Layer Style dialog box set to the Outer Glow options in the middle column. First, increase the Opacity of the glow to 100%. This will make it easier to see the color we're selecting. Then, to choose a color, click on the color swatch:
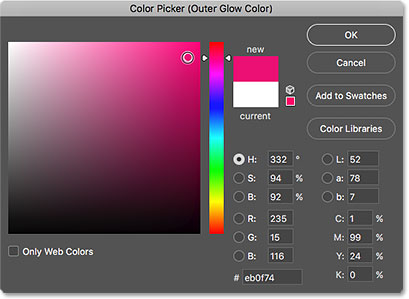
Choose the color you want to use from Photoshop's Color Picker. In my case, I'll choose a reddish-pink to match the color of the girl's dress:
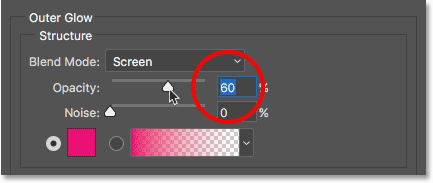
Click OK to close out of the Color Picker. Then, back in the Layer Style dialog box, lower the Opacity of the glow to reduce its intensity. I'll lower mine down to 60%:
Click OK to close out of the Layer Style dialog box. And with that, we're done! Here, after adding some color to my sparkle trail with the Outer Glow layer style, is my final result:

And with that, we're done! Here, after adding some color to the sparkle trail, is my final result:

And there we have it! That's how to create a custom sparkle brush from scratch in Photoshop, and how to use the brush to add a magical sparkle trail to a photo! I hope you enjoyed it, and be sure to check out our Photo Effects section for more step-by-step, easy-to-follow Photoshop effects tutorials!