Vintage Photo Effect With Adobe Lightroom
Learn how to create an old-fashioned, vintage photo effect with Adobe Lightroom. Once you know the steps, you can easily create the same effect using Camera Raw in Photoshop! For Lightroom CC.
In this Adobe Lightroom tutorial, we'll learn how to easily turn a new photo into an old-fashioned, vintage photo. In a previous tutorial, we learned how to create the same vintage photo effect using the Camera Raw filter in Photoshop. Since Camera Raw and Lightroom share the same panels with the same options, the steps for creating this effect in Lightroom are exactly the same. In fact, with Lightroom, it's even easier, since we can select the image we want to use and apply the vintage photo effect all from within Lightroom itself. Let's see how it works.
We'll start by creating a custom black and white version of our image using Lightroom's HSL / Color / B&W panel. Then, we'll give it more of an old fashioned look by adding a sepia tone using the Split Toning panel. We'll add grain and a vignette effect with the Effects panel. And finally, we'll use the Basic panel to fade the image by toning down the highlights, brightening the shadows and reducing contrast in the midtones. And because everything we do in Lightroom is non-destructive, the original image always remains safe.
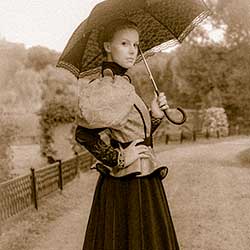
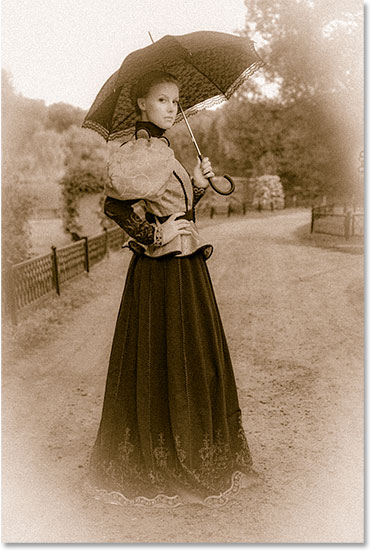
Here's what the final vintage photo effect will look like when we're done:

How To Create A Vintage Photo Effect In Lightroom
Step 1: Open Your Image In Lightroom's Develop Module
Start by selecting the image you want to use from your Lightroom catalog. Here's the photo I'll be using (woman in vintage suit photo from Shutterstock):

Then, make sure you're in the Develop module by selecting it from the Module Picker in the upper right of the screen:

Step 2: Open The HSL / Color / B&W Panel
The first thing we'll do is convert our color image to black and white. In the panel column along the right, twirl open the HSL / Color / B&W panel by clicking on the arrow to the right of the panel's name:

Step 3: Create A Custom Black And White Version
Then, click on B&W in the panel's tab to switch to the Black and White conversion options. Your image will instantly switch from color to black and white:

To create a custom black and white version of your image, drag the individual color sliders (Red, Orange, Yellow, Green, Aqua, Blue, Purple, and Magenta) left or right. Dragging a slider to the left will darken any areas in the black and white version that originally contained the slider's color. Dragging to the right will lighten those areas. For example, dragging the Red slider to the right will lighten any areas that originally contained red. Dragging the Green slider to the left will darken any areas that contained green, and so on.
If you drag a slider and nothing happens, it's because no part of your image contained that specific color. Every image will be different, so keep an eye on your image as you drag each slider to judge the results:

Here's my black and white version after experimenting with the sliders:

Step 4: Open The Split Toning Panel
Next, we'll add a sepia tone to the image. Open the Split Toning panel in Lightroom:

Step 5: Add A Sepia Tone To The Image
The Split Toning panel is divided into a Highlights section at the top and a Shadows section at the bottom, allowing us to set different colors for the lightest and darkest areas of the image. In the Highlights section, set the Hue to 40 for a nice orange-yellow. You won't actually see the color until you increase the saturation. Set the Saturation value to 20.
Then in the Shadows section, use a slightly different Hue value of 45 (just to add some variety), and then increase the Saturation value to 50 for a more intense effect in the shadows:

Here's my image with the sepia tone applied:

Step 6: Open The Effects Panel
Next, we'll add some grain and a vignette to the image. Open the Effects panel:

Step 7: Add Grain To The Image
The Effects panel contains three main effects that we can apply to the image. There's Post-Crop Vignetting at the top, Grain in the middle and a new Dehaze effect that was recently added to Lightroom (and which we don't need for our vintage photo effect). We'll start by adding some grain.
The three sliders in the Grain section let us adjust the amount, size and roughness of the grain. If you want to use the same settings I'm using, set the Amount value to 50, and then set both the Size and Roughness values to 60. You can also experiment with the sliders on your own to find settings that work best with your image:

Here's a close-up view of my image to make the grain effect easier to see:

Step 8: Add A Vignette
Next, let's add a vignette using the Post-Crop Vignetting section of the Effects panel. The main control here is the Amount slider. If you drag the Amount slider to the left, you'll darken the corners of the image. Normally, that's the result you'd want. But for our vintage photo effect, we actually want the opposite. We want to lighten the corners as if they've faded over time, and we can do that by dragging the Amount slider to the right. I'll increase my Amount value all the way to +80. You can leave the other sliders at their default settings:

Here's my vintage photo effect so far with the vignette applied:

Step 9: Open The Basic Panel
We're almost done. Open Lightroom's Basic panel:

Step 10: Lower The Overall Contrast
We'll use a few sliders in the Basic panel to lower the overall contrast of the image so it looks even more like it has faded over time. First, to tone down the highlights, drag the Highlights slider towards the left. The further you drag, the more you'll darken the brightest parts of the image. I'll lower my Highlights value all the way down to -70. Then, to brighten the darkest areas, drag the Shadows slider towards the right. I'll increase my Shadows value to +80.
Finally, to reduce the contrast in the midtones, drag the Clarity slider towards the left. The further you drag, the more you'll soften and blur the details in the image. Don't drag too far or you'll lose too much detail. I'll lower my Clarity value down to -40:

To see a before and after comparison of your effect, press the Backslash ( \ ) key on your keyboard. Press it once to see a "Before" view of the image, and then press it again to see the "After" view. And here, after lowering the overall contrast with the Basic panel, is my final "vintage photo effect" result:

And there we have it! That's how to easily turn a new photo into an old fashioned, vintage photo using Adobe Lightroom! To see how the steps we've covered in Lightroom compare with Camera Raw, check out our Vintage Photo Effect With Camera Raw tutorial. Looking for Photoshop effects? Visit our Photo Effects section for easy-to-follow, step-by-step tutorials, or check out our latest video tutorials on our YouTube channel!