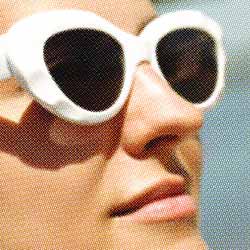
Get Better Color Halftone Effects in Photoshop
Learn how to create more realistic color halftone patterns in Photoshop using the Color Halftone filter and this simple trick! A step-by-step tutorial.

Download the PDF: Get Better Color Halftone Effects in Photoshop
One of the most popular effects to create with Photoshop is a color halftone pattern, which is based on how a printing press uses cyan, magenta, yellow and black dots of ink, in varying sizes and patterns, to create the illusion of a continuous tone image.
Color halftone effects can give images a vintage or retro look by simulating print techniques used in newsprint, magazines, comic books and pop art.
Photoshop even includes a Color Halftone filter, the focus of this tutorial, which sounds like the perfect choice for creating a halftone effect. But if you’ve ever used the Color Halftone filter, the results were probably not as good as you expected.
Let's take a quick look at the problem with the Color Halftone filter, and then I'll show how to get much better results from it using a simple trick.
Which Photoshop version do I need?
The Color Halftone filter is available in any recent version of Photoshop.
I'm using Photoshop 2024. You can get the latest Photoshop version here.
Let's get started!
The document setup
For this tutorial, I’ll use this retro-style photo from Adobe Stock

See also:
- Create a black and white halftone pattern in Photoshop
- Turn a photo to a color dot pattern
- Create a Pointillism painting effect
Where to find the Color Halftone filter in Photoshop
The Color Halftone filter is found by going up to the Filter menu in the Menu Bar, choosing Pixelate and then Color Halftone.

How the Color Halftone filter works
In the Color Halftone dialog box, the Max Radius value at the top sets the maximum size of the dots, in pixels.
And each Channel option sets the angle for a specific color’s dot pattern (1 is for cyan, 2 is magenta, 3 is yellow and 4 is black). Where the dots overlap, the colors mix together to create new colors. At least, that’s the idea.
I generally leave the Channel options set to their defaults and the only value I change is the dot size (the Max Radius).

The standard Color Halftone filter result
The default Max Radius value is 8 pixels.
Since I’m working with a large image (5000 px by 3333 px) and I need the effect to be visible in the screenshots, I’ll increase the radius to 20.
Then I’ll click OK to apply the filter.

But the result is not what a true halftone pattern should look like.
Instead of the cyan, magenta, yellow and black dots mixing together to create the photo’s original colors, they just look like they’ve been added in front of the image.

If I zoom in to 100% for a closer look, the problem is more obvious. The dots are not blending with the original colors at all.

The problem with Photoshop’s Color Halftone filter
So why is the Color Halftone filter so bad at creating halftone effects? Well, the filter itself is not the problem. The real issue is that our image is in the wrong color mode.
If you go up to the Image menu and choose Mode (short for Color Mode), you’ll see that your image is most likely in RGB color. And in the RGB (Red, Green and Blue) color mode, all colors in the image are made from different combinations of red, green and blue.

The problem is that the Color Halftone filter wants to be in the CMYK color mode.
CYMK stands for Cyan, Magenta, Yellow and Black, which are the same colors as the halftone dots (and the same colors a printing press would use). So if we want better results from the Color Halftone filter, we first need to switch color modes.
Since my initial attempt with the Color Halftone filter didn’t work, I’ll undo it by going up to the Edit menu and choosing Undo Color Halftone.

And now I'm back to the original photo.

How to get better Color Halftone filter results
To get the best results from the Color Halftone filter, we first need to convert our image from RGB color to CMYK.
But to be safe and avoid making any permanent changes to the image, we’ll duplicate the image and work in a separate document. Then we’ll move the halftone effect back over to the original document when we’re done.
Related tutorial: 5 ways to move images between documents
Step 1: Duplicate the image
With your Background layer selected in the Layers panel, go up to the Layer menu and choose Duplicate Layer.

In the Duplicate Layer dialog box, set the Document to New and click OK.

A copy of the image opens in a separate document, which we can tell from the new tab at the top.

Step 2: Convert the image to CMYK color
With the new document active, go up to the Edit menu and choose Convert to Profile.

In the Convert to Profile dialog box, make sure the Destination Space is set to Working CMYK.
The information you see next to it may be different depending on where you are in the world. Mine says U.S. Web Coated (SWOP) v2
. But the important part is Working CMYK
.
Click OK to close the dialog box.

Then if you go back to the Image menu and choose Mode, you’ll see that the image is now in the CMYK color mode.
We’re ready to apply the Color Halftone filter.

Step 3: Apply the Color Halftone filter
Go up to the Filter menu, choose Pixelate and then Color Halftone, just like we did before.

In the Color Halftone dialog box, enter a Max Radius value to set the maximum size for the halftone dots, in pixels. I’ll use the same value of 20 to start but we can come back and change it if needed.
Leave the four Channel options (I covered them earlier in the tutorial if you missed it) at their default values.
Then click OK to apply the filter.

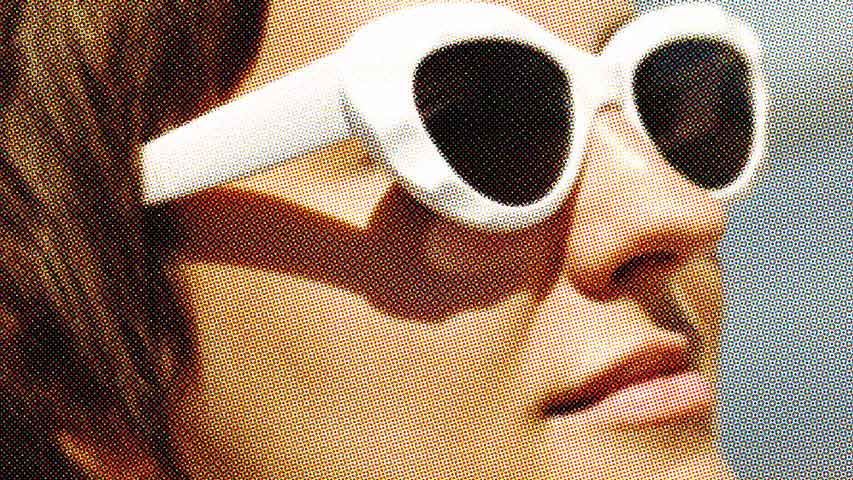
This time, because the image is in the CMYK color mode, the Color Halftone filter creates a much better effect.
The cyan, magenta, yellow and black halftone dots are not just sitting in front of the image like they were in the RGB color mode. Instead the dots are blending with the photo’s original colors, giving it a nice vintage look.

For comparison, here again is the original color halftone effect using RGB color.

Step 4: Change the halftone dot size
If you want to try a different dot size:
- Press Ctrl+Z on a Windows PC or Command+Z on a Mac to undo the Color Halftone filter, then
- Go back to the Filter menu, choose Pixelate and then Color Halftone.
Enter a different Max Radius value. The value you need will depend on the size of your image and the look you want to achieve. The default size is 8 and the lowest size you can choose is 4.
I’ll lower my setting from 20 to 12 pixels.

Click OK to apply the filter, and I think these smaller halftone dots look better.

Step 5: Copy and paste the halftone effect into the original document
To move the halftone effect over to the original document, go up to the Select menu and choose All.

Then go to the Edit menu and choose Copy.

Close the halftone pattern document by clicking the small x in the document’s tab.
Leave the original document open.

Choose No (or Don’t Save on a Mac) when Photoshop asks if you want to save your changes.

Then back in the original document, go up to the Edit menu and choose Paste.

Photoshop pastes the color halftone effect into the document.

And in the Layers panel, the halftone effect appears on its own layer above the original image on the Background layer.

And there we have it! That’s the trick to creating better halftone pattern effects using Photoshop’s Color Halftone filter.
Related tutorials:
- Create a black and white halftone pattern in Photoshop
- Turn a photo to a color dot pattern
- Create a Pointillism painting effect
Don't forget, all of my Photoshop tutorials are now available to download as PDFs!