How to Sharpen Images in Photoshop
Photoshop's sharpening filters work great but are too confusing. Here's a better and easier way to sharpen your images in Photoshop. A step-by-step tutorial.

Download the PDF: How to Sharpen Images in Photoshop
When sharpening images in Photoshop, most people turn to the sharpening filters (Smart Sharpen or Unsharp Mask). These filters work great but they have confusing options that make sharpening your image more challenging than it needs to be.
Sharpening an image really just means that we’re increasing the contrast along edges. So all we should need is a way for Photoshop to detect the edges and a simple way to increase their contrast.
Thankfully, there is a way to do that using a different filter called High Pass. The High Pass filter is an edge detection filter, not a sharpening filter. But we can use it as a sharpening filter when we combine it with one of Photoshop’s layer blend modes. So here is the easiest way to sharpen an image and get great results.
Which Photoshop version do I need?
I'm using Photoshop 2025 but this sharpening method works with any recent version.
Let's get started!
I've gone ahead and opened the image I want to sharpen.

Step 1: Duplicate your image
The first step is to make a copy of our image layer.
In the Layers panel, the image is on the Background layer.

To make a copy of it, go up to the Layer menu in the Menu Bar, choose New and then Layer via Copy.
You can also press the keyboard shortcut, Ctrl+J on Windows or Command+J on a Mac.

Back in the Layers panel, the copy (Layer 1) appears above the original.

I’m going to double-click on the copy’s name and rename it Sharpening
, and I’ll press Enter on a Windows PC or Return on a Mac to accept it.

Sharpening.
Step 2: Desaturate the copy
Next we need to desaturate the sharpening layer.
Go up to the Image menu in the Menu Bar and choose Adjustments.

Then in the Adjustments menu, choose Desaturate.

This removes the color, leaving us with a grayscale version of the image.

But notice in the Layers panel that only the sharpening layer has been desaturated. The original image on the Background layer remains in color.

Step 3: Convert the copy into a smart object
Before we apply the High Pass filter, we’ll convert the sharpening layer into a smart object. That way, the High Pass filter will be applied as a smart filter which will keep the filter’s settings editable, in case we need to go back and adjust the sharpening amount.
In the Layers panel, right-click on the sharpening layer and choose Convert to Smart Object from the menu.

Nothing will happen to the image, but a smart object icon appears in the lower right of the sharpening layer’s thumbnail.
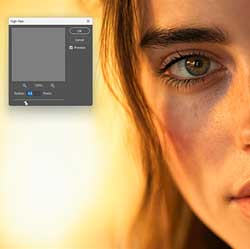
Step 4: Select the High Pass filter
With the smart object selected in the Layers panel, go up to the Filter menu in the Menu Bar, choose Other and then High Pass.

This does two things. One, it opens the High Pass filter dialog box. And two, it turns your image gray.
Depending on the Radius value in the High Pass filter dialog box, you will see either solid gray or, as with my image here, some of the image details will appear as outlines.

Step 5: Adjust the Radius value to detect the edges
We’ll use the High Pass filter to detect the edges in the image so we can sharpen them.
In the dialog box, start by dragging the Radius slider all the way to the left to its lowest setting (0.1). This will turn the image completely gray with no edges detected.

Then begin dragging the Radius slider to the right to increase the value so that some of the edges begin to appear. You’ll need to release your mouse button to see any changes, so drag the slider a short distance, then release your mouse button, drag some more, release your mouse button, and so on.
Generally a Radius value of between 3 and 6 pixels works well. A value too low will not detect enough edges for the sharpening to work, and too high will start to include areas around the edges which will produce a halo effect (a telltale sign of oversharpening).
For my image, a Radius value of around 4.5 looks good. At this value, I can clearly see the woman’s eyes, eyelashes and other fine details like hair, while her skin texture (which we don’t want to sharpen) remains mostly solid gray and undetected.

Click OK to accept it and close the High Pass filter dialog box.
In the Layers panel, the High Pass filter appears as a smart filter below the smart object.

Step 6: Change the layer blend mode to Overlay
Now that we’ve detected the edges, we need a way to increase their contrast. We can do that using one of Photoshop’s layer blend modes.
In the Layers panel, change the blend mode of the sharpening layer (the smart object) from Normal to Overlay.

Overlay is one of the blend modes that boosts contrast.
As soon as you select it, all of the areas of solid gray on the sharpening layer disappear, revealing the original image.
And those outlines along the edges we detected with the High Pass filter are used to increase edge contrast, resulting in a sharper image.

To see the difference, toggle the sharpening layer on and off by clicking its visibility icon.

With it off, you’ll see the original unsharpened image. And with it on, you’ll see the sharpened image.
If you’re working on a portrait image like I am, the sharpening will be most noticeable around the subject’s eyes.
Here’s a comparison of my subject’s eyes with and without the sharpening. The original image is on the left and the sharpened image is on the right.

Step 7: Adjust the sharpening if needed
If you want to adjust the sharpening amount, reopen the High Pass filter by double-clicking on its name in the Layers panel.

Drag the Radius slider to increase or decrease the amount of sharpening. Then click OK to accept it or Cancel if you change your mind. I’ll click Cancel.

Step 8: Add a layer mask
At this point we’ve sharpened the image, but we’ve sharpened the entire image. If you’re working on a landscape photo, sharpening everything may be what you want.
But with portraits, we want to limit the sharpening to just the eyes and avoid sharpening anything else, especially the skin texture.
To accomplish that, we’ll use a layer mask.
In the Layers panel, make sure the sharpening layer is selected. Then on your keyboard, press and hold the Alt key on a Windows PC or the Option key on a Mac. With the key held down, click the Add Layer Mask icon at the bottom of the Layers panel.

This adds a layer mask to the sharpening layer, as we see with the mask thumbnail.
Normally layer masks are initially filled with white which reveals the entire layer and we would paint on the mask with black to hide certain areas.
But because we held the Alt or Option key, we got the opposite. The mask is filled with black to hide the entire layer, and we can now paint with white over the eyes to reveal the sharpening in just that area.

Step 9: Paint with white to reveal the sharpening in specific areas
In the toolbar, select the Brush Tool.

Make sure your Foreground color (your brush color) is set to white. If it’s set to black, press D on your keyboard to reset it to white.

Right-click anywhere in the document to open the Brush Options and lower the Hardness value down to 0 percent.
This lets you paint with a soft edge brush so the sharpened areas will blend smoothly into the surrounding unsharpened areas.

Resize your brush using the left and right bracket keys ( [ and ] ) on your keyboard.
Then simply paint over the areas where you want to bring back the sharpening. With a portrait image, that would be your subject’s eyes, eyelashes and maybe the eyebrows. Avoid painting over the rest of your subject’s face since we don’t want to sharpen the skin texture.

Again you can toggle the sharpening layer on and off in the Layers panel to compare the original image with the sharpened version.
If you think you’ve over-sharpened the image, an easy way to reduce the sharpening amount is to simply lower the sharpening layer’s opacity in the Layers panel until it looks good.

Here, with only my subject’s eyes sharpened, is my final result.

And there we have it! That’s an easy way to sharpen images without using the confusing sharpening filters in Photoshop.
Related tutorials:
- New in Photoshop 2025: Using the Remove Tool with Generative AI
- New in Photoshop 2025: Remove Distracting People From Photos
- New in Photoshop 2025: Remove Wires and Cables From Photos