
Photoshop Borders And Frames – Matted Picture Frame
In this tutorial, the second in our series on creating photo borders and frames in Photoshop, we'll learn how to add a matted picture frame around an image, and we'll create most of the effect using nothing more than a few simple layer styles! Along the way, we'll learn how to merge layer styles onto a layer, and how we can use blend modes like Screen and Multiply to easily turn shadows into highlights and vice versa!
I'll be using Photoshop CS6 here but this tutorial is also fully compatible with Photoshop CC.
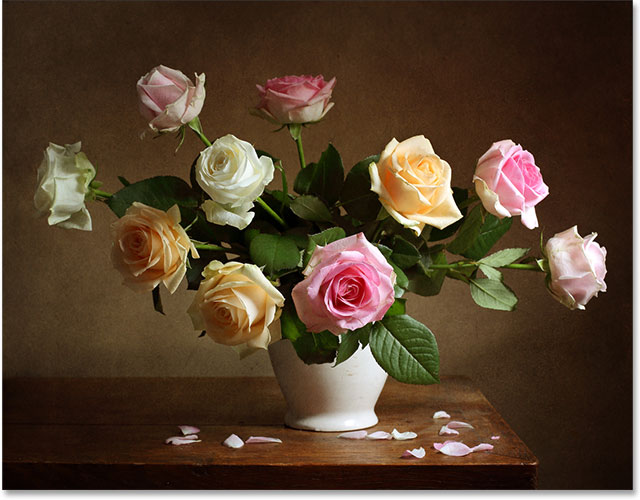
Here's the image I'll be working with (still life photo from Shutterstock):
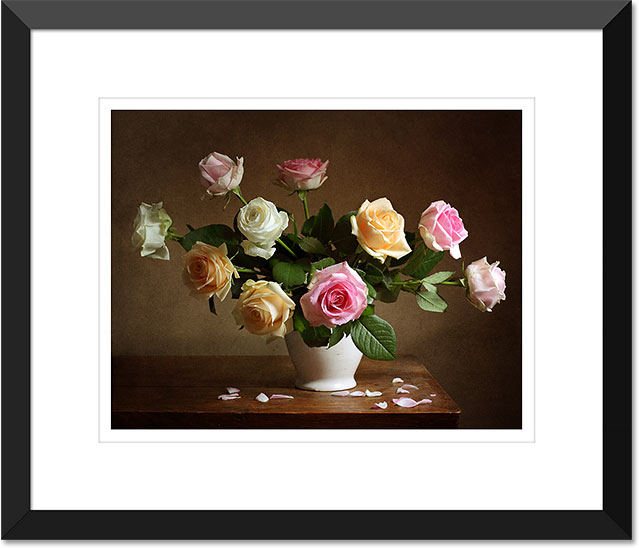
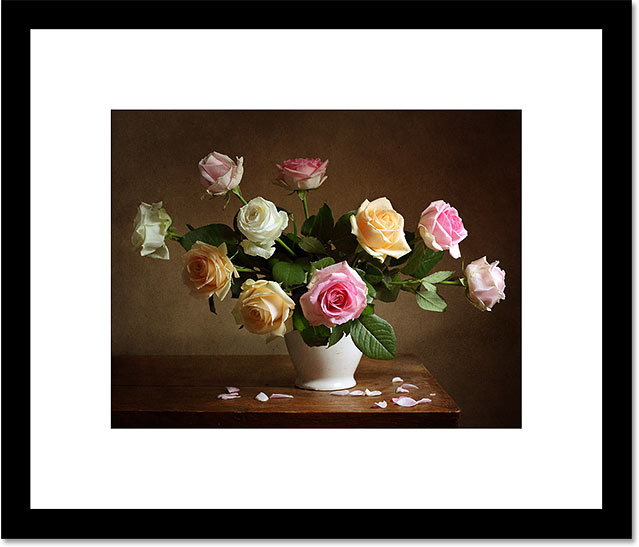
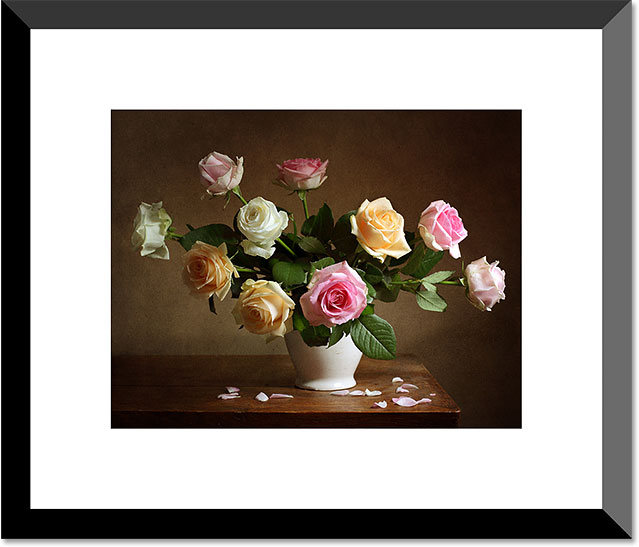
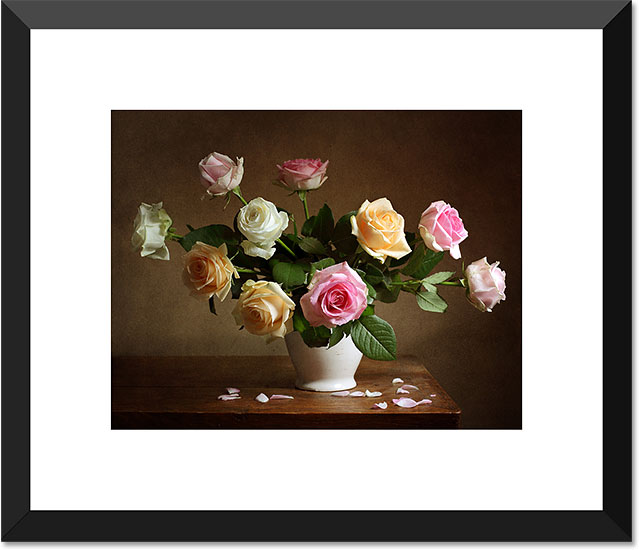
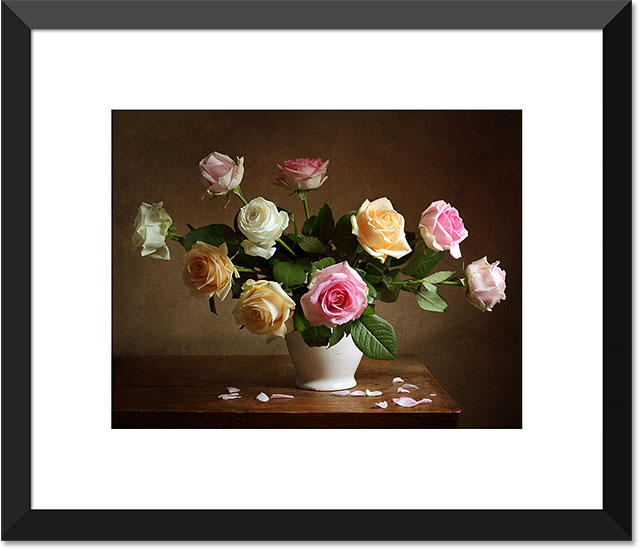
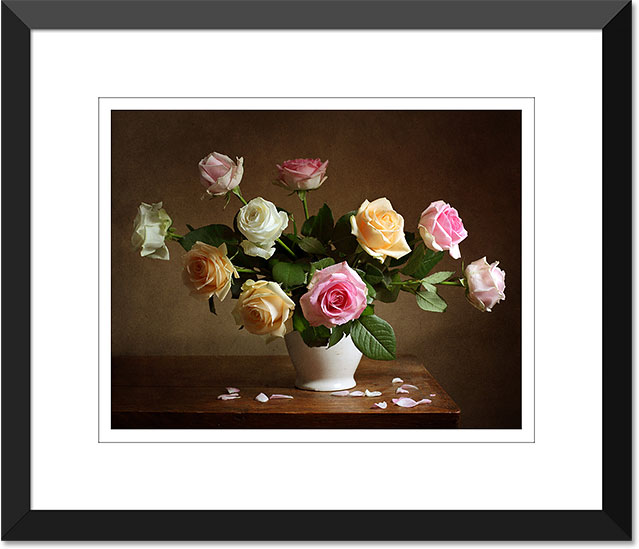
And here's what the matted picture frame will look like when we're done:
How To Create A Matted Photo Frame
Step 1: Duplicate The Background Layer
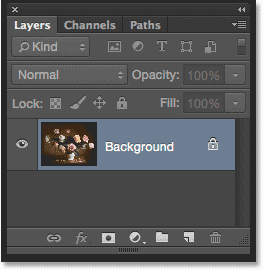
The first thing we need to do to create our matted frame is duplicate the Background layer. If you've newly opened your image in Photoshop as I have, you'll see in the Layers panel that the Background layer is currently the only layer in the document:
To duplicate it, and name the new layer at the same time, press and hold the Alt (Win) / Option (Mac) key on your keyboard as you click on the Background layer and drag it down onto the New Layer icon at the bottom of the Layers panel:
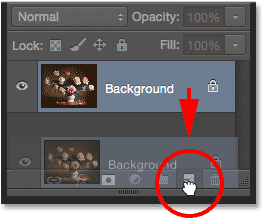
When you release your mouse button, Photoshop will pop open the Duplicate Layer dialog box, giving us the chance to name the new layer before it's added. Name the layer "photo" (since this will be the layer our photo sits on), then click OK:
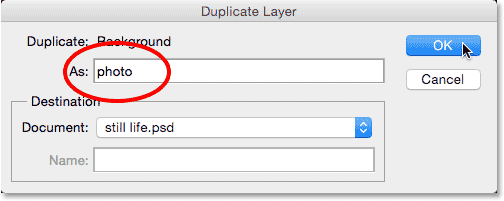
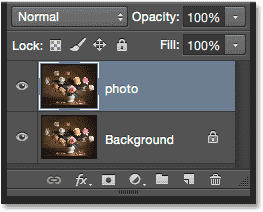
A copy of the Background layer now appears on a new layer named "photo" above the original:
Step 2: Select The Background Layer
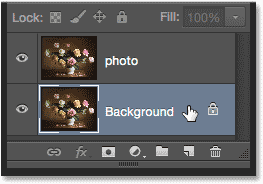
Click on the Background layer in the Layers panel so it's once again selected and active:
Step 3: Add More Canvas Space Around The Image
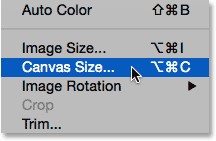
Let's add a white border around the image to serve as the mat that sits between the frame and the photo, and we'll do that using Photoshop's Canvas Size command. Go up to the Image menu in the Menu Bar along the top of the screen and choose Canvas Size:
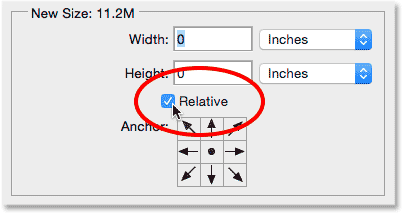
This opens the Canvas Size dialog box. First, make sure the Relative option is checked. This will let us start with our current canvas size and add additional space to it:
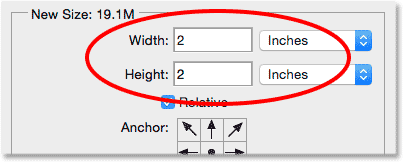
With Relative checked, enter the amount of canvas space you want to add for your mat into the Width and Height boxes, using whichever measurement type is easier (usually either Pixels or Inches). When deciding how much space to add, keep in mind that whatever value you enter for the Width will be divided between the left and right sides. So, for example, entering a value of 2 inches, as I'm going to do, will add 1 inch of space to the left and 1 inch to the right. The same thing goes with the Height value. It gets divided between the top and bottom, so entering 2 inches for the Height will add 1 inch of space to the top and 1 inch to the bottom. The actual values you enter will depend a lot of the size of your image, so even though I'm setting both my Width and Height values to 2 Inches, you may find that smaller or larger values work better:
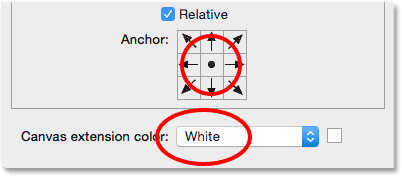
Next, make sure the center square is selected in the Anchor grid directly below the Relative option. Selecting the center square tells Photoshop to add the extra space evenly around the canvas. Finally, since we want our mat to be white, set the Canvas extension color to White:
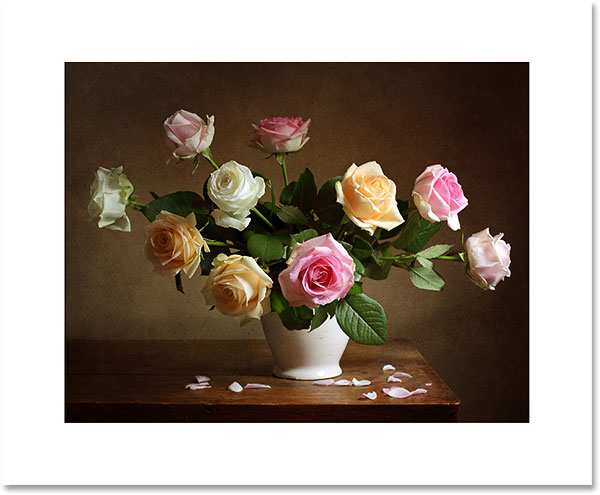
Click OK when you're done to close out of the Canvas Size dialog box, at which point Photoshop adds the extra space around the image, creating our white mat. If you find that you've added too much or too little space, just press Ctrl+Z (Win) / Command+Z (Mac) on your keyboard to undo it, then go back to Image > Canvas Size and try again with different Width and Height values:
Step 4: Rename The Background Layer
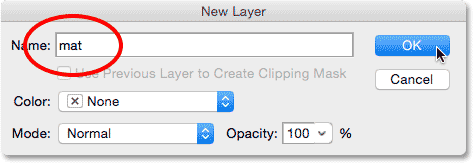
Since we're using the Background layer as the mat, let's give the layer a more descriptive name. Double-click directly on the name "Background" in the Layers panel. This will pop open the New Layer dialog box. Enter "mat" as the new name for the layer, then click OK:
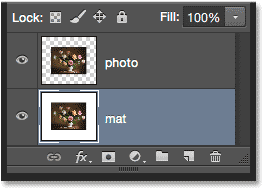
Photoshop changes the name of the layer from "Background" to "mat":
Step 5: Add A New Layer
Next, we'll add another new layer, this time to hold the frame. With the "mat" layer selected, press and hold the Alt (Win) / Option (Mac) key on your keyboard and click on the New Layer icon at the bottom of the Layers panel:
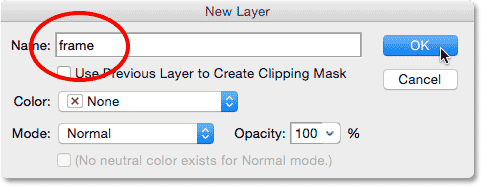
This once again opens the New Layer dialog box. Name the new layer "frame", then click OK:
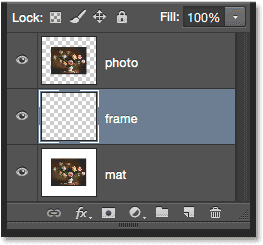
A new blank layer named "frame" appears between the "photo" and "mat" layers:
Step 6: Fill The New Layer With White
Go up to the Edit menu at the top of the screen and choose Fill:
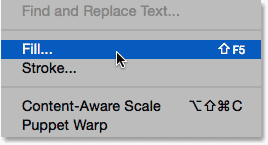
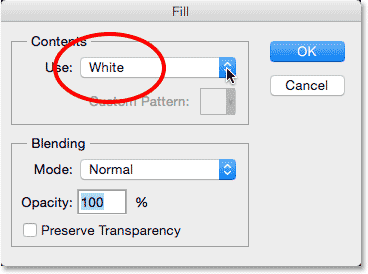
This opens the Fill dialog box. We're going to temporarily fill the "frame" layer with white, so set the Use option at the top of the dialog box to White. Make sure the other two options are set to their defaults (Mode is set to Normal and Opacity is set to 100%), then click OK:
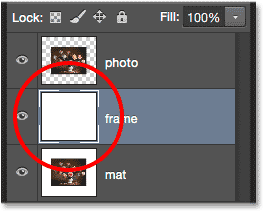
Nothing will seem to have happened in the document, but if we look at the "frame" layer's preview thumbnail in the Layers panel, we see that the layer has in fact been filled with white:
Step 7: Apply A Stroke Layer Style
Next, to draw the frame, we'll use a couple of Photoshop's layer styles (effects). Click on the Layer Styles icon (the "fx" icon) at the bottom of the Layers panel:
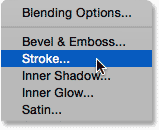
Choose Stroke from the list of layer styles that appears:
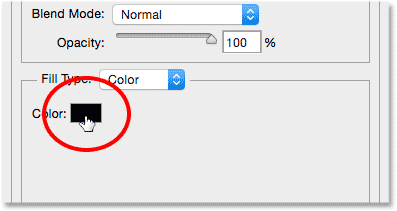
This opens Photoshop's Layer Style dialog box set to the Stroke options in the middle column. We want our frame to be black, which means we'll need the stroke to be black. If your stroke isn't set to black already, click on the color swatch to the right of the word Color:
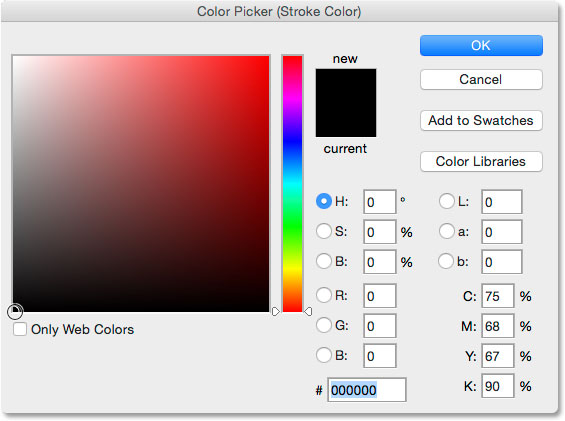
This will open the Color Picker. Choose black for the stroke color, then click OK:
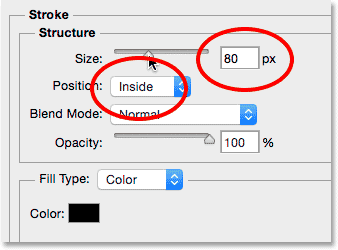
Next, to give the stroke sharp corners, change the Position option to Inside. Then, keep an eye on your document as you drag the Size slider towards the right to increase the thickness of the stroke, creating the initial frame. There's no "one-size-fits-all" value to use here because the size you'll want for your frame will depend a lot on the size of your image, as well as your own personal taste. I'm working with a fairly large image so for me, I think a stroke size of 80 px looks good. Your value may be different, but whichever value you choose, remember it because we'll need it again in a moment:
Here's what my document looks like with the stroke applied around the outer edges. Don't close out of the Layer Style dialog box just yet. We have one more style to apply:
Step 8: Apply A Bevel & Emboss Layer Style
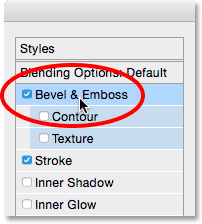
Let's give our frame some depth using another of Photoshop's layer styles - Bevel & Emboss. With the Layer Style dialog box still open, click directly on the words Bevel & Emboss at the top of the list of styles on the left. Make sure you click on the words themselves, not just inside the checkbox, otherwise the options for Bevel & Emboss won't appear:
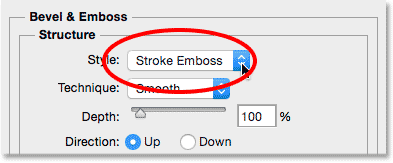
The middle column of the Layer Style dialog box will change to the Bevel & Emboss options. We need to apply this effect directly to the stroke we added in the previous step, and we can do that by changing the Style option at the top from Inner Bevel (the default setting) to Stroke Emboss:
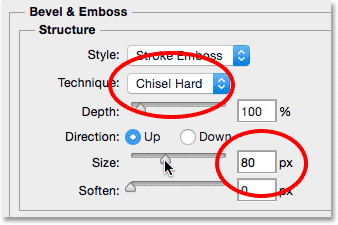
Next, change the Technique option directly below it from Smooth to Chisel Hard. Then, set the Size value to the same value you used for your stroke size in the previous step. For me, it was 80 px. If you don't remember the exact value you used, that's okay. Just keep an eye on your document as you drag the Size slider towards the right and make sure you set it high enough so that the emboss effect covers the entire thickness of the stroke:
Here's what the frame should look like so far, but we're not quite done yet:
Back in the Bevel & Emboss options, change the Angle value in the Shading section to 120° so the light appears to be shining on the frame from the upper left:
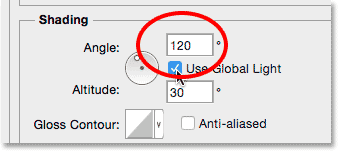
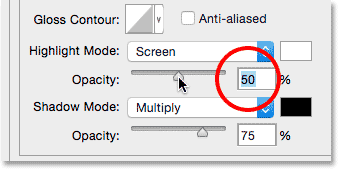
Let's make a couple more adjustments to the lighting. Down near the bottom are some options for adjusting the highlight and shadow of the effect. Lower the Highlight Opacity value from 75% (the default setting) down to 50%. You may even want to go a bit lower than that. This will darken the brightest sections of the frame:
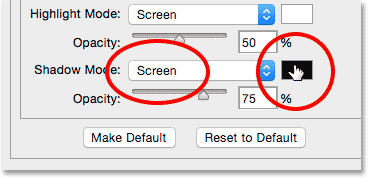
Then, to brighten up the darker areas (which at the moment are pure black), first change the Shadow Mode from Multiply to Screen, then click on the color swatch beside it to change the shadow color:
When the Color Picker opens, choose white for the new shadow color (I know, I know... white for a shadow?? Just trust me on this), then click OK:
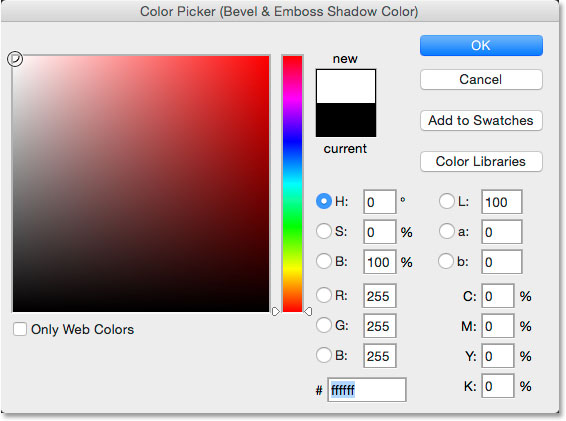
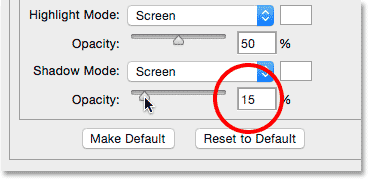
Why did we choose white for the shadow color? It's because we don't actually need a shadow here since our frame is already pure black. Instead, what we need is a second highlight, and by changing the Shadow Mode from Multiply to Screen, then changing its color from black to white, we effectively turned the shadow into a highlight! With white now as the new color, lower the Shadow Opacity value from 75% all the way down to somewhere between 10-20%. I'll split the difference and set mine to 15%. The sections of the frame that were pure black before will now appear a bit brighter, revealing some detail in the corners where the frame sections meet:
Click OK to close out of the Layer Style dialog box. Here's what the frame should look like:
Learn more about the five essential blend modes every Photoshop user should know!
Step 9: Rasterize The Layer Styles
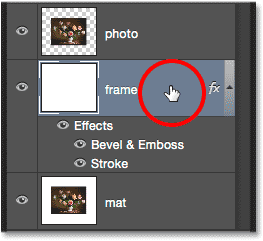
Next, we'll add a drop shadow to the frame. To do that, we'll first need to delete everything on the layer except the frame itself. And to do that, we'll need to rasterize our two layer styles, essentially flattening (merging) them onto the layer as normal pixels. Right-click (Win) / Control-click (Mac) on the "frame" layer:
Choose Rasterize Layer Style from the menu that appears:
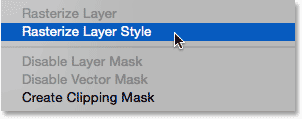
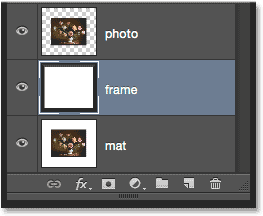
The frame will still look the same as before, but the two layer styles are no longer listed separately below the "frame" layer in the Layers panel. They've now been merged onto the layer. This does mean we've lost the ability to go back and edit them later, but that's okay because we've already done everything we needed to do with them:
Step 10: Select The Magic Wand Tool
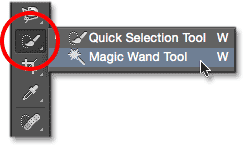
Select the Magic Wand Tool from the Tools panel. By default, it's nested behind the Quick Selection Tool, so to access it, click and hold on the Quick Selection Tool until a fly-out menu appears, then choose the Magic Wand Tool from the menu:
Step 11: Turn Off "Sample All Layers"
Up in the Options Bar, make sure the Sample All Layers options in unchecked (turned off). This will limit our selection to just the contents of the "frame" layer:

Step 12: Select The White Area And Delete It
To make it easier to see what we're about to do, press and hold the Alt (Win) / Option (Mac) key on your keyboard and click on the visibility icon (the "eyeball") on the far left of the "frame" layer in the Layers panel. This will temporarily hide all layers in the document except the "frame" layer:

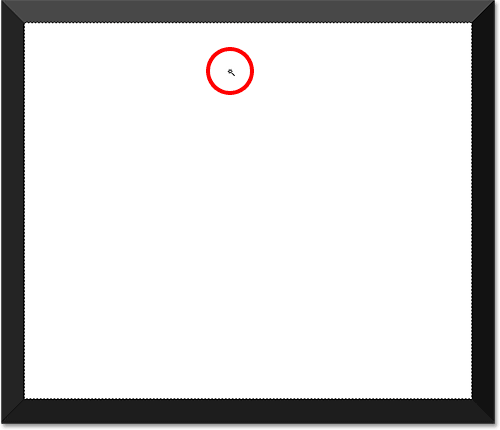
Then, click with the Magic Wand Tool anywhere inside the white area to select it. You'll see a selection outline appear around the outer edges. Everything except the frame is now selected:
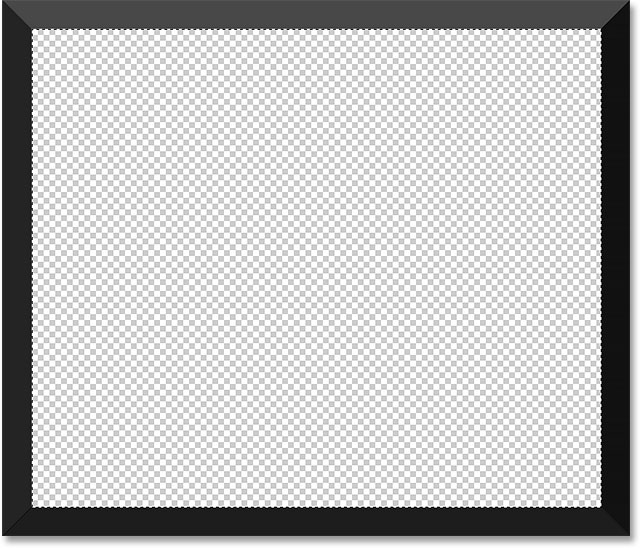
With the white area selected, press the Backspace (Win) / Delete (Mac) key on your keyboard to delete it. The same area will now be filled with transparency, indicated by the checkerboard pattern. Only the frame itself remains:
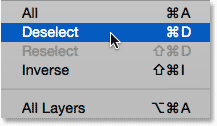
We don't need the selection outline anymore, so to remove it, go up to the Select menu at the top of the screen and choose Deselect. Or, just press Ctrl+D (Win) / Command+D (Mac) on your keyboard:
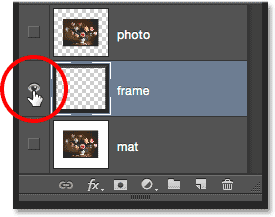
Then, to turn the other layers back on in the document, bringing back the photo and the white mat, once again press and hold Alt (Win) / Option (Mac) on your keyboard and click on the "frame" layer's visibility icon:
Step 13: Add A Drop Shadow
Click again on the Layer Styles icon at the bottom of the Layers panel:
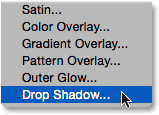
Choose Drop Shadow from the bottom of the list:
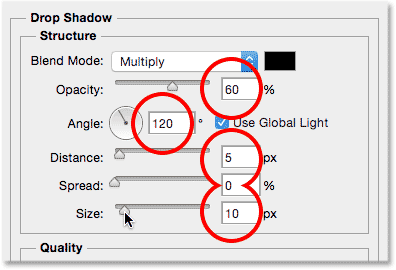
This opens the Layer Style dialog box set to the Drop Shadow options. First, lower the Opacity of the drop shadow from 75% (the default value) down to between 50-60% so it's not as intense. Leave the Angle set to 120° so the lighting direction remains the same as it was when we created the frame. Then, adjust the Distance and Size values as needed for your image. Distance controls how far away the shadow appears from its source (the frame), while Size controls the softness of the shadow. I'll leave my Distance value set to the default of 5 px but I'll increase the Size value to 10 px:
Click OK to close out of the Layer Style dialog box. You should now see a fairly soft, thin shadow along the top and left inner edges of the frame:
Step 14: Add A New Layer
We'll finish off our picture frame by adding a second, smaller border around the photo, creating a double mat effect. Once again press and hold Alt (Win) / Option (Mac) on your keyboard and click on the New Layer icon at the bottom of the Layers panel:
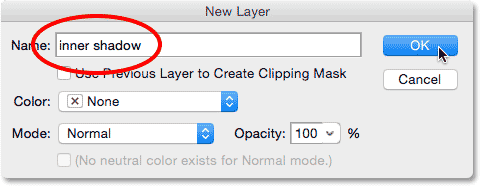
When the New Layer dialog box appears, name the layer "inner shadow" and click OK:
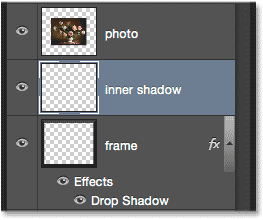
A new blank layer named "inner shadow" appears between the "frame" and "photo" layers:
Step 15: Select The Rectangular Marquee Tool
Grab the Rectangular Marquee Tool from the Tools panel:

Step 16: Draw A Selection Around The Photo
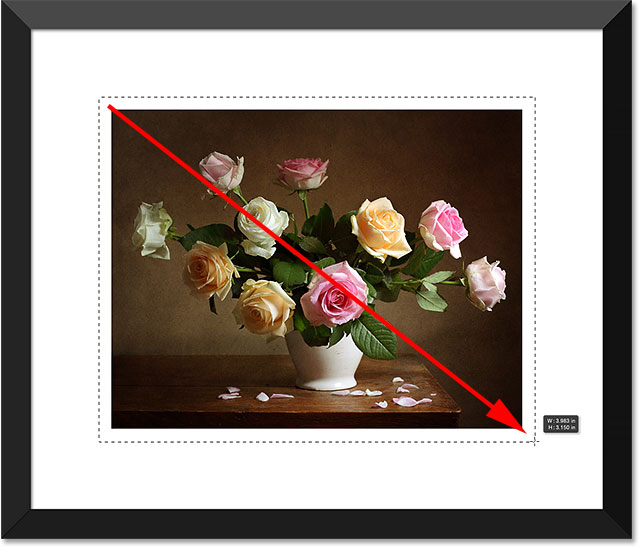
With the Rectangular Marquee Tool in hand, drag out a rectangular selection around the photo, making it a bit larger than the photo itself. Start by clicking above and to the left of the top left corner of the photo, then keep your mouse button held down and drag diagonally to just below and to the right of the bottom right corner, leaving the same amount of space around all four sides. If you need to reposition the selection outline as you're drawing it, press and hold your Spacebar, move the selection around with your mouse, then release your Spacebar and continue dragging:
Step 17: Fill The Selection With White
Go up to the Edit menu at the top of the screen and choose Fill:

When the Fill dialog box opens, set the Use option to White if it isn't already, then click OK:

This fills the selection with white on the "inner shadow" layer. You won't be able to see it yet in the document, but you can see it in the layer's preview thumbnail:
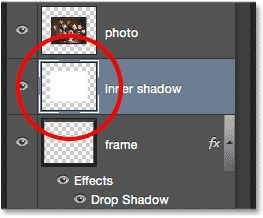
We don't need the selection outline anymore, so go up to the Select menu and choose Deselect, or press Ctrl+D (Win) / Command+D (Mac) on your keyboard to quickly remove it:

Step 18: Apply An Inner Glow Layer Effect
To create this second border, all we need to do is apply a subtle inner shadow to the area we just filled with white (which is why we named the layer "inner shadow"). Photoshop does include an actual Inner Shadow layer style, we're not going to use it because it would create a shadow only along two of the four sides (similar to how the Drop Shadow looks on the frame). Instead, we'll create our own inner shadow using a different layer style - Inner Glow.
Click on the Layer Styles icon at the bottom of the Layers panel:
Choose Inner Glow from the list:
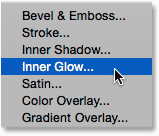
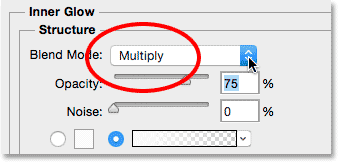
When the Layer Style dialog box opens, change the Blend Mode at the top of the Inner Glow options from Screen to Multiply. This turns the glow into a shadow, or at least, it will when we also change its color:
Click on the color swatch to open the Color Picker and change the Inner Glow's color:
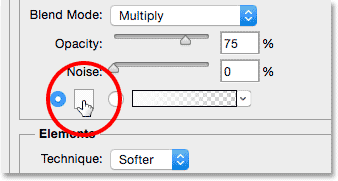
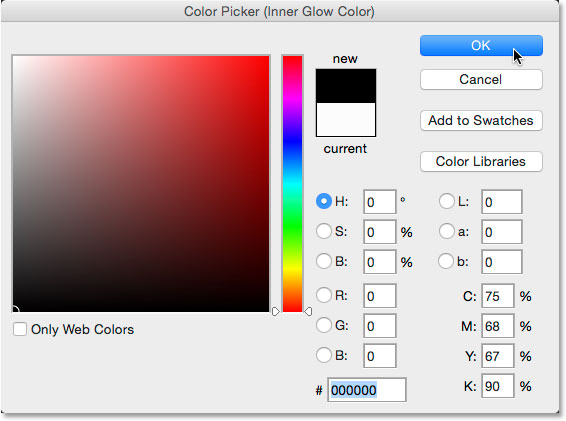
Choose black, then click OK to close out of the Color Picker:
This creates a thin border around the photo:
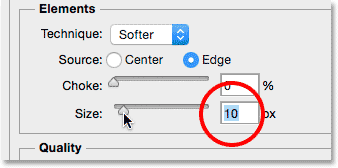
You may want to increase the Size value slightly to soften the shadow edges a bit. I'll increase mine to 10 px:
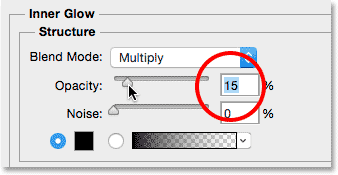
Finally, lower the Opacity value all the way down to somewhere between 15-20% so the shadow appears very faint and subtle:
Click OK to close out of the Layer Style dialog box, and we're done! Here, after increasing the Size and lowering the Opacity values, is my final matted picture frame:

Where to go next...
And there we have it! That's how to add a matted picture frame around a photo using layer styles in Photoshop! Visit our Photo Effects section for more Photoshop effects tutorials!