How To Merge Layer Blend Modes In Photoshop
If you've been using Photoshop for a while, you've probably been taking advantage of layer blend modes, which are easy and powerful ways to change the way two or more layers blend, or interact, with each other.
Blend modes can be used for creative effects, but they also have practical uses for image retouching, like using the Screen blend mode to brighten an underexposed image, the Multiply blend mode to darken overexposed images, or the Overlay blend mode to instantly boost contrast in an image that needs more "pop".
You may also have been taking advantage of Photoshop's ability to merge layers together. Merging layers has several important advantages, like keeping the Layers panel clean and organized, and reducing the file size of the document. Merging layers can also be a necessary step before applying further edits to an image.
Yet for all the power of blend modes and the benefits of merging layers in Photoshop, something strange often happens when we try to merge multiple layers together when those layers are set to different blend modes. What happens is that we usually end up with a different looking image than what we had before merging the layers. Sometimes it's a subtle difference; sometimes it's a big difference. If you haven't yet come across this problem, chances are you will at some point. So in this tutorial, we'll look at an example of the problem, explain why it happens, and learn an easy trick to get around it!
This tutorial assumes you're already familiar with layer blend modes in Photoshop. If not, be sure to check out our Five Essential Blend Modes For Photo Editing tutorial where I cover everything you need to know.
The Problem With Merging Blend Modes
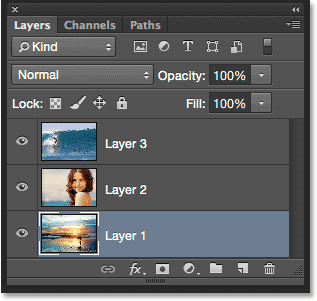
To see an example of the problem, I'll create a quick composite image using three separate photos and a few blend modes. Since compositing images in Photoshop is a huge topic that's beyond the scope of this tutorial, I'll run through this fairly quickly. If we look in my Layers panel, we see that I've already added all three photos to my document, and that each image is sitting on its own separate layer:

Learn how to open multiple images as layers in Photoshop!
Let's look at the photos one at a time, starting with the one on the bottom. I'll turn off the top two layers by clicking on their visibility icons:
Hiding the top two layers lets us see just the image on the bottom layer. This is the photo I'll use as the starting point for the composite (surfer on beach photo from Shutterstock):

Since this is the bottom layer, I'll leave its blend mode set to Normal (the default mode):

Next, I'll turn on the second image (the one on the middle layer) by clicking its visibility icon:
Here's my second photo. To save time, I've already cropped and repositioned it to fit better within the composition (woman on beach photo from Shutterstock):

This image is also currently set to the Normal blend mode, which is why it's completely blocking the photo below it from view. To blend the two images together, first I'll click on Layer 2 in the Layers panel to select it. Then, I'll change its blend mode from Normal to Multiply. I'll also lower it's Opacity value down to 60%:

Here's the result of blending the two layers together. So far, so good:

Let's bring in the third image (on the top layer). I'll turn it back on in the document by clicking its visibility icon:
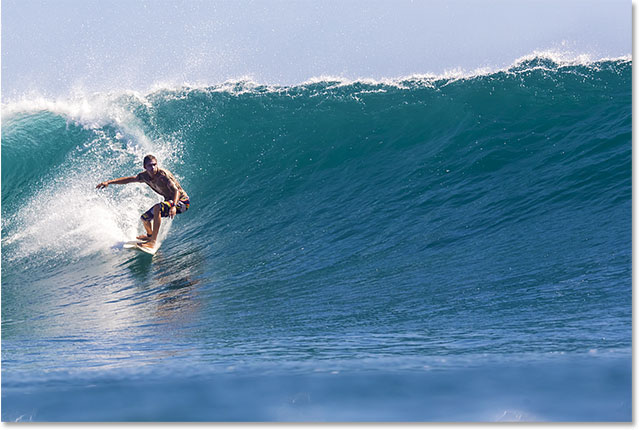
Here's my top image. Again, to save time, I've already cropped and repositioned it (surfing the wave photo from Shutterstock):

To blend this top image with the photos below it, I'll click on Layer 3 to select it, then I'll change its blend mode from Normal to Overlay:

Here's the result with all three layers now blending together. Not bad considering all I had to do to achieve this effect was change a couple of layer blend modes (and lower the opacity of the middle layer):

Let's say I'm happy with the results so far, and now I want to make further edits to the overall image. Before I can do that, I'll need to merge the layers together. Now, you may think that all I need to do is merge the top two layers, since they're the ones set to the different blend modes (by "different", I mean they're set to something other than the default Normal mode). Let's see what happens, though, if I try to merge just those top two layers.
There's a few different ways I could merge them. One way would be to use Photoshop's Merge Down command which takes the currently-selected layer and merges it with the layer directly below it. That sounds like exactly what we need, so with my top layer (Layer 3) selected in the Layers panel, I'll go up to the Layer menu in the Menu Bar along the top of the screen and choose Merge Down:

Here's the result after merging the top layer (set to the Overlay blend mode) with the layer below it (set to the Multiply blend mode). As we can see, something's not right. The image has suddenly lost most of its contrast. It also looks much darker than it did before:

Let's look in the Layers panel to see if we can figure out what's happened. Here, we see that the top two layers have in fact been merged together onto Layer 2, but what happened to my Overlay blend mode? It's gone! All I'm left with is the Multiply blend mode. That explains why the image now looks so much darker:

Well, that didn't work, so I'll press Ctrl+Z (Win) / Command+Z (Mac) on my keyboard to quickly undo the Merge Down command. Another way I can try to merge the top two layers together is with Photoshop's Merge Layers command. With my top layer already selected, I'll press and hold my Shift key and click on the middle layer. This selects both the Overlay and Multiply layers at the same time:

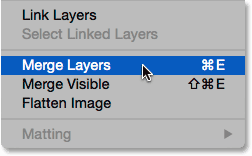
With both layers selected, I'll go back up to the Layer menu at the top of the screen and this time, I'll choose Merge Layers:

Did that work? Nope. The Merge Layers command gave me a different result from what I saw with the Merge Down command, but it's still not right. The top two images merged together, but what happened to my third image (the one on the bottom layer)? It completely disappeared:

Looking in the Layers panel, we see that Photoshop once again merged the top two layers as expected, but this time, it discarded both my Overlay and Multiply blend modes, setting the merged layer to Normal. That's why the merged layer is now completely blocking the image on the bottom layer from view:

Why We Can't Merge Blend Modes
So, what's going on? Why can't I simply merge the Overlay and Multiply layers together without changing the composite's overall appearance? That's a good question. In fact, it's so good, there's actually three good reasons for why it's not working.
The first is because of what blend modes in Photoshop do, or more accurately, what they don't do; blend modes don't change the actual pixels on the layer. They simply change the way the pixels on the layer interact with the pixels on the layer, or layers, below it. What we see after changing a layer's blend mode is nothing more than a live preview of that interaction. The pixels themselves have not changed.
To quickly see what I mean, I'll press Ctrl+Z (Win) / Command+Z (Mac) on my keyboard to undo the Merge Layers command. Then, I'll change my top layer (Layer 3) from Overlay back to the Normal blend mode:

"Normal", in the world of layer blend modes, simply means that the layer will not interact with the layer(s) below it at all. This allows us to view the actual contents of the layer, and here, with the top layer set back to Normal, we see that the image on the layer has not changed in any way. All I did by changing its blend mode to Overlay was change the way these pixels were interacting with the pixels on the layers below it. If I tried a different blend mode, something other than Overlay, I'd see a different result, but again, all I'd be seeing is a live preview. The original image on the layer never changes:

The second reason is because a layer in Photoshop can have only one blend mode applied to it at any given time. Each blend mode causes the pixels on the layer to interact in a different way, but only one way can be active. The Overlay blend mode, for example, boosts contrast in the image, while the Multiply blend mode darkens the image. It's a choice between one or the other. It's not possible to have a single layer doing both of these things at once.
The third reason why I can't just merge the two blend mode layers together without changing the overall appearance is that the overall appearance is not simply a result of those two layers. It's a result of all three layers working together, including the bottom layer that's set to the Normal blend mode. The top two layers may be the ones that actually had their blend modes changed, but remember, they're blending not with themselves, or just with each other; they're blending with the bottom layer as well (the one we tend to forget about). That means that if I want to keep the exact same result after merging the layers, I need to merge all the layers that are creating the result, and that includes the Normal layer on the bottom.
The Hidden Keyboard Trick
So the bad news is, there is simply no way to do what I initially tried to do; I can't just merge the Overlay and Multiply layers together, at least not without changing the overall appearance of the image. Yet now we know why! The problem was that I was forgetting about the layer on the bottom (the one set to the Normal blend mode). It's not just my top two layers creating the composition; it's a combination of all three layers. This means that if I want to merge the result, I need to merge all three layers (the one set to Overlay, the one set to Multiply, and the one set to Normal).
One thing I don't want to do is just flatten the image. I want to keep my layers intact and simply merge the result I've achieved so far onto a new layer. Thankfully, Photoshop includes a hidden keyboard trick for doing exactly that! First, select the top layer in the Layers panel:

With the top layer selected, here's the trick. Press and hold your Shift, Alt and Ctrl (Win) / Shift, Option and Command (Mac) keys on your keyboard and press the letter E. Photoshop essentially takes a snapshot of the way the image currently looks (with all the blend modes intact), then places the snapshot on a brand new layer above the others! It won't look like anything has happened in the document (already a good sign), but if we look in my Layers panel, we see that I now have a fourth layer (Layer 4) sitting above the original three layers:

To get a better sense of what just happened, I'll press and hold my Alt (Win) / Option (Mac) key and click on Layer 4's visibility icon. This keeps Layer 4 visible but turns off all the other layers in the document:
Even though Layer 4 is now the only visible layer in my document, the overall appearance of the image hasn't changed. That's because I've successfully merged the entire effect onto this single layer:

To turn the other layers back on again (even though I don't really need to), I'll once again press and hold my Alt (Win) / Option (Mac) key and click on Layer 4's visibility icon:

At this point, it's a good idea to rename the top layer. To do that, I'll double-click on the name "Layer 4" to highlight it, then I'll type in "Merged" as the new layer name. To accept the name change, I'll press Enter (Win) / Return (Mac) on the keyboard:

And there we have it! That's how to merge multiple layers set to different blend modes in Photoshop! Check out our Photo Retouching section for more Photoshop image editing tutorials!