
How to use the Object Selection Tool in Photoshop CC 2020
Ever wish you could select people or objects in your photos just by dragging around them? Now you can with the brand new Object Selection Tool in Photoshop CC 2020!
Version Note: This tutorial is for Photoshop 2020 and 2021. Photoshop 2022 users will want to read my updated Using the Object Selection Tool and Object Finder in Photoshop 2022 tutorial
In this tutorial, I show you how to use the new Object Selection Tool in Photoshop CC 2020 to quickly select people, animals or other objects in your photos! Unlike Photoshop's Select Subject command which looks at the entire image and tries to identify the subject automatically, the Object Selection Tool lets you identify the subject yourself just by drawing a rough selection around it. Once you've drawn a quick selection, Photoshop automatically shrink-wraps the selection to the edges of your subject. And if the initial selection isn't perfect, you can easily add or subtract areas, again just by dragging around them. Let's see how it works.
The Object Selection Tool is brand new as of Photoshop 2020. So to follow along, make sure that your copy of Photoshop CC is up to date.
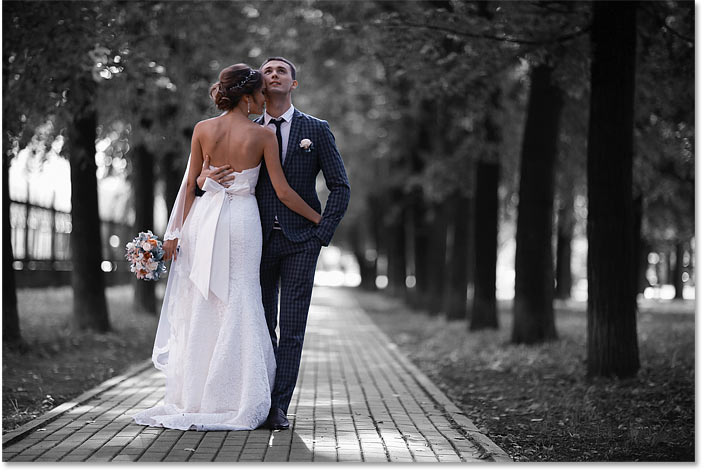
For this tutorial, I'll be using this image that I downloaded from Adobe Stock. I'll use the Object Selection Tool to select the wedding couple in the foreground. And then once the couple is selected, I'll show you a quick way to leave your subject in color and turn the rest of the photo to black and white:

Let's get started!
Where do I find the Object Selection Tool?
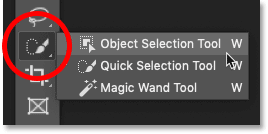
In Photoshop CC 2020, the Object Selection Tool is found in the toolbar, nested in with the Quick Selection Tool and the Magic Wand Tool. It has a keyboard shortcut of W:

If one of the other tools in that slot was previously active, click and hold on the tool's icon until a fly-out menu appears, and then choose the Object Selection Tool from the menu:
Related: How to customize the toolbar in Photoshop CC
The Object Selection Tool options
Let's take a quick look at a few important options for the Object Selection Tool in the Options Bar. Note that these options need to be set before drawing your selection, since they only apply to the next selection you make.
Mode
There are two selection types that we can draw with the Object Selection Tool—Rectangle and Lasso— and we switch between them using the Mode option. Rectangle is the default mode, and it lets you draw a simple rectangular box, just like you could with the Rectangular Marquee Tool. And Lasso works like the Lasso Tool, letting you draw a freeform selection around the object:

Tip! How to use the Polygonal Lasso with the Object Selection Tool
Here's a hidden trick to use with the Object Selection Tool. When drawing your initial selection with the Mode set to Lasso, you can switch to the Polygonal Lasso Tool by pressing and holding the Alt (Win) / Option (Mac) key on your keyboard. The Polygonal Lasso Tool lets you simply click around the object to select it. Release the Alt (Win) / Option (Mac) key when you're done to complete the selection.
Sample All Layers
By default, the Object Selection Tool looks for objects only on the active layer. But if you want your selection to be based on a composite of all layers in your document, then turn on Sample All Layers. In most cases, you'll want to leave it off:

Auto-Enhance
Auto-Enhance adds a slight amount of smoothing to the edges of your selection. The difference with Auto-Enhance on or off is minimal, so it's usually fine to leave it off:

Object Subtract
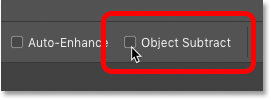
The Object Subtract option allows Photoshop to use its advanced Object Selection technology when subtracting unwanted areas from the initial selection. When Object Subtract is turned off, the Object Selection Tool behaves just like the standard Rectangular Marquee or Lasso Tool and simply removes whatever pixels you manually drag around. Object Subtract should almost always be left on.
We'll look more closely at the Object Subtract option a bit later in this tutorial:

How to select objects with the Object Selection Tool
The way the Object Selection Tool works is that we draw a selection outline around the general area where the object appears. Photoshop then looks inside the boundaries of that selection to find the object, and it wraps the selection outline around it. Once the initial selection is in place, we can add missing areas to the selection, or subtract areas from the selection, again just by dragging around them with the Object Selection Tool.
Step 1: Draw an initial selection around the object
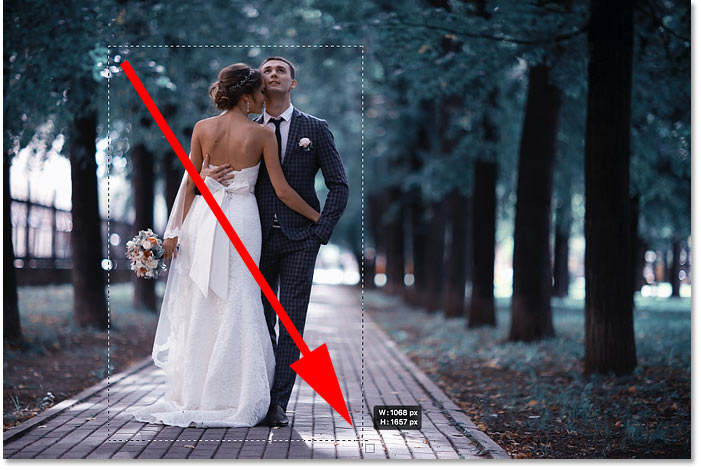
Start by drawing your initial selection. The default Rectangle mode usually works best. I'll draw a rectangular selection around the wedding couple. Try to stay fairly close to the object while still keeping it entirely within the selection boundaries:
Tip! How to move the selection outline as you draw it
If you started your selection outline in the wrong spot, keep your mouse button held down and press and hold the spacebar on your keyboard. Drag your mouse to move the selection outline into place, and then release your spacebar to continue drawing the rest of the selection.
The initial result
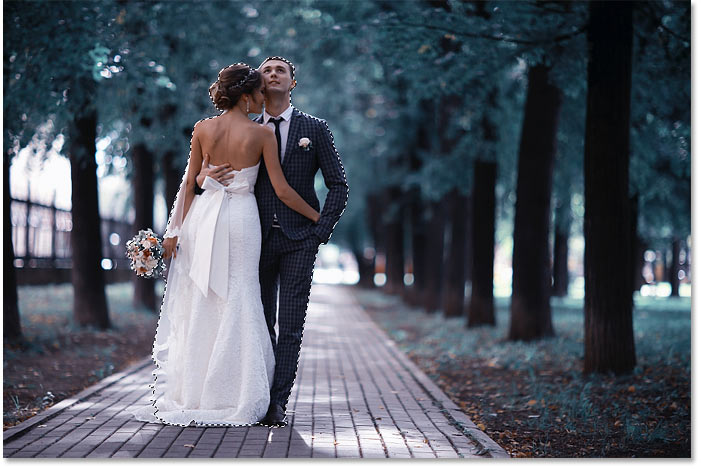
Once you have surrounded the object with your selection outline, release your mouse button. Photoshop analyzes the area within the selection, and after a few seconds, it shrink-wraps the outline around the object:
Step 2: Look for problems with the selection
While the initial results are often impressive, they're usually not perfect. You'll want to zoom in and scroll around the object looking for problems with the selection.
For example, here we see that Photoshop did a pretty bad job of selecting the flowers in the bouquet:

Step 3: Hold Shift and drag to add to the selection
To add a missing part of the object to your selection, press and hold your Shift key and drag another selection outline around it:
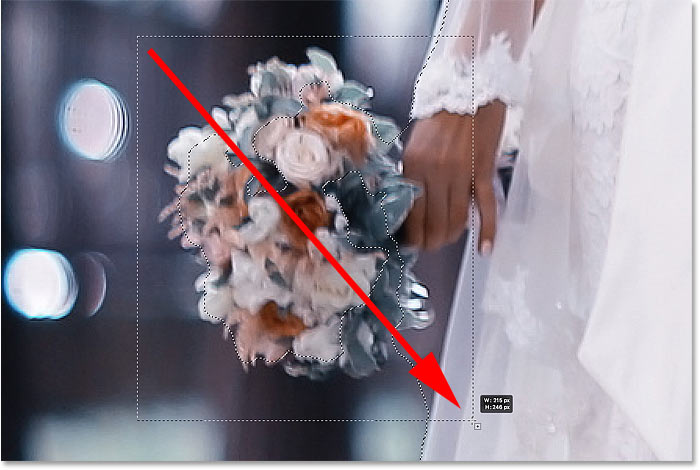
Photoshop again analyzes the area within the selection boundaries, and just like that, the missing part is added:

Step 4: Hold Alt (Win) / Option (Mac) and drag to subtract from the selection
To remove, or subtract, an unwanted area from the selection, press and hold the Alt (Win) / Option (Mac) key on your keyboard and drag around it.
With my image, notice that the area between the bouquet and the dress is also selected and needs to be removed:
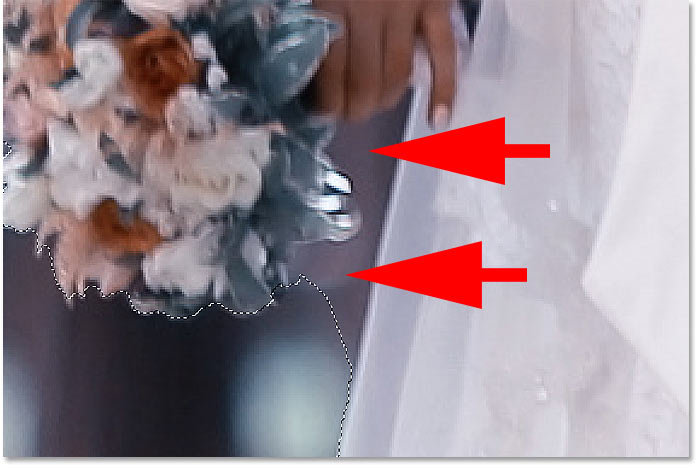
Changing the tool mode from Rectangle to Lasso
Since this area is on a bit of an angle, I'll change the Mode option in the Options Bar from Rectangle to Lasso:

Drawing a selection around the area
Lasso mode lets us draw freeform selections with the Object Selection Tool. I'll hold my Alt (Win) / Option (Mac) key and I'll draw around the area that needs to be subtracted. Notice that I'm not drawing a precise selection. I'm simply drawing around and outside the general area:
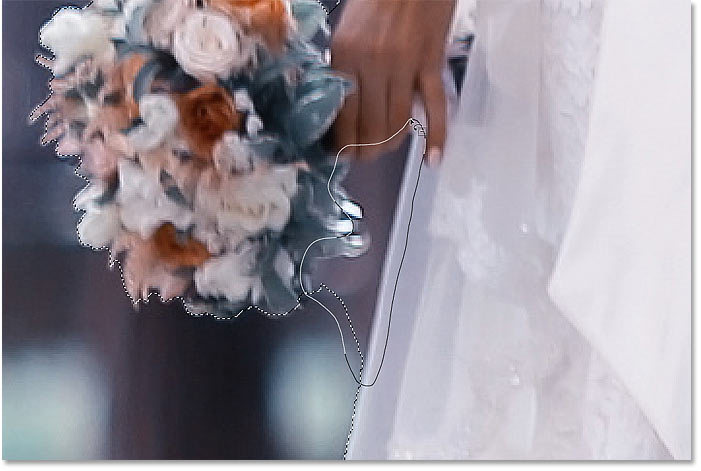
Release your mouse button, and the unwanted area is removed:
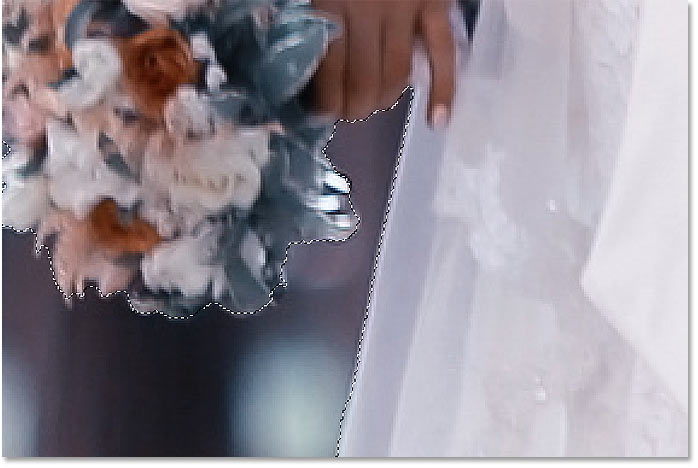
What does the Object Subtract option do?
Earlier when we looked at the Object Selection Tool's options in the Options Bar, I mentioned that Object Subtract should usually be left on. Let's take a quick look at exactly what the Object Subtract option does.
Here's another problem area with my image. The space between the side of the man's suit jacket and his arm needs to be subtracted from the selection:
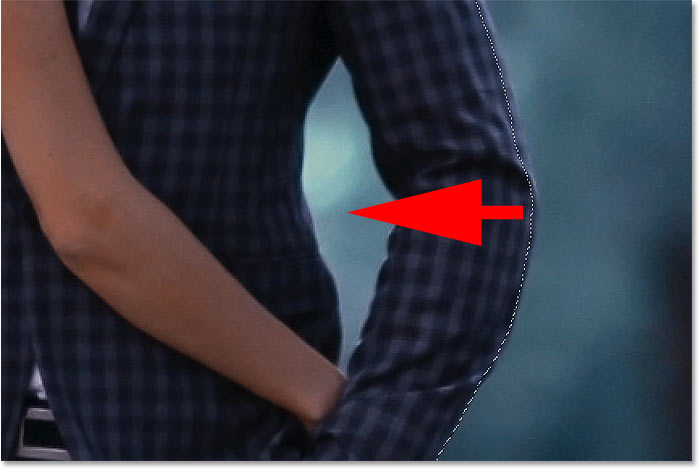
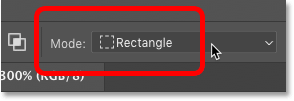
Since this area looks like it can easily fit inside a rectangular box, I'll switch the Mode option in the Options Bar from Lasso back to Rectangle:
Removing an area with Object Subtract off
I'll turn Object Subtract off:
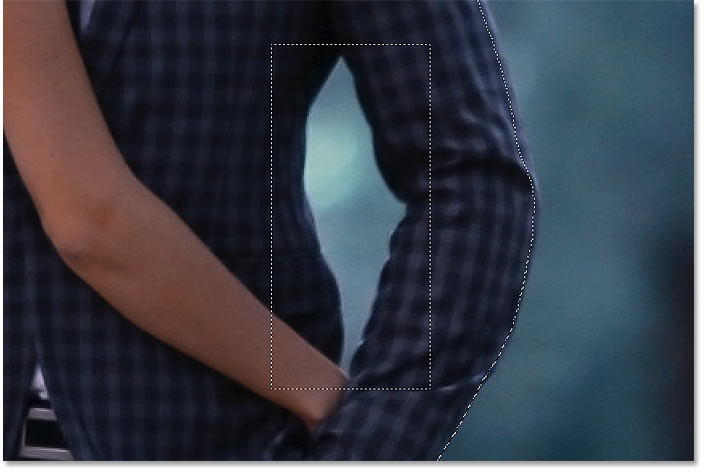
And then to subtract from the selection, I'll press and hold Alt (Win) / Option (Mac) and I'll drag out a rectangular selection outline around it:
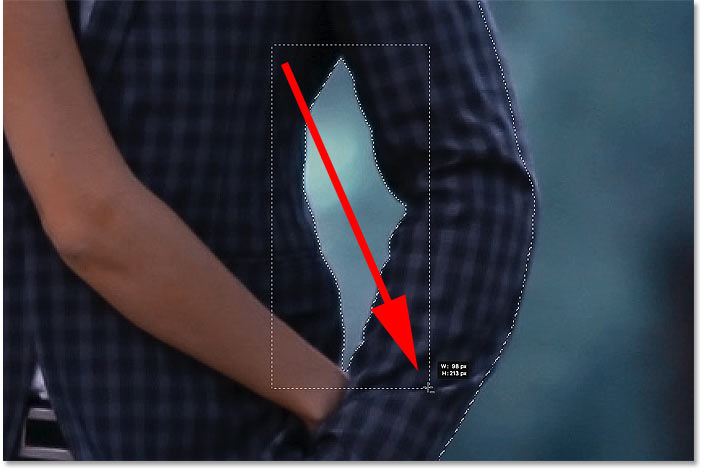
But notice that instead of subtracting just the empty area in the middle, Photoshop subtracted everything within the selection. That's because turning Object Subtract off disables the advanced technology that the Object Selection Tool uses to analyze the image. Instead, it behaves like the standard Rectangular Marquee or Lasso Tool and just subtracts everything you drag around.
How to undo a step with the Object Selection Tool
I'll undo my last step by going up to the Edit menu in the Menu Bar and choosing Undo Object Selection. Or I could press Ctrl+Z (Win) / Command+Z (Mac) on my keyboard. Photoshop gives us multiple undos with the Object Selection Tool, so you can press Ctrl+Z (Win) / Command+Z (Mac) repeatedly to undo multiple steps:

Removing an area with Object Subtract on
This time, I'll turn Object Subtract on:
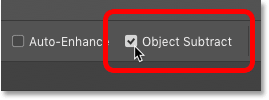
Then I'll again hold Alt (Win) / Option (Mac) as I draw the same rectangular selection outline around the area:

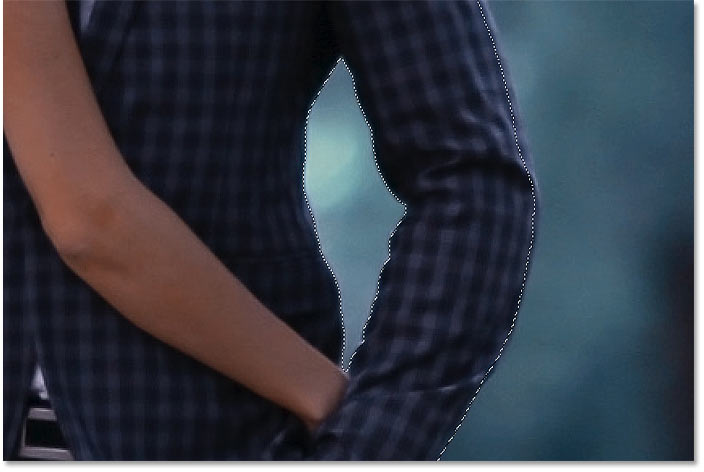
And with Object Subtract turned on, Photoshop is able to analyze the area within the selection, figure out which part of the selection needs to be removed, and subtracts only the area in the center:
When should I turn Object Subtract off?
If you're trying to subtract an area and the Object Selection Tool is having too much trouble, turn Object Subtract off to manually (and carefully) select the area yourself. Otherwise, leave Object Subtract turned on for the best results.
Switching between "Add" and "Subtract" modes
When using the Object Selection Tool, you'll often need to switch back and forth between "Add" and "Subtract" mode in order to fine-tune a selection area.
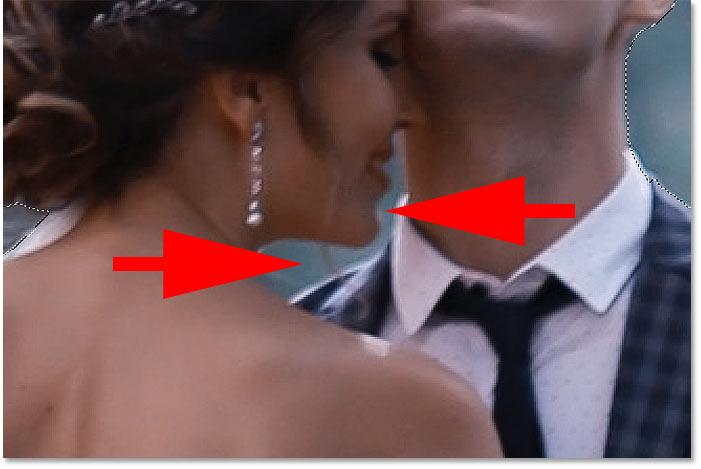
For example, here we see some empty space between the couple that needs to be subtracted from the selection:
Subtracting from the selection
In the Options Bar, I'll set the Mode to Lasso:

And then to subtract it, I'll hold Alt (Win) / Option (Mac) and I'll draw a rough outline around the area:
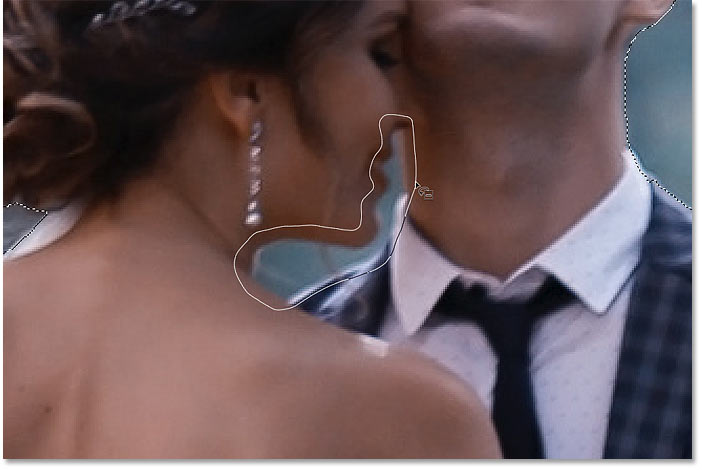
But notice that along with subtracting the empty space, Photoshop also removed some of the man's shoulder and his shirt collar, which means I need to add those areas back:
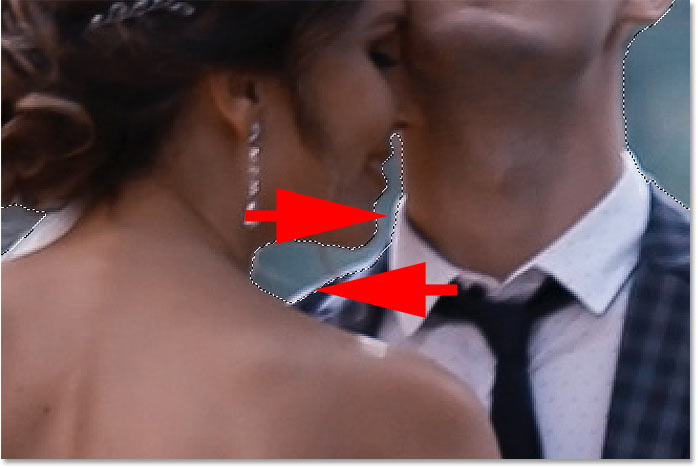
Adding back some of the original selection
So to add them to the selection, I'll hold my Shift key as I drag around them:
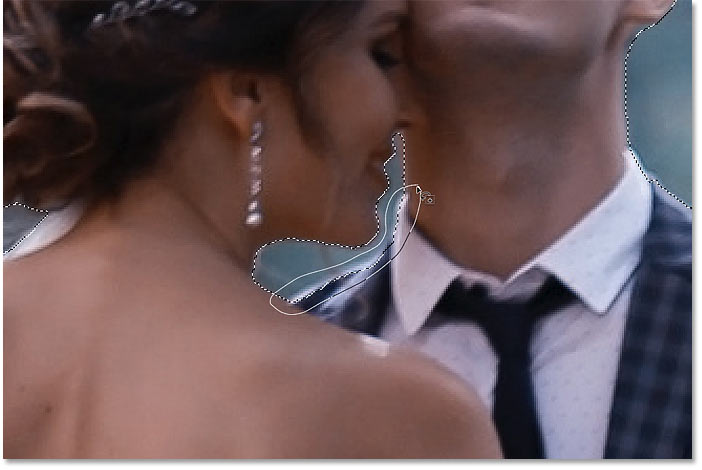
And now those areas are once again selected:
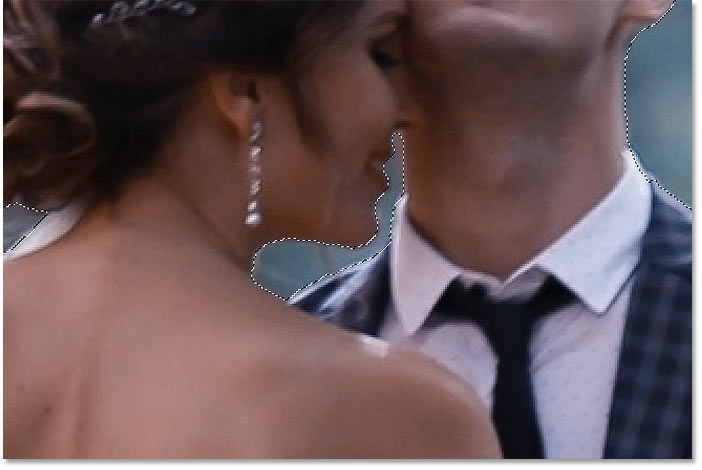
Finishing up the selection
Continue making your way around the object, holding Shift to add to the selection or Alt (Win) / Option (Mac) to subtract from it, until the selection looks good. Here's my final result with the wedding couple selected in front of the background:
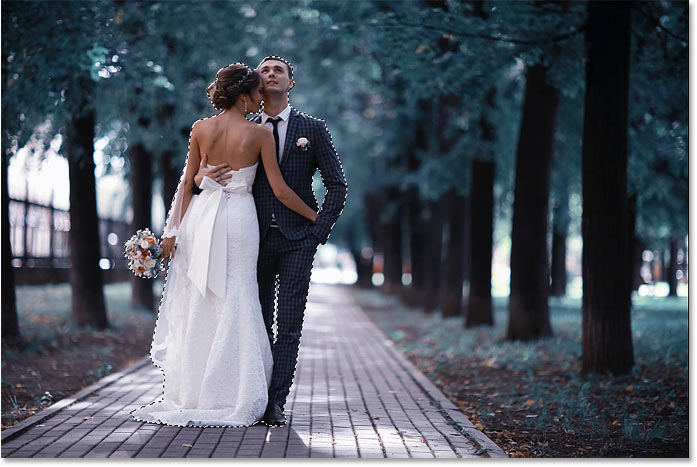
At this point, you could refine the selection further using Photoshop's Select and Mask workspace. But I'm going to save that for the next tutorial where we'll look specifically at using the Object Selection Tool with Select and Mask.
How to convert the deselected area to black and white
Instead, let's look at how to quickly convert the rest of the image to black and white while leaving our subject in color. This part assumes that you have already selected your subject with the Object Selection Tool, or with any of Photoshop's other selection tools.
Step 1: Invert the selection
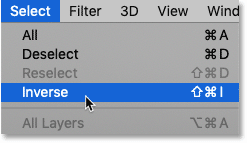
At the moment, we have our subject(s) selected and everything else is deselected. To convert the background to black and white, we need to invert the selection so that everything except our subject is selected. To invert the selection, go up to the Select menu in the Menu Bar and choose Inverse:
Step 2: Add a Black & White adjustment layer
To convert the rest of the image to black and white, we'll use a Black & White adjustment layer.
In the Layers panel, click the New Fill or Adjustment Layer icon:
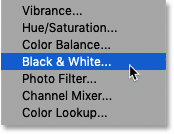
And choose Black & White from the list:
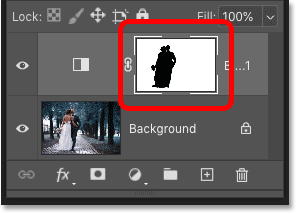
Photoshop adds the adjustment layer above the image, and it automatically converts our selection outline into a layer mask:
And instantly, the surrounding area is converted to black and white while our subject remains in full color:
Related: Create an easy Selective Color effect with Photoshop!
Step 3: Drag the color sliders to fine-tune the black & white conversion
The controls for the Black & White adjustment layer appear in Photoshop's Properties panel. To customize the black and white conversion, drag the individual color sliders left or right.
Each color slider lightens or darkens different parts of the image based on their original color. So the Reds slider affects the brightness of red areas, the Yellows slider effects yellows, and so on. If a slider has no effect on the brightness of the image, it's because no part of the image contained that color. I cover black and white conversions in much more detail in my Converting Color Photos to Black and White tutorial:
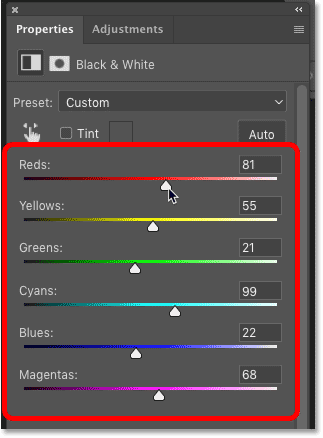
Since the background in my image contained lots of cyan, I increased the brightness slightly by dragging the Cyans slider to the right. And here's my final result:
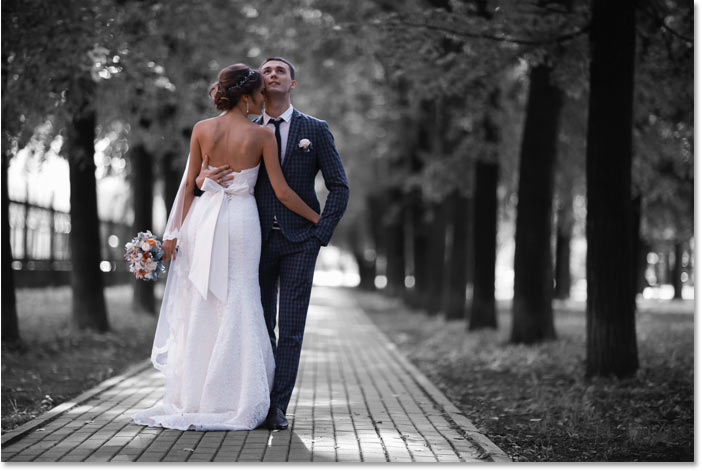
And there we have it! That's how to quickly select objects in your photos using the brand new Object Selection Tool in Photoshop CC 2020! Check out our Photoshop Basics section for more tutorials. And don't forget, all of our Photoshop tutorials are available to download as PDFs!