
How To Batch Rename Images With Adobe Bridge
In this tutorial, we'll learn how to quickly rename multiple image files at once using the powerful Batch Rename feature in Adobe Bridge, a free companion program included with every version of Photoshop.
Previously, we learned how to transfer photos from your camera or memory card to the computer using the Adobe Photo Downloader, and we saw that one of the features available to us in the Photo Downloader is the ability to rename the files as they're being transferred. In that tutorial, though, I mentioned that it's often better to wait until you've had a chance to browse through your images and delete the ones you don't plan on keeping before renaming them. That way, you can rename the keepers as a continuous sequence, without any gaps between one image number and the next. When you are ready to rename them, the fastest and most flexible way to do it is with the Batch Rename command.
As we'll see, the Batch Rename function in Adobe Bridge allows us to create any sort of file name structure we need, from simple to highly detailed. It even lets us copy the renamed versions to a separate folder to preserve the originals, and save our custom naming structures as presets to quickly access again whenever we need them. I'll be using Adobe Bridge CS6 here, included with Photoshop CS6, but this tutorial is compatible with any recent version including Adobe Bridge CC (Creative Cloud). Let's get started!
Step 1: Select The Images You Want To Rename
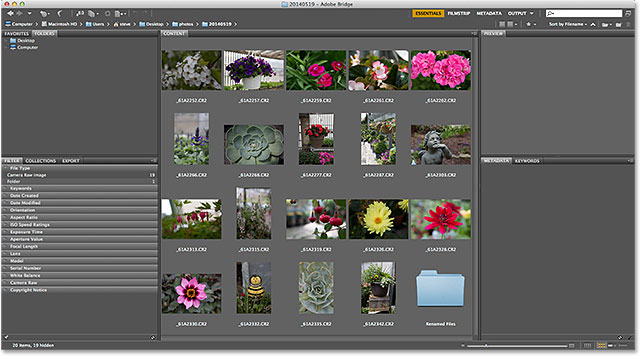
With Adobe Bridge open on your screen, navigate to the folder on your computer containing the images you want to rename. Thumbnail previews of the images inside the folder appear in the Content panel in the center of Bridge's interface:
Step 2: Select The Images
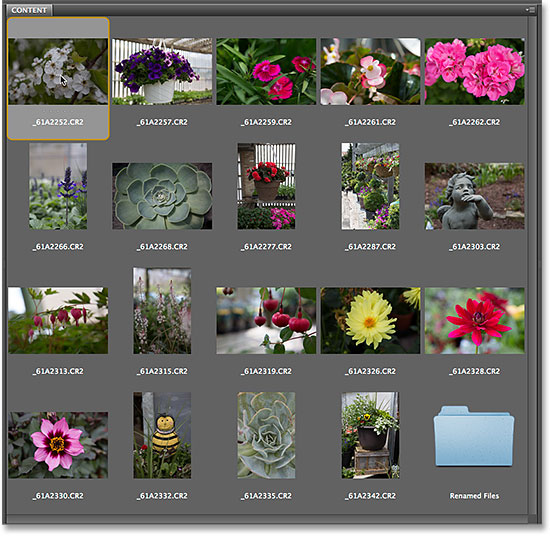
Next, we need to select the images. Click on the first image thumbnail in the top left of the Content panel to select and highlight it:
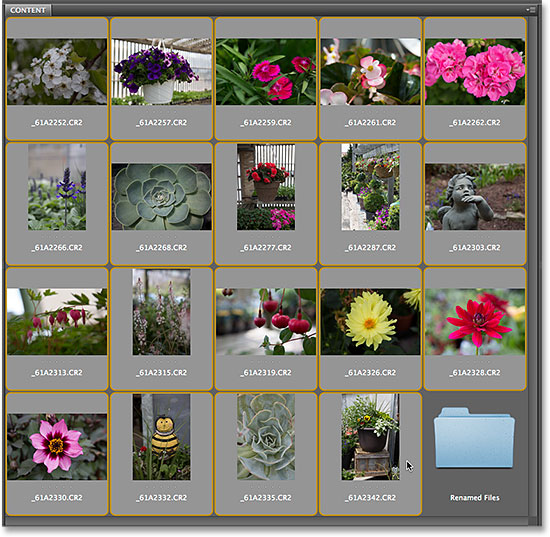
Then, press and hold the Shift key on your keyboard and click on the last image at the bottom. This will select the first image, the last image and every image in between:
Step 3: Select The Batch Rename Command
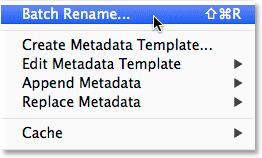
With all of the images selected, go up to the Tools menu in the Menu Bar along the top of the screen and choose Batch Rename:
Step 4: Choose A Destination Folder
This opens the Batch Rename dialog box. The first thing we need to consider when renaming our files is where we're going to place the renamed images, and the Destination Folder section near the top of the dialog box gives us three choices. By default, the first option in the list, Rename in same folder, is selected, and this means we'll simply be renaming the original files, replacing the current names with new names:
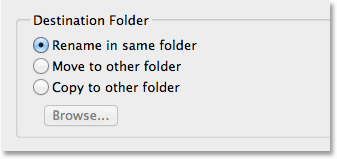
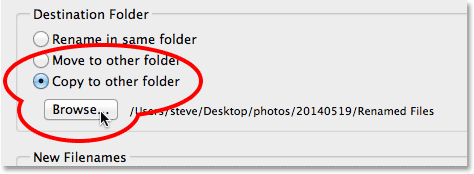
This is usually the option most people select, but it's not necessarily the best choice. The problem with renaming your original files is that, well, you've renamed your original files! A better option, and the one I usually prefer, is the third one - Copy to another folder. This option tells Adobe Bridge to leave the original files (and their file names) alone. Instead, it makes a copy of the files, renames the copies (not the originals) and places them in their own separate folder. If you select the Copy to another folder option, you'll also need to click the Browse button and choose where you want to place the copies. In my case, I've already created a separate subfolder named Renamed Files, so I'll choose that as my destination folder:
Step 5: Create Your New Naming Structure
Below the Destination Folder options, in the center of the Batch Rename dialog box, is the New Filenames section. This is where we decide what we want to include in the new names, and there's quite a few options to choose from. You'll notice that there's four rows (by default). Each row represents one new item being added to the file name. The first selection box at the beginning of each row is where we choose a main item to add, like Text (for adding your own custom text to the file name), Date Time (to add the date the file was created or modified), Sequence Number, and so on. Click on the box to bring up the full list of available options:
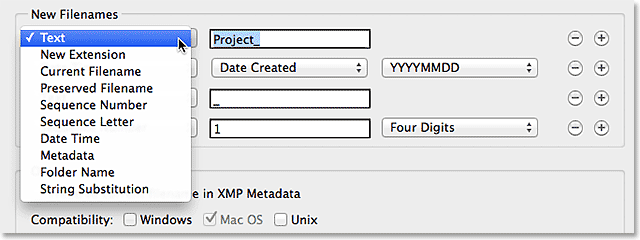
Once you've chosen a main item in the first box, a second and possibly third box will appear beside it in the row, allowing you to either enter in your own custom text or value, or choose from a related list of sub-options. I'm going to leave the main option for the first row at the top set to Text, and since I shot all my photos at a local garden center, I'll enter "GardenCenter_" as the first part of my new file name structure (note the underscore "_" I added at the end of the text. This will be used to separate the first item in the file name from the second item to keep things more legible):

For the second row (and the second item in the new file name), I'll set the main option in the first box on the left to Sequence Number. Of course, this is just my own custom file name that I'm creating as an example. You may need to choose something different. With Sequence Number selected, two additional boxes appear beside it. In the first, we enter the number we want to use as the start of the sequence (I'll leave it set to the default value of 1). In the second, we choose how many digits we want for the sequence number. I'll set mine to Four Digits so that my sequence will appear as 0001, 0002, 0003, and so on:

Adding And Removing Rows
I mentioned that by default, Adobe Bridge gives us four rows for adding four different items to the file name, but we can add even more if we need them, or we can delete any we don't need. If you look to the far right of each row, you'll see a minus (-) and plus (+) button. Clicking one of the plus buttons will add a new row directly after that specific row in the list. To remove a row you don't need, click on its minus button.
In my case here, I'm happy with just my custom text followed by a sequence number, so I don't need the third and fourth rows. I'll remove them by clicking on the minus button for each one:

And now, only the first two rows remain:

Previewing The New Name
If we look down in the Preview section at the bottom of the dialog box, we see an example of what the current file name looks like along with a preview below it of the new name we're creating:

Step 6: Additional Options
There's two more options to consider, both of which are found in the Options section above the Preview area. If you want to preserve the original file name in with the metadata for the image in case you ever need it, select Preserve current filename in XMP Metadata by clicking inside its checkbox. For Compatibility, select both Windows and Mac OS:

Step 7: Save The New Name As A Preset
If you're going to be using this new naming structure again with future images, you can save yourself the hassle of recreating it each time by saving it as a preset. Click the Save button in the Presets area at the top of the dialog box:

Give your preset a name. Since my name consists of custom text followed by a sequence number, I'll name it "Text_SeqNum". Click OK when you're done:

And now, if you open up your list of presets, you'll see the one you just created at the bottom:

Step 8: Rename The Files
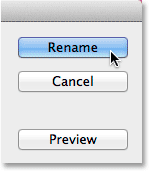
When you're ready, click the Rename button in the upper right corner of the Batch Rename dialog box to rename the files:
If, back in the Destination Folder section, you chose to simply rename your images in the same folder, you'll see the original file names instantly change to their new names. If, like me, you chose to copy the renamed images to a separate folder, you'll need to navigate to that folder to see the changes:
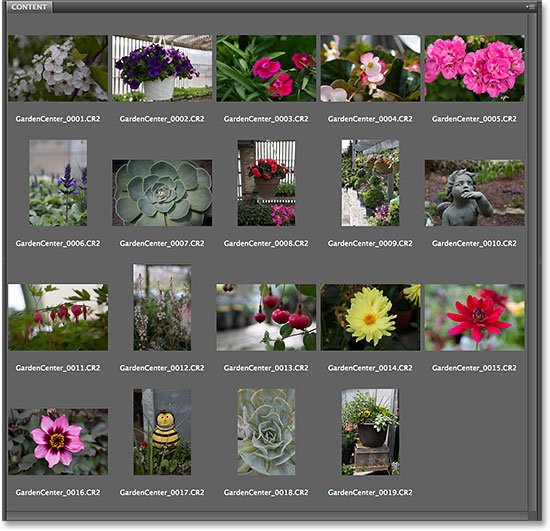
And there we have it! That's how to quickly and easily rename multiple image files at once using the Batch Rename feature in Adobe Bridge!