
How To Change Eye Color With Photoshop
In this tutorial, I show you how to change eye color in Photoshop using a Hue/Saturation adjustment layer! Whether you know which eye color you need or you just want to play around and experiment, a Hue/Saturation adjustment layer makes changing eye color easy, fast and fun! And because we'll be working with an adjustment layer, we won't make any permanent changes to the image. You'll still have your original, unedited version, with the original eye color, even after we're done.
I'll be using Photoshop CC but the steps are fully compatible with Photoshop CS6. Get the latest Photoshop version here.
To follow along, you can use any image where you want to change the person's eye color. I'll use this photo from Adobe Stock:
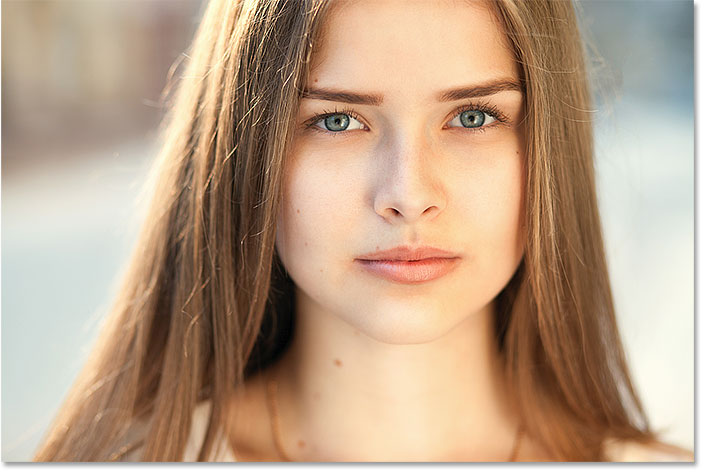
Let's get started!
How To Change Eye Color In Photoshop
Step 1: Zoom In On The Eyes
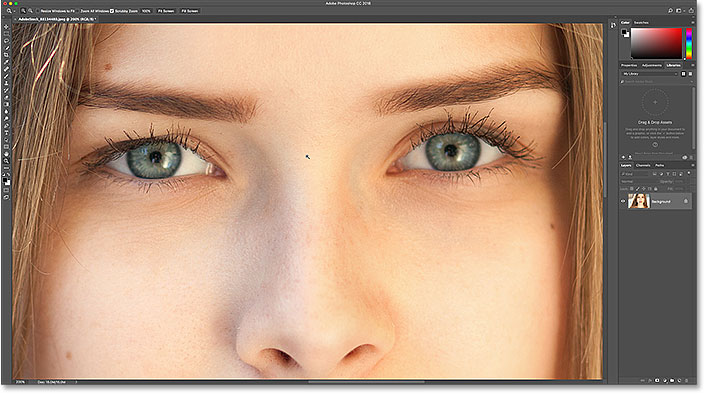
Before we begin, let's make it easier to see what we're doing by zooming in on the eyes. Select the Zoom Tool from the Toolbar:

Click a few times on the area between the eyes to zoom in on both eyes at once. To center the eyes on your screen after you've zoomed in, press the H key on your keyboard to switch to Photoshop's Hand Tool, and then click and drag the image into position:
Watch the video tutorial on our YouTube channel!
Step 2: Select The Lasso Tool
To change the eye color without affecting the rest of the image, we first need draw a selection around the eyes. Select the Lasso Tool from the Toolbar:

Step 3: Draw A Selection Around The Eyes
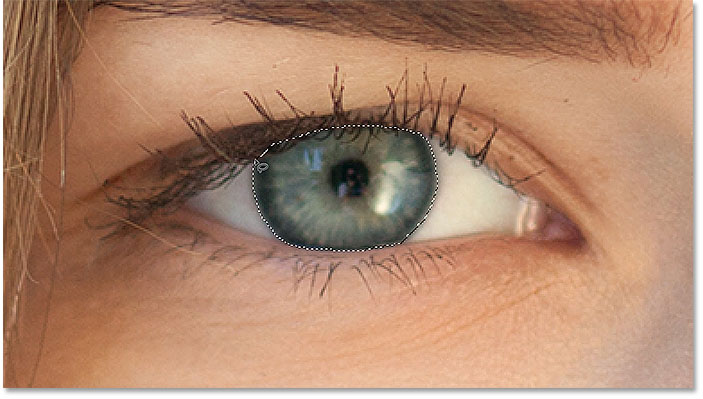
Draw a selection around one of the eyes. We don't need the entire eye, just the iris (the colored area) in the center. Don't worry if your selection outline isn't perfect. We'll clean things up later:
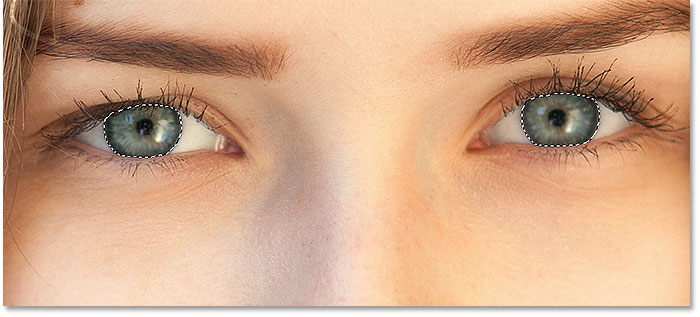
With the first eye selected, press and hold your Shift key. A small plus sign ( + ) appears in the lower right of your Lasso Tool cursor. Holding the Shift key tells Photoshop to add the selection you're about to draw to the selection you've already drawn. Draw a selection around the second eye. Both eyes should now be selected:
Related: How to add, subtract and intersect selections in Photoshop
Step 4: Add A Hue/Saturation Adjustment Layer
To change the eye color, we'll use a Hue/Saturation adjustment layer. In the Layers panel, click the New Fill or Adjustment Layer icon:
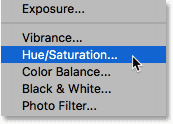
Choose Hue/Saturation from the list:
Step 5: Select The "Colorize" Option
The controls and options for the Hue/Saturation adjustment layer appear in Photoshop's Properties panel. Turn on the Colorize option by clicking inside its checkbox:
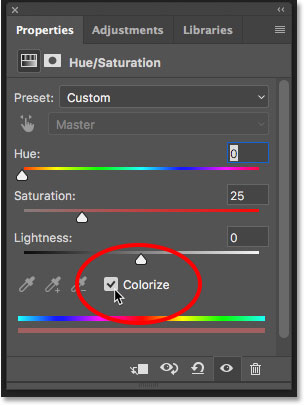
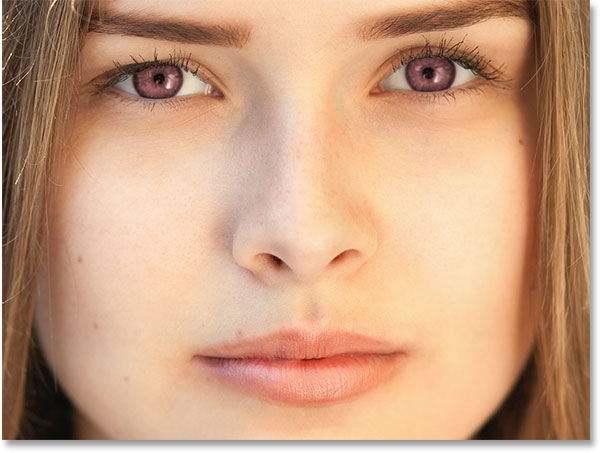
As soon as you select Colorize, the person's eyes will turn red. Red is probably not the color you're going for, so we'll learn how to change it next:
Step 6: Choose A New Eye Color With The Hue Slider
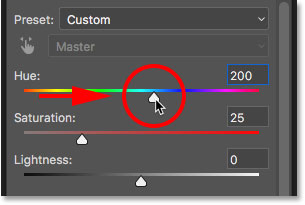
To choose a different color for the eyes, drag the Hue slider. "Hue" is what most of us think of as the actual color itself, and dragging the slider from left to right cycles you through all the colors of the rainbow, moving from red on the far left to oranges and yellows, greens, blues, magentas, and so on, all the way back to red on the far right. You'll see the eye color changing in the image as you drag the slider. I'll set my Hue value to around 200 for a nice blue, but of course you can choose whichever color you need:
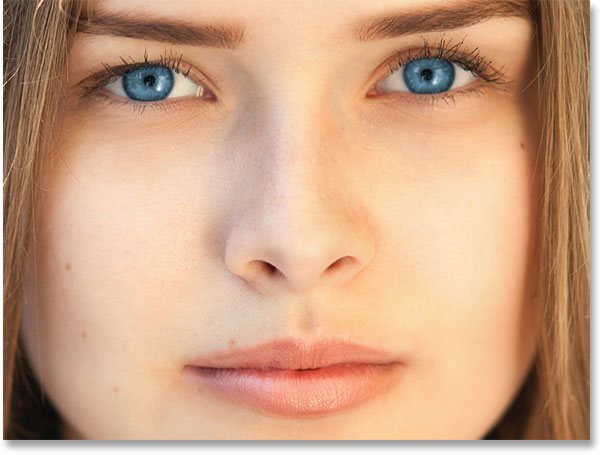
Here's what the new eye color looks like so far. The color is too intense, so we'll fix that next:
Step 7: Lower The Saturation Of The New Color
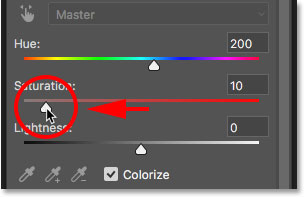
Once you've chosen a new eye color with the Hue slider, drag the Saturation slider to the left to lower the intensity until the color looks more natural. A Saturation value of between 10 and 15 usually works well:
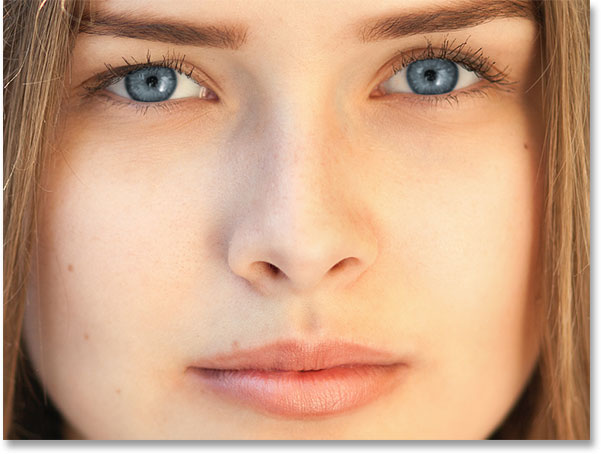
Here's my result after lowering the saturation:
Step 8: Change The Blend Mode To Color
In the Layers panel, the Hue/Saturation adjustment layer sits above the image on the Background layer. At the moment, the adjustment layer's blend mode is set to Normal, which means that it's affecting not only the color of the eyes but also their brightness. To change only the color, change the blend mode from Normal to Color:
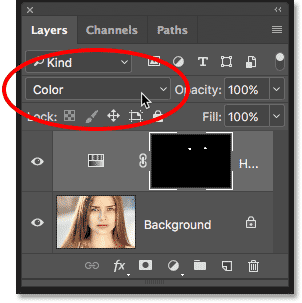
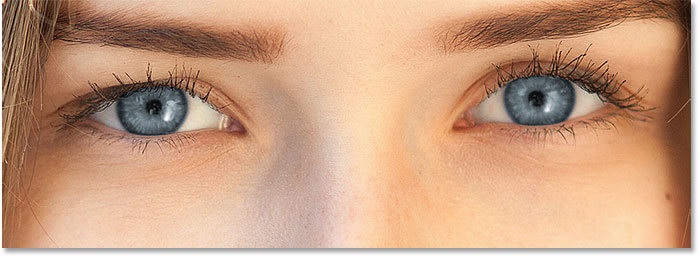
The difference can be subtle, but you should see more of the original detail in the eyes after switching to the Color blend mode. In my case , the eyes now appear a bit brighter than they did with the blend mode set to Normal:
Step 9: Select The Layer Mask
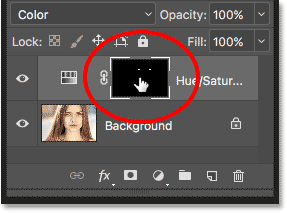
A great feature of adjustment layers in Photoshop is that they include a built-in layer mask, and whether we've known it or not, we've been using the layer mask ever since we added the Hue/Saturation adjustment layer. Photoshop used our initial Lasso Tool selection to create the mask for us, and we can see the layer mask thumbnail in the Layers panel.
Notice that the thumbnail is filled mostly with black, with only two tiny areas of white. Black represents the areas where the Hue/Saturation adjustment layer is having no effect on the image. In other words, those areas are still showing their original color. The two small white areas are the selections we made around the eyes with the Lasso Tool. Those are the only areas in the image that are being colorized by the adjustment layer.
Notice also that the thumbnail has a white highlight border around it. The border tells us that the layer mask is currently selected. If you're not seeing the border around the thumbnail, click on the thumbnail to select the mask:
Step 10: Select The Brush Tool
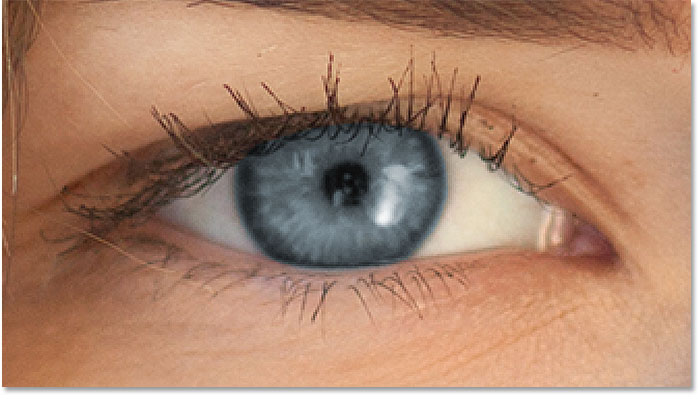
If your initial Lasso Tool selection wasn't perfect (mine certainly wasn't), some of your new color probably extends into the white parts of the eyes, and maybe into the eyelids as well. If we look closely at one of the eyes in my photo, we see some of the blue around the edges of the iris extending into the white areas and a little bit into the eyelids:
To clean those areas up, all we need to do is paint on the layer mask. Select Photoshop's Brush Tool from the Toolbar:

Step 11: Set Your Foreground Color To Black
To hide the color from around the iris, we need to paint with black. Photoshop uses our Foreground color as the brush color, and we can see our current Foreground and Background colors in the color swatches near the bottom of the Toolbar. Press the letter D on your keyboard to reset the Foreground and Background colors to their defaults. This will set your Foreground color to white and the Background color to black:

Then press the letter X on your keyboard to swap the colors, making your Foreground color (and the brush color) black:

Step 12: Paint Around The Iris In Each Eye
Paint around the iris in each eye to clean up any problem areas. For best results, use a small, soft-edge brush. You can adjust the size of your brush from the keyboard by pressing the left bracket key ( [ ) repeatedly to make the brush smaller or the right bracket key ( ] ) to make it larger. To change the hardness of the brush, press and hold Shift while pressing the left bracket key to make the brush edges softer. Holding Shift while pressing the right bracket key will make the edges harder.
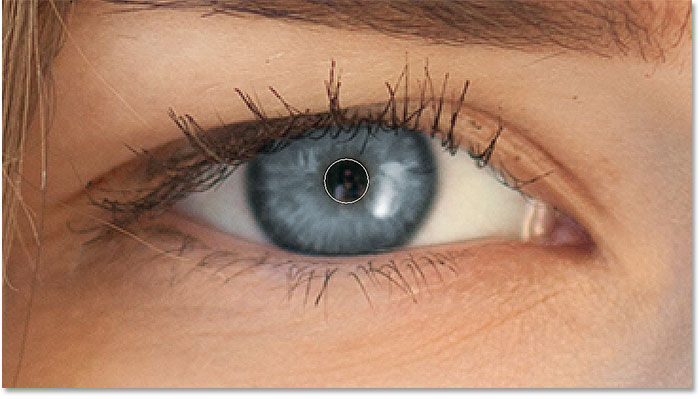
Since we're painting on a layer mask, not directly on the image itself, we don't see our brush color as we paint. Instead, the new eye color disappears from the areas we've painted over:
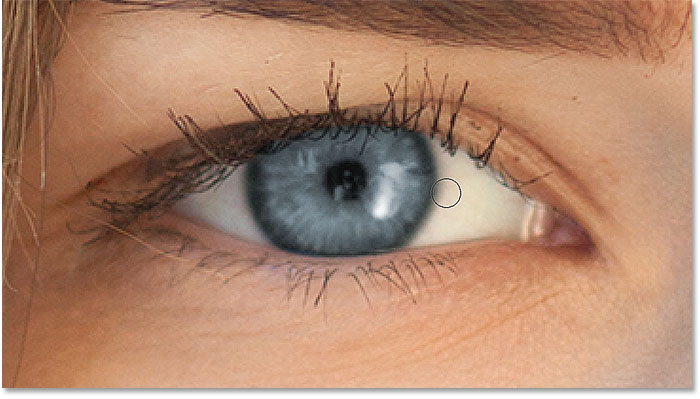
We also don't want the color to appear inside the pupil (the dark center of the eye), so resize your brush if needed and paint inside the pupil with black to remove the color from that area. Once you're done with the first eye, move over the other eye and clean it up as well:
Fixing Mistakes
If you make a mistake and accidentally paint away some of the color in the iris, press the letter X on your keyboard to swap your Foreground and Background colors. This will set your Foreground color to white. Paint with white over the area to restore the color. Then, press X again to set your Foreground color back to black and continue painting.
Comparing The New Eye Color With The Original
To compare your new eye color with the original color, turn the Hue/Saturation adjustment layer off by clicking its visibility icon in the Layers panel:
With the adjustment layer turned off, the original eye color re-appears:

Click the visibility icon again to turn the adjustment layer back on and view your new eye color:
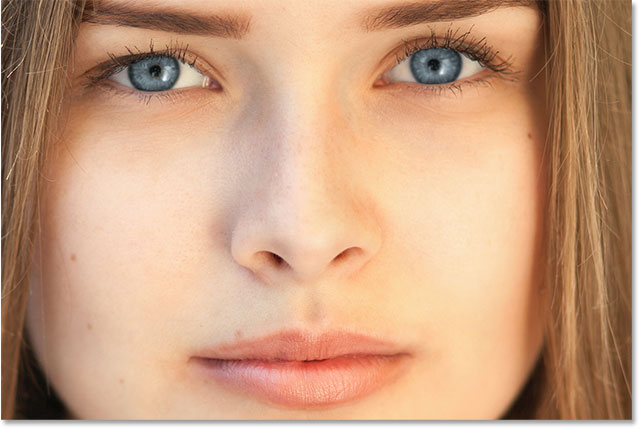
And there we have it! That's how to easily change eye color in an image using a Hue/Saturation adjustment layer in Photoshop! Looking for similar tutorials? Learn how to lighten and brighten eyes, or try our Radial Zoom Enhanced Eyes effect! Visit our Photo Retouching section for more image editing tutorials!