
Photoshop Background Eraser Tool
Before you begin... Please note that this version of the Background Eraser tutorial is for Photoshop CS5 and earlier. Using Photoshop CS6 or CC? Check out our fully updated Background Eraser tutorial.
In this Photoshop tutorial, we look at the Background Eraser Tool and how we can use it to easily remove background areas of an image. The Background Eraser is especially useful with photos that contain lots of fine detail along the edges between the foreground and background, like, for example, if you want to erase the sky in an image without first having to select all of the trees below it.
Don't let the name fool you, though. The Background Eraser really has nothing to do with erasing backgrounds, since Photoshop has no way of knowing what's considered the background in a photo and what isn't. It can just as easily be used to erase any part of an image, and that's because the Background Eraser is really a color eraser. It samples colors as you drag the tool over them and erases only those colors, leaving all other colors untouched. So if your sky is blue and your trees are green, the Background Eraser can easily erase the blue sky while leaving the green trees alone, at least until someone comes along and cuts them down, which makes it all the more important to protect them in your image.
The Background Eraser is, without a doubt, one of the best tools in Photoshop for removing unwanted areas of a photo, but it's not perfect and it does have one serious drawback. As an eraser tool, it physically deletes pixels from the image, which means they're gone for good, so you'll definitely want to either duplicate your Background layer first before erasing any pixels or work on a separate copy of your image.
Selecting The Background Eraser
By default, the Background Eraser is hiding behind Photoshop's regular Eraser Tool in the Tools palette. To select it, click and hold your mouse button down on the Eraser Tool until a small fly-out menu appears, then select the Background Eraser Tool from the menu:
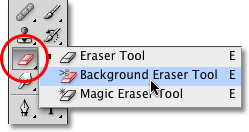
With the Background Eraser selected, your mouse cursor will change into a circle with a small crosshair in the center of it:
You can adjust the size of the circle directly from your keyboard just as you can with Photoshop's other brush tools. Press the left bracket key ( [ ) to make the circle smaller or the right bracket key ( ] ) to make it larger. You can also adjust the hardness of the edges by adding the Shift key. Press Shift+left bracket ( [ ) to make the edges softer or Shift+right bracket ( ] ) to make them harder. In general, you'll want to use hard edges with the Background Eraser, since soft edges can leave many background artifacts behind.
How The Background Eraser Works
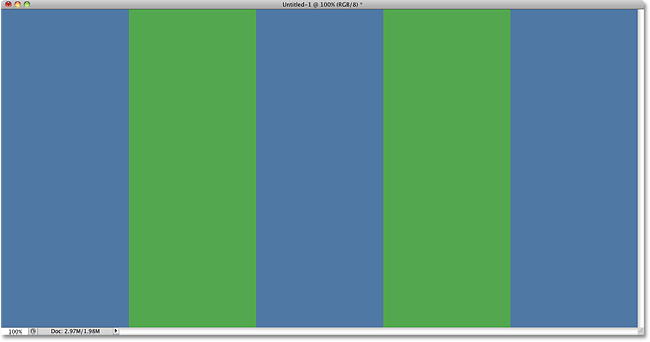
Before we look at a real-world example of the Background Eraser in action, let's take a more basic look at how it works. Here's a simple image made up of nothing more than a few blue and green vertical columns:
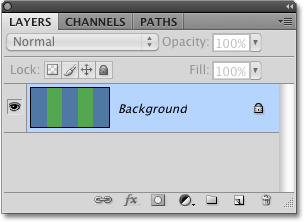
If we take a quick look over at the Layers palette, we see that the image is sitting on the Background layer, which is usually the case when we first open an image in Photoshop:
Let's say I want to erase the blue column in the middle of the image. The way the Background Eraser works (by default, anyway) is that Photoshop samples the color that's directly underneath the small target symbol in the center of the circle. The larger circle surrounding the target symbol represents the area where Photoshop will erase pixels. Any pixels inside the circle that match the color of the pixel directly under the target symbol will be erased.
To erase the blue center column, I'll move the circle into the blue area, making sure that the target symbol in the center of the circle is directly over the blue color I want to erase. When I click my mouse button, Photoshop will sample the blue color under the target symbol and then erase all of the blue pixels that fall within the larger circle:
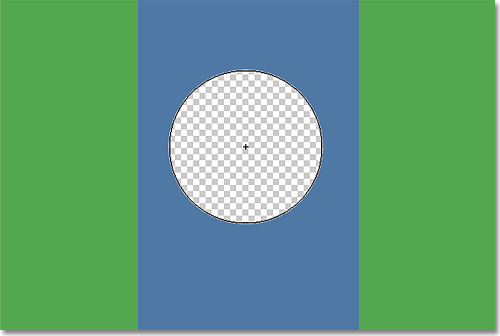
To erase more of the blue column, I just need to continue holding my mouse button down while I drag the Background Eraser over more of the area I want to erase. Notice that even though the circle sometimes extends into one of the green columns on either side of the blue column, they remain untouched since those pixels are not the same color as the color I'm erasing. This makes it easy to get right up along the edges of the area I want to erase. As long as I keep the small target symbol inside the blue area, Photoshop will only erase blue pixels:
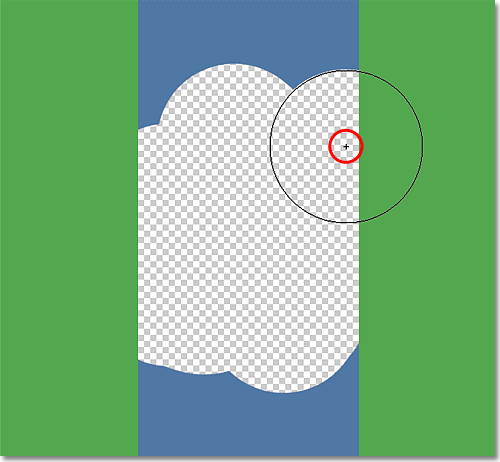
If I accidentally move the target symbol over one of the green columns, though, Photoshop will sample the green color and start erasing green pixels:
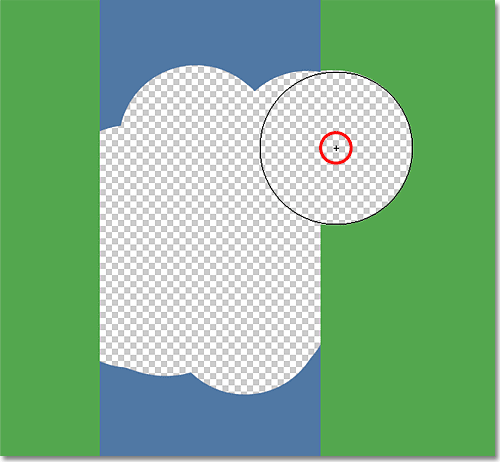
If you do make a mistake like this, simply press Ctrl+Z (Win) / Command+Z (Mac) to undo it. If you need to undo multiple steps, press Ctrl+Alt+Z (Win) / Command+Option+Z (Mac) repeatedly.
The Background Layer
Notice the checkerboard pattern that appears in place of the areas I've erased. That's Photoshop's way of representing transparency on a layer, which, if you're familiar with Photoshop, may have you wondering what's going on here. A moment ago, we saw that my image was sitting on the Background layer. Photoshop treats Background layers differently from normal layers, with different rules for what we can and can't do with them. One of the things we can't do is erase pixels on them, since transparency is not allowed on a Background layer (after all, it's the background, and not being able to see through it is part of what makes it a background). How, then, did I manage to erase the pixels? Is there some sort of "Extra Strength" setting for the Background Eraser we haven't looked at yet?
Nope. What's happened is that Photoshop assumed I knew what I doing (not always the best assumption to make) and, rather than tossing up an error message complaining that I can't delete pixels on a Background layer, automatically converted the Background layer into a regular layer, which it named "Layer 0". This isn't anything terribly important, but it's still good to know what's going on:

Here's an example of the Background Eraser in action. As I make my way around the tree in the photo, the Background Eraser has little trouble erasing the blue sky while leaving the tree itself untouched, as long as I keep the target symbol over the sky and away from the tree:

However, if I slip and move the target symbol over the green color in the tree, Photoshop starts erasing the tree, in which case I'd need to undo the last step and try again:
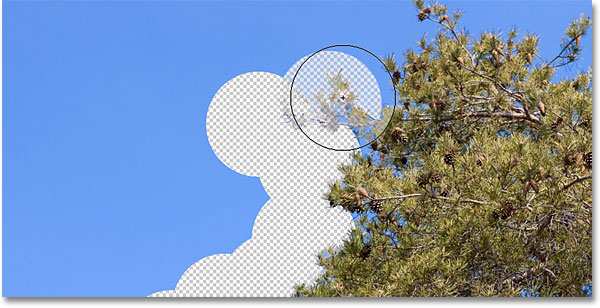
So far, we know that Photoshop samples the color directly under the target symbol in the center of the Background Eraser's cursor, then it erases any pixels of that same color that fall within the larger circle. We also know that if we move the target symbol over a different color as we're dragging the Background Eraser around, Photoshop will sample the new color and use it as the color it should be erasing. What we've just described here is the default behavior of the Background Eraser, but it's not the only way the tool can behave. So how do we change things? We do that using the settings and options found in the Options Bar, which we'll look at next!
Sampling Options
Whenever we have the Background Eraser selected, the Options Bar along the top of the screen displays various options for controlling how the tool behaves. One of the most important behaviors we can change is how Photoshop samples colors under the target symbol, or if it samples them at all.
Directly to the right of the Brush Presets picker on the left side of the Options Bar are three icons. Each of these icons selects a different sampling option. From left to right, we have Continuous, Once and Background Swatch:

Of these three, the two you'll switch between the most are Continuous (the icon on the left) and Once (the middle icon). Continuous is selected by default, and it means that as we move the Background Eraser around, Photoshop continuously samples the color under the target symbol. That's why, when I accidentally moved the target symbol over the green column or the green tree, Photoshop started erasing green pixels in the image even though I was initially erasing blue pixels.
The Continuous sampling option works great when you're trying to erase backgrounds that contain multiple colors, but if the color of your background doesn't change much, the Once option usually works better. I'll select it by clicking on the middle icon:

As you may have guessed from its name, Once tells Photoshop to sample the color under the target symbol once and that's it. Whichever color is under the target symbol the moment you click your mouse button is the color that Photoshop will erase no matter how many other colors you drag the target symbol over (while you're still holding the mouse button down). Watch what happens now when I "accidentally" move the target symbol over the green column. The Background Eraser has no effect on it this time because the target symbol was over the blue column when I clicked my mouse button:

We see the same thing happening in our photo. With Once selected as the sampling option, Photoshop is able to ignore the tree this time even though I've moved the target symbol over it, and that's because I initially clicked on the blue sky:

If you're having trouble positioning the target symbol over the color you want to erase, try the Background Swatch sampling option (the icon on the right). With Background Swatch selected, click on the Background color swatch in the Tools palette and select a color from the Color Picker that matches (as close as possible, anyway) the color in your image that you want to erase. If the color you've selected isn't quite right, adjust the Tolerance value in the Options Bar (which we'll look at in a moment) until you're able to erase the pixels:

Limits
Another important option for the Background Eraser is Limits. Once Photoshop knows which color you want to erase, Limits tells it where it can look for pixels that match the color so it can erase them. The two main choices for the Limits option are Contiguous and Discontiguous:

Contiguous, the default setting, means that Photoshop can only erase pixels in areas that are physically touching the pixel under the target symbol. In other words, it can't jump across tree branches, fence posts, or anything else in the photo that separates and isolates one area of pixels from another. This causes a problem for me as I try to erase the sky showing through the tree branches:

To get around this problem, I'll set my Limits option to Discontiguous:
Discontiguous means that Photoshop is free to erase any pixels anywhere in the image that match the sampled color we're erasing, whether they're in the same area as the target symbol or not. Once I've clicked the target symbol on an area of blue sky, I can simply drag the Background Eraser around inside the tree to easily erase the sky showing through it (I have my sampling option set to Once so Photoshop doesn't change the color being erased as I move over the tree):

Unfortunately, if we look closely, we can see some darker blue areas of the sky remaining around some of the tree branches. Even with the Limits option set to Discontiguous, the Background Eraser still needs a little more help with this image:

This brings us to the third important option for the Background Eraser, and the one that can make all the difference when it comes to using the tool successfully - Tolerance, which we'll look at next!
Tolerance
The third of the three major options for the Background Eraser is Tolerance, which determines how different a pixel's color can be from the sampled color for Photoshop to erase it. You'll find the Tolerance option directly to the right of the Limits option in the Options Bar:

The default Tolerance value is 50% and that's usually a good starting point, but if you find that the Background Eraser keeps erasing part of the area you're trying to keep because the color of the background is too similar to your subject, try a lower Tolerance setting. If your background color is quite different from your subject, increase the Tolerance value.
I'm going to undo my previous steps with the Background Eraser so I can try again, and since my sky is quite a bit different in color from the tree, I'll increase my Tolerance value to 70%. I'll click to sample an area of blue sky with the target symbol, and this time, with the higher Tolerance setting, the Background Eraser is able to do a much better job with cleaner results:

Protect Foreground Color
Finally, if you can't seem to get the Background Eraser to erase the background in your image without erasing part of your subject as well no matter what Tolerance value you use, try the Protect Foreground Color option. Click inside its checkbox to select it:

This option allows us to sample a color from the image that Photoshop will protect, preventing it from being erased. The color you sample will become your Foreground color, hence the name Protect Foreground Color. In this photo below, the flowers are very similar in color to the background, causing the Background Eraser to erase part of the flowers along with the sky:

To overcome this problem, I'll first undo my last step, then I'll select the Protect Foreground Color option in the Options Bar. I'll hold down my Alt (Win) / Option (Mac) key, which temporarily gives me access to the Eyedropper Tool. Then, I'll click with the eyedropper on one of the flowers to sample that color. This will become the color that's protected:

If you look at your Foreground color swatch near the bottom of the Tools palette, you'll see that the color you sampled has become your Foreground color:

With that color now protected, I'll try again to erase the background around the flower. This time, things work out better. Just remember to deselect the Protect Foreground Color option when you're done, otherwise the next time you use the Background Eraser, you could get unexpected results:

And there we have it! That's how to remove backgrounds with the Background Eraser Tool in Photoshop! Check out our Photo Retouching section for more Photoshop image editing tutorials!