
New And Improved Curves In Photoshop CS3
In this Photoshop tutorial, we'll look at what's new and improved in the Curves dialog box in Photoshop CS3. The Curves image adjustment has been around in Photoshop since the very beginning and is widely considered to be the most powerful and versatile photo editing tool in the entire program.
In a previous tutorial, we looked at the basics of Curves and how it compares with another of Photoshop's most popular image adjustments, the Levels command. While the fundamentals of how Curves works haven't changed in Photoshop CS3, the Curves dialog box itself certainly has.
Adobe made major changes to Photoshop's user interface in CS3, and the Curves dialog box received quite a few improvements and additions, including the ability to view the histogram directly inside the Curves grid. In fact, with Photoshop CS3, Curves has become such a complete image editing solution that you may never go back to using Levels again!
Be sure to check out our Comparing the Levels and Curves Image Adjustments tutorial if you're completely new to Curves, since in this tutorial, we'll simply be covering what's new with Curves in Photoshop CS3. Let's get started!
The New Curves Dialog Box
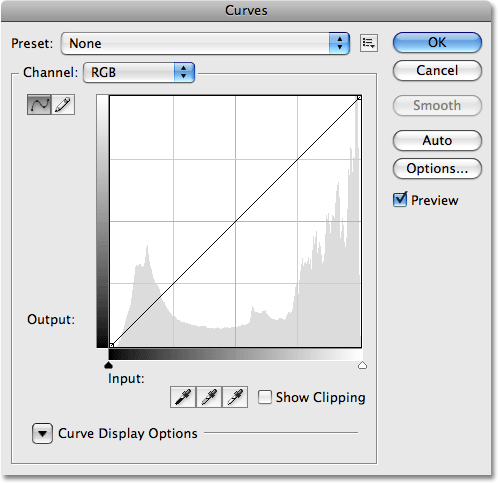
In previous versions of Photoshop, we had the option of viewing the Curves dialog box in two different sizes, the default smaller version or a larger full-size version which featured a larger grid area to work with. In Photoshop CS3, the smaller version is gone and the larger version is all we get. This is actually a good thing, since the grid area in the smaller version of the dialog box was too small to include all 256 brightness levels. Even though the larger version takes up more space on your screen, having access to all 256 brightness levels in the grid makes it much more useful:
The Histogram
In Photoshop CS3, we can finally see the histogram directly within the Curves grid! Previously, the histogram was only available in the Levels dialog box or by viewing it in the Histogram palette. The only downside to the histogram in Curves is that like Levels, it shows us only what the image looked like before making any adjustments. To view an updated histogram as you work, you'll still want to keep the Histogram palette open. However, having the histogram displayed in the Curves grid makes it much easier to judge which tonal values need to be adjusted, and makes it almost as easy to set new black and white points for an image as it is in Levels. And when I say almost as easy, wait till you see the next new feature!
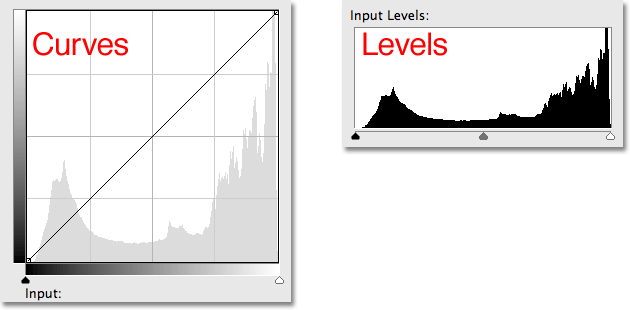
If the histogram appears different to you in Curves than it does in Levels or in the Histogram palette, it's only due to the shape of the Curves grid. Both the Levels dialog box and the Histogram palette display the histogram in a rectangular window. In Curves, the histogram has been stretched upward to take better advantage of the square grid area. Other than that, the histograms are the same:
The Black Point And White Point Sliders
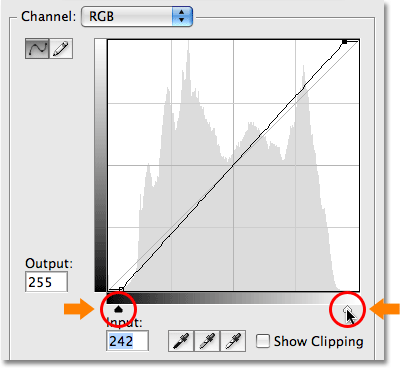
Most people over the years have found it easier to make basic tonal adjustments to an image with Levels thanks to its histogram and sliders, but in Photoshop CS3, Levels may have just become obsolete. Not only does the Curves dialog box now display a histogram, it also now features the same Black Point and White Point sliders found in Levels, and they work exactly the same way. Simply drag the sliders, which you'll find below the bottom gradient bar, to the left and right edges of the histogram to set new black and white points, making the darkest pixels in the image pure black and the lightest pixels pure white, improving overall image tone. As you drag the sliders, you'll see the points on either end of the diagonal line moving with you:
Show Clipping
If you want to make sure you're not clipping any shadow areas to pure black or any highlights to pure white as you're dragging the Black Point and White Point sliders, select the new Show Clipping option:
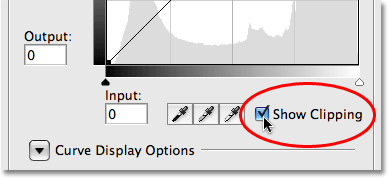
As you drag the Black Point slider towards the right with the Show Clipping option enabled, areas where you're losing some detail will appear in different colors (representing the color channels that are being clipped), while areas that have lost all detail will appear black:
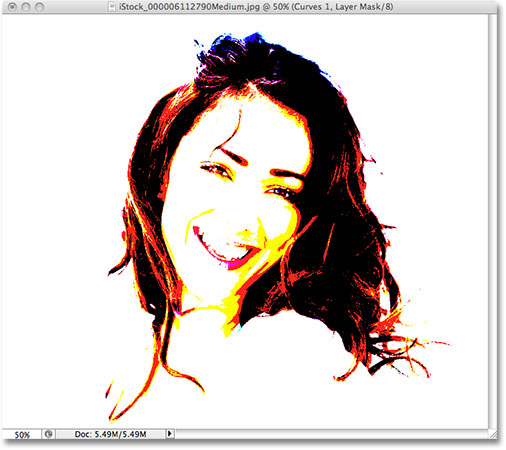
The same thing happens with the White Point slider. As you drag the slider towards the left, areas that are losing some detail will appear in color, and areas where all detail has been lost will appear white:
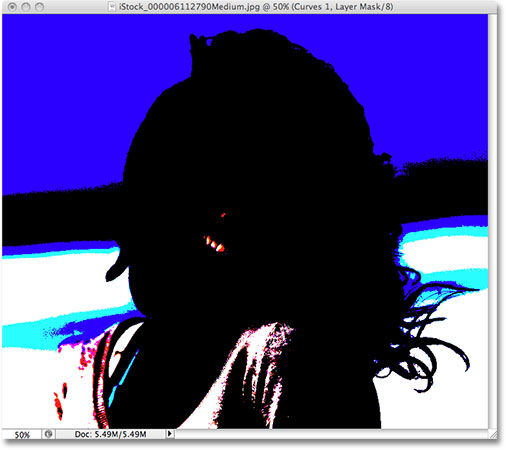
You can switch between viewing the black and white clipping displays by clicking on the Black and White eyedroppers to the left of the Show Clipping option (with Show Clipping enabled):
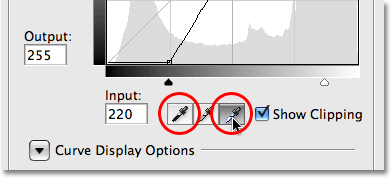
You can also turn on the clipping display temporarily by simply holding down your Alt (Win) / Option (Mac) key while dragging the Black and White Point sliders.
Switching Between Light And Ink
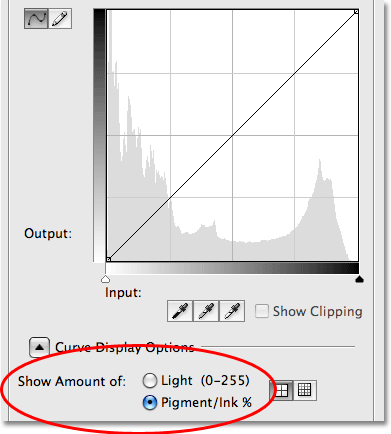
By default, Photoshop displays the Input levels and Output levels gradients in the Curves dialog box from black to white, which makes sense when working with brightness values. Black represents areas of no light, a brightness value of 0, and as we increase the brightness values, we add more and more light until finally reaching white, the maximum amount of light possible, at level 255. For most people, this is the preferred way of working in Curves. If you come from a printing background, though, and you're more comfortable thinking in terms of ink percentages rather than light values, where white represents 0% ink and black is 100% ink, you may prefer to switch the gradients around so that they go from white-to-black rather than black-to-white.
In previous versions of Photoshop, the Input levels gradient along the bottom of the grid contained a small toggle icon in the middle. Clicking on it would switch the gradients between light values and ink percentages. In Photoshop CS3, Adobe has removed the toggle icon and replaced it with a more descriptive set of options. You'll find these options, along with the rest of the options we're about to look at, in the Curve Display Options section at the bottom of the dialog box. You'll need to click on the small triangle icon to twirl the options open, since they're hidden by default. If you want to keep working with brightness values, leave the Light (0-255) option selected. To switch to ink percentages, select the Pigment/Ink % option:
Changing Grid Sizes
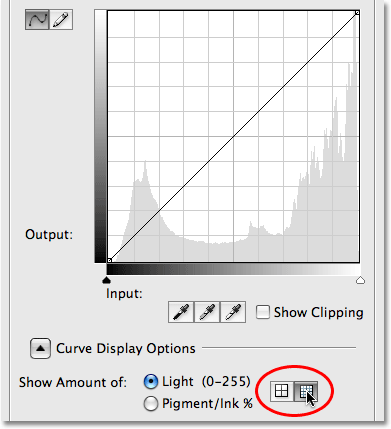
Previous versions of Photoshop have allowed us to switch from the default 4x4 grid size to a more precise 10x10 grid by holding down Alt (Win) / Option (Mac) and clicking anywhere inside the grid area, but it's always felt like more of a hidden trick than a feature. In Photoshop CS3, Adobe has finally given us an actual option for switching between the two grid sizes. You'll find two icons directly to the right of the Light / Ink % options. Click on the left icon to select the standard 4x4 grid, or click on the right icon to select the 10x10 grid:
Channel Overlays
At the very bottom of the Curves dialog box in Photoshop CS3 are four new options that control what's displayed inside the grid area. The first one is Channel Overlays. Curves isn't used only for adjusting brightness levels in an image. It's also great at correcting color problems by allowing us to adjust the curve for each individual color channel. We've always been able to select individual color channels from the Channel option above the grid area, but we could only view the curve for a color channel when we had that channel selected. In Photoshop CS3, we can now view the curves for all color channels at once as an overlay when viewing the composite channel. Simply select the Channel Overlays option at the bottom of the dialog box (it's already selected by default) to view the overlay:
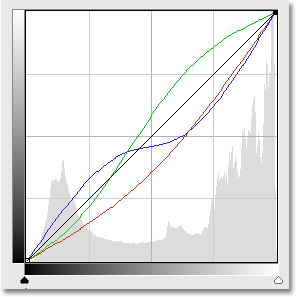
Unfortunately, we can't select any of the individual color channels in the overlay. We still need to select a color channel from the Channel option to make any changes to it.
To View Or Not To View The Histogram
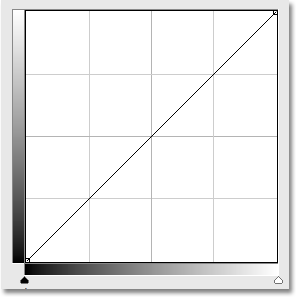
If you find that the histogram makes the Curves grid area in Photoshop CS3 look too cluttered, you can hide it by unchecking the Histogram option at the bottom of the dialog box. Select the option again to turn the histogram back on:
Baseline
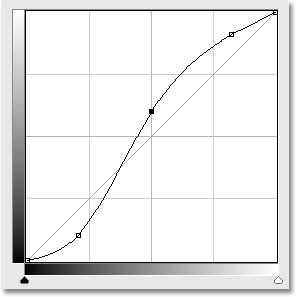
As you drag points around and reshape the curve in Photoshop CS3, you'll see a light gray diagonal line appear from the bottom left corner to the top right corner of the grid. This is known as the Baseline and it represents the starting point of the curve before any adjustments were made. The Baseline gives us a quick way to see what's happening with our adjustments. When working with brightness values, any areas of the curve that appear above the baseline will be brighter than they were originally, and any areas of the curve below the baseline will be darker. If you're working with ink percentages, the opposite is true. By default, the Baseline is visible, but if you'd prefer to hide it, simply uncheck the Baseline option at the bottom of the dialog box:
Intersection Lines
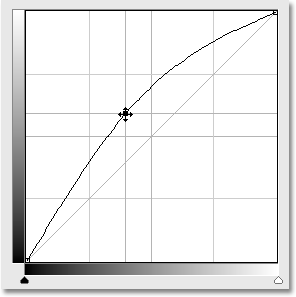
As you move a point from one spot to another, a horizontal and vertical line will appear that intersects at the point, helping to see exactly which brightness values you're selecting in the bottom gradient bar and where you're moving them to in the left gradient bar. If you'd rather not see the intersecting lines, uncheck the Intersection Lines option at the bottom of the dialog box:
Ready-Made Curves
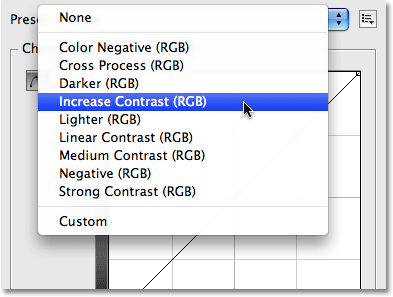
Photoshop CS3 comes with a collection of ready-made curves that you can choose from to quickly lighten or darken an image, adjust contrast or create simple photo effects. You can access the list of preset curves from the Preset drop-down list at the top of the Curves dialog box. Click on the name of the one you want in the list to select it:
Saving Your Own Custom Curve Presets
If you've created a curve and you know you'll want to use the same curve with other images, there's no need to recreate it each time. Simply click on the icon directly to the right of the Preset option at the top of the dialog box and choose Save Preset from the list:
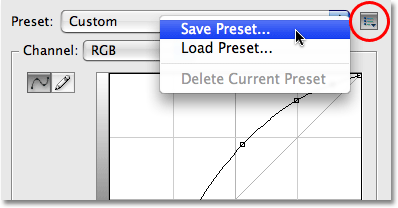
Give your custom curve a descriptive name (I named mine "Steve's Curve" but you may want to come up with something better), then click Save. As long as you saved your curve in the default location, your curve will now be available any time you need it along with the rest of the preset curves in the Preset drop-down list:
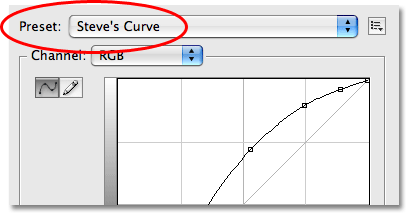
If you chose to save your curve somewhere else, you'll need to click back on the icon to the right of the list of presets and choose Load Preset, then navigate to the where you saved the curve to access it.
And there we have it! That's our look at what's new and improved inside the Curves dialog box in Photoshop CS3! Check out our Photo Retouching section for more Photoshop image editing tutorials!