
Bourne Ultimatum Color and Motion Blur Effect With Photoshop
In this Photoshop Effects tutorial, we're going to look at how to recreate the same color and motion blur effect used in the movie poster for the biggest action movie of the 2007 summer, the Bourne Ultimatum. We'll be using Photoshop's Hue/Saturation adjustment layer to colorize the image using a color I've sampled directly from the poster itself.
To create the motion blur, we'll be using Photoshop's classic Motion Blur filter, and we'll be finishing off the effect with a couple of layer masks to bring back just a hint of the flesh tones from the original image, as well as to remove the blur effect from the main subject.
To complete this Photoshop tutorial, you'll need a photo of Matt Damon walking towards you looking a little upset about something and carrying a gun. If you don't happen to have a photo like that (and hopefully you don't), any photo of someone walking towards you on the street will do.
Here's the image I'll be using for this Photoshop Effects:

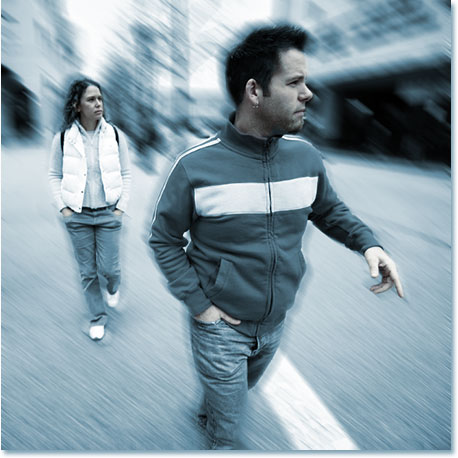
And here's the same image after applying the "Bourne Ultimatum" color and motion blur effect to it:

This tutorial is from our Photo Effects series. Let's get started!
Step 1: Duplicate The Background Layer
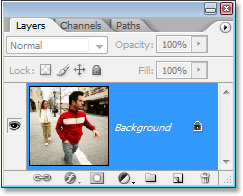
As is often the case with many of our Photoshop tutorials (and also a good habit to get into), the first thing we want to do in creating this effect is duplicate our Background layer. Photoshop's Layers palette is currently showing us that we have only one layer, the "Background" layer, which contains our original image:
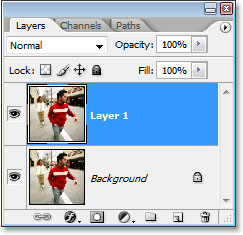
Let's duplicate the layer using the keyboard shortcut Ctrl+J (Win) / Command+J (Mac). When I look in my Layers palette now, I can see that Photoshop has copied my Background layer and has named the copy "Layer 1". The copy is also above the original Background layer:
Step 2: Set The Color You Want To Colorize The Image With As Your Foreground Color
We're going to use a "Hue/Saturation" adjustment layer to colorize the image in a moment, but to make things easier, let's choose the color we're going to use first by setting it as our Foreground color. This way, we won't have to fumble around with any sliders in the Hue/Saturation dialog box trying to find the color we want. To do that, click on the Foreground color swatch in the Tools palette:

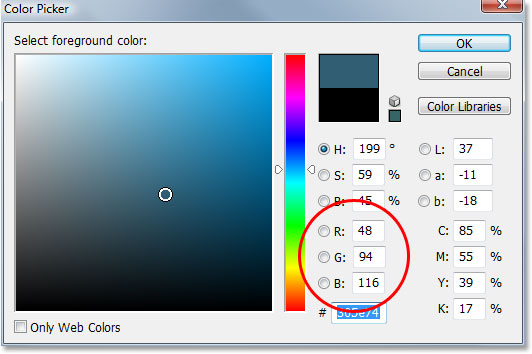
When you click on it, Photoshop's Color Picker will appear. You're of course free to use whichever color you want for your effect. I've gone ahead and sampled a color directly from the movie poster, so if you want to use the same color I'll be using, look on the bottom right side of the Color Picker for the RGB options and enter 48 for the R value (which stands for Red), 94 for the G value (Green), and 116 for the B value (Blue):
Click OK when you're done to exit out of the dialog box.
Step 3: Colorize The Image With A Hue/Saturation Adjustment Layer
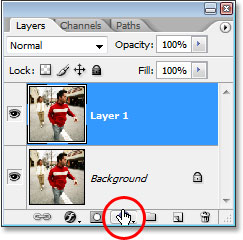
Now that we've selected the color we're going to use to colorize the image, this next step is going to be easy. Click on the New Adjustment Layer icon at the bottom of the Layers palette:
Then choose Hue/Saturation from the list that appears:
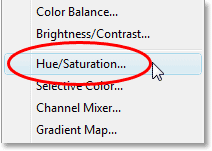
This will bring up Photoshop's Hue/Saturation dialog box. Since we've already chosen the color we want to colorize the image with, all we need to do here is select the Colorize option in the bottom right corner of the dialog box:
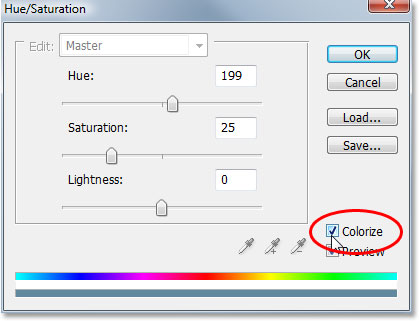
As soon as you check the option, Photoshop goes ahead and colorizes the image using our chosen Foreground color:
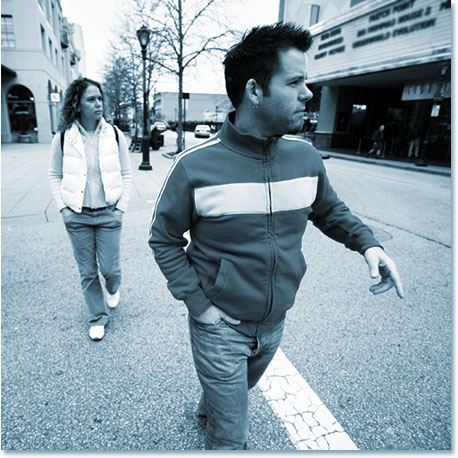
Click OK to exit out of the Hue/Saturation dialog box.
Step 4: Select Your Brush Tool
In the movie poster for the "Bourne Ultimatum", the entire image is colorized except for Matt Damon's face and hands, which have some of his original flesh tone showing through, and we can do the same thing with our image very easily. First, we need the Brush Tool, so either select it from the Tools palette or press B on your keyboard:

Step 5: Set Your Foreground Color To Black
In order to bring back some of the color from the original image, we're going to use our brush to paint with black on the Hue/Saturation adjustment layer's layer mask. Anywhere we paint with black is going to hide the effects of the adjustment layer and bring back our original color. In order to paint with black, we need black as our Foreground color, and we can get that easily by pressing D on the keyboard, which resets Photoshop's Foreground and Background colors, making black our new Foreground color (white becomes the Background color). We can see this if we look at the Foreground and Background color swatches in the Tools palette:

Step 6: Lower The Opacity Of The Brush To About 30%
We only want to bring back a subtle amount of color, so we need to lower the opacity of our brush before we begin painting. To do that, with the Brush Tool selected, go up to the Opacity option in the Options Bar at the top of the screen and lower the opacity of the brush to around 30%:

This way we'll only be bringing back 30% of the original color rather than the full amount.
Step 7: Select The Hue/Saturation Adjustment Layer's Layer Mask
As I mentioned, we're going to paint with black on the Hue/Saturation adjustment layer's layer mask, rather than on the image itself, so let's select the layer mask by clicking on the layer mask thumbnail in the Layers palette:
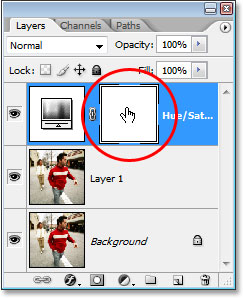
You'll know that the layer mask is selected because it will have a white highlight border around the thumbnail, as we can see in the image above.
Step 8: Paint On The Image To Bring Back Some Of The Skin Tone
We have our Brush Tool with our Foreground color set to black, we've lowered the opacity of the brush to 30%, and we've selected the layer mask for the Hue/Saturation adjustment layer in the Layers palette. All we need to do now is paint over any areas where we want to bring back some of the color from the original image. I want to bring back some color in the skin tones of both people in my image, so I'm going to paint over their faces and hands to bring back some skin color. To resize my brush as needed, I'll use the left and right bracket keys on my keyboard. The left bracket key makes the brush smaller and the right bracket key makes it larger. Here' I'm painting over the guy's face and you can see that his skin tone is showing through:
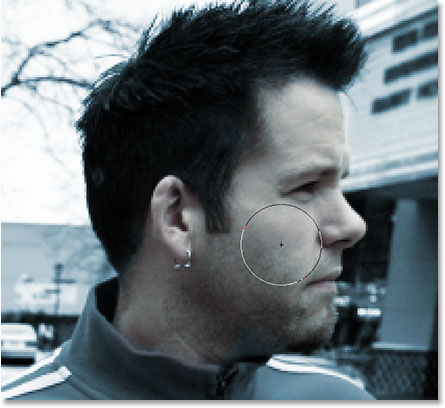
If you accidentally paint over an area you didn't mean to paint over, simply press X on your keyboard to switch your Foreground color to white and paint over the mistake, then press X again to switch back to black and continue painting.
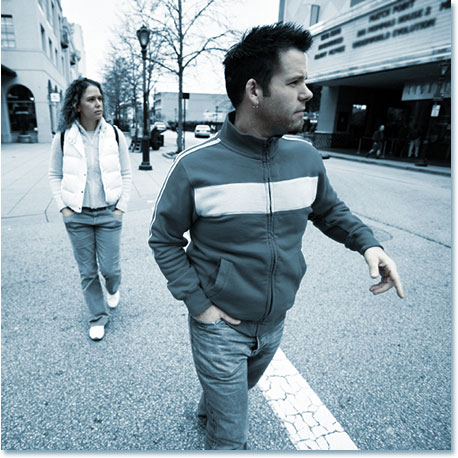
At this point, we're done colorizing our image. Next, we're going to add the motion blur effect.
Step 9: Apply The Motion Blur Filter To The Background Copy Layer ("Layer 1")
We're going to add our motion blur effect to the image, and we'll use Photoshop's classic and appropriately named "Motion Blur" filter to do it. We want to apply the motion blur to the copy of the Background layer that we created back at the beginning of this tutorial, so click on "Layer 1" in the Layers palette to select it. You'll know it's selected because it will appear highlighted in blue:
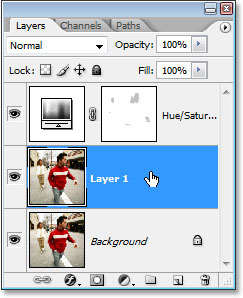
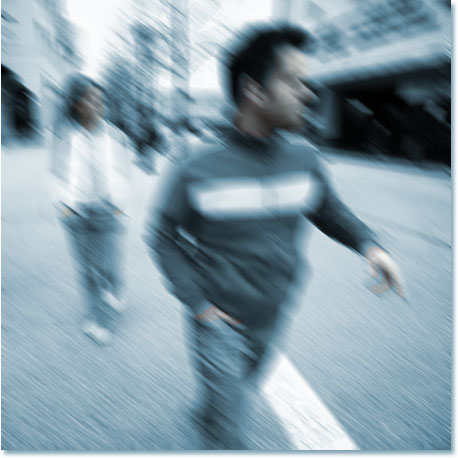
Now that we have the correct layer selected, let's go up to the Filter menu at the top of the screen, choose Blur, and then choose Motion Blur. This will bring up the Motion Blur filter's dialog box. Set your Angle to around -40°. Then drag the slider at the bottom to adjust the Distance of the motion blur. The value you set this to is going to depend a lot on the size of your image. I'm using a small image for this tutorial, and for me, a value of about 35 pixels gives me roughly the same effect used in the Bourne Ultimatum movie poster:
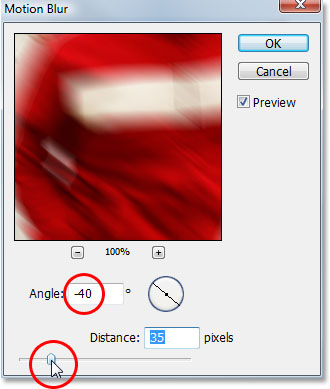
If you're using a large, high resolution image, you'll want to set your Distance value higher. Use my image below as a guide for the blur distance you're aiming for:
Step 10: Add A Layer Mask To The Motion Blur Layer
What I'm going to do next is allow the two people in the image to show through the motion blur effect, and I'm going to once again use a layer mask for that. With "Layer 1" still selected, I'm going to click on the Layer Mask icon at the bottom of the Layers palette:
This adds a layer mask to our motion blurred layer, and it also adds a layer mask thumbnail in the Layers palette. I can tell from the white highlight border around the thumbnail that the layer mask is already selected for me:
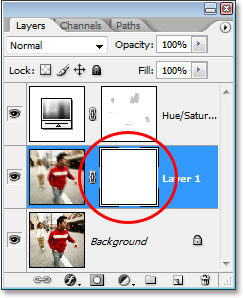
I can now use this layer mask to hide the motion blur from in front of the two people in my image, which I'll do next.
Step 11: Paint With Black On The Layer Mask To Hide The Motion Blur
With black still as my Foreground color and the layer mask on "Layer 1" selected, I'm going to use my Brush Tool again to paint over the areas in the image where I want to hide the motion blur, which in my case is in front of the two people. I want to use a soft-edged brush for this, so I'm going to hold down my Shift key and press the left bracket key on my keyboard a few times, which will give me a nice soft edge for my brush. Before I begin painting, I'm going to go back up to the Options Bar and set the opacity of my brush back up to 100%:

Once again, I'm going to resize my brush as needed using the left and right bracket keys, and I'm simply going to paint with black over the two people in my image, allowing them to show through the motion blur. As I approach the edges of the people, I'm going to keep my brush just inside the edge to give me a nice blend between the people and the motion blur around them. If I make a mistake and accidentally paint over an area I didn't mean to, I can simply press X on my keyboard to switch my Foreground color to white, just as I did when painting on the Hue/Saturation layer mask, and paint over the mistake. Then I'd press X again to switch back to black and continue painting away the motion blur:
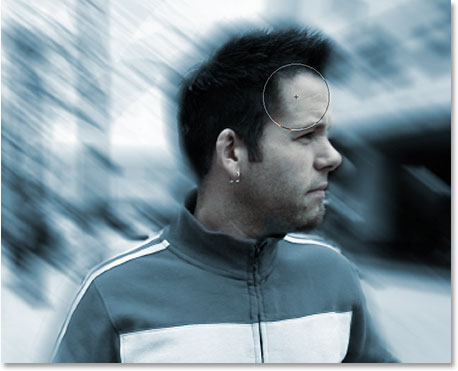
I'm going to continue painting over the guy until I've removed all of the motion blur in front of him, leaving a nice effect around the edges:
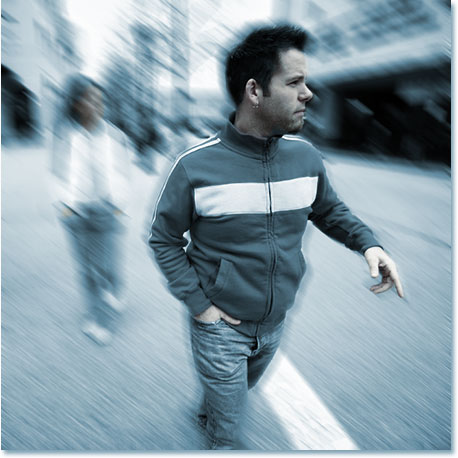
And here's my image after painting away the motion blur effect in front of the woman behind him as well:
Step 12: Add A New Layer At The Top Of The Layers Palette
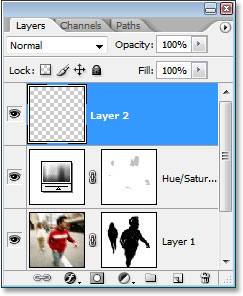
At this point, our effect is pretty much complete. We've colorized the image, brought back some of the original skin tone, added our motion blur, and then painted away the motion blur in front of the two people. Let's finish things off by adding a little grunge to the image. First, click on the Hue/Saturation layer in the Layers palette to select it so we can add a new blank layer above it. Then click on the New Layer icon at the bottom of the Layers palette:
Photoshop will add a new blank layer at the top of the Layers palette, and will name it "Layer 2":
Step 13: Fill The New Layer With White
We need to fill this new layer with white, and since white is currently our Background color, we can use the keyboard shortcut Ctrl+Backspace (Win) / Command+Delete (Mac), which tells Photoshop to fill the layer with the Background color. The image will now appear completely filled with white.
I won't bother showing a screenshot, since a white image on a white background wouldn't look very interesting.
Step 14: Apply Photoshop's "Add Noise" Filter To The Layer
Go up to the Filter menu at the top of the screen, choose Noise, and then choose Add Noise. This brings up the "Add Noise" filter's dialog box. I'm going to use the slider to set my Amount value to around 100% or so, giving me quite a bit of noise. You may want to set yours even higher if you're using a high resolution image. Also, make sure that the Gaussian and Monochromatic options are both selected at the bottom of the dialog box:
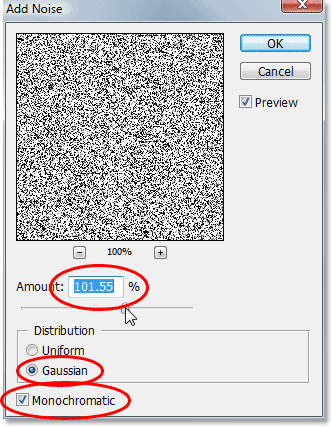
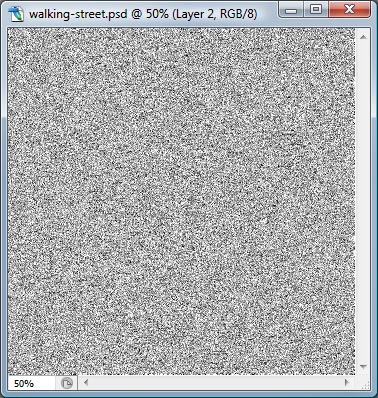
Click OK when you're done to exit out of the dialog box. Your image will now be filled with noise:
Step 15: Change The Blend Mode Of The Noise Layer To "Color Burn"
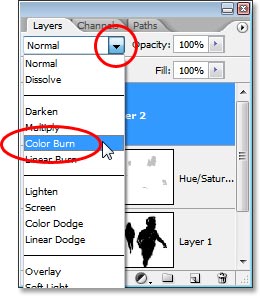
Our image is filled completely with noise, which isn't what we want. Let's blend the noise in with the image by first changing the blend mode of the noise layer. Go up to the blend mode options in the top left corner of the Layers palette, click on the down-pointing arrow to the right of the word "Normal" and change the blend mode to Color Burn:
Step 16: Lower The Opacity Of The Noise Layer To 10% Or Less
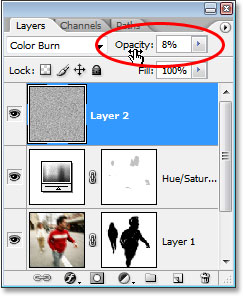
The noise is now blending in with the image but it's much too intense. To fix that and complete our effect, go over to the Opacity option in the top right of the Layers palette (directly beside the blend mode option) and lower the opacity of the layer all the way down to 10% or less. I'm going to set mine to 8%, leaving the noise barely visible but enough to add a little "dirt" to the image:
Once you've blended in your noise with the image, you're done! Here is the final "Bourne Ultimatum movie poster" color and motion blur effect:

And there we have it! That's how to create a Bourne Ultimatum-inspired color and motion blur effect in Photoshop! Check out our Photo Effects section for more Photoshop effects tutorials!