
Colorizing A Photo With Multiple Colors In Photoshop
In this Photoshop Effects tutorial, we're going to learn how to colorize a photo using multiple colors. It's an effect I've seen used quite a bit in ads for photo printers and for color calibration software.
The idea is simple. Take a single photo, divide it into multiple sections of equal size (usually four sections), then colorize each section using a different color, or a different shade of the same color, to create interesting results. With the photo printer ads, for example, each section of the photo is usually colorized using one of the four main colors of ink (cyan, magenta, yellow, and black). With the color calibration software ads, each section of the photo is tinted with a slightly different color to show how the same image can look different on different monitors when they're not properly calibrated.
These are just two common examples of how this photo effect can be used, but you can colorize your image with whatever colors you like depending on the subject of your image and the mood or message you're trying to convey. Use reds, oranges and yellows to colorize an image of kids playing in the leaves in the Fall, or different shades of blue to colorize a cold, wintry landscape photo. Or colorize three of the four sections with the same color and use a different color to highlight one specific section of the photo. For such a simple effect, there's lots of different ways you can use it.
Photoshop makes creating this effect incredibly easy. First, we'll divide our photo into four sections using guides, then we'll use several Hue/Saturation adjustment layers, as well as their layer masks, to colorize each section with a different color. When we're done with the initial effect, we'll see how we can use an additional Hue/Saturation adjustment layer to quickly change all four colors at once!
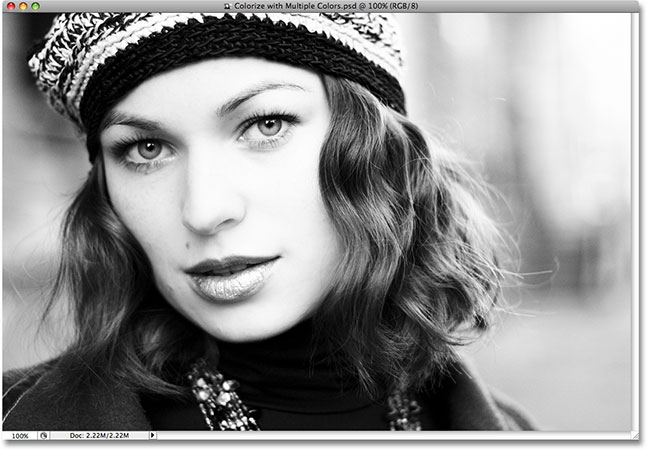
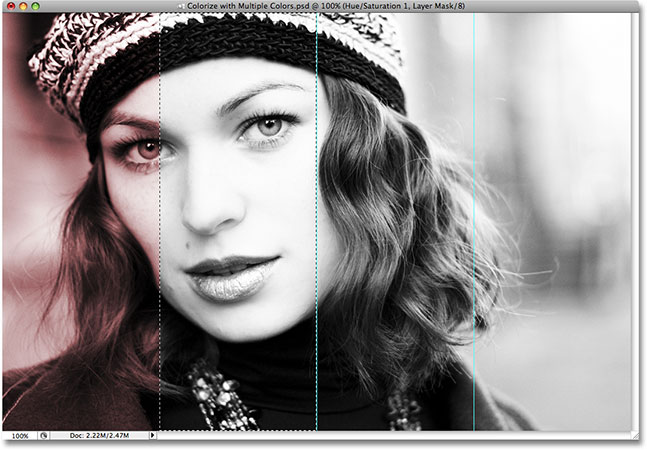
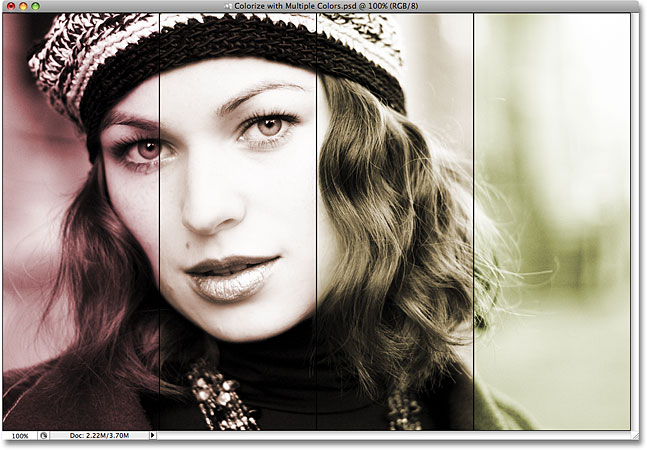
Here's the image I'll be using for this tutorial. My image is a black and white photo, but a full color photo will work equally well. There's no need to convert your image to black and white first, I just happen to like this photo:
Here's how the image will look when we're done. Keep in mind that you don't need to use the same colors I'll be using. This tutorial simply shows you how to create the effect. The actual colors you use are completely up to you. As I mentioned, at the end of the tutorial, we'll see how we can quickly change all four colors at once for different results.

How To Colorize A Photo With Multiple Colors
Step 1: Add A New Vertical Guide Set To 25%
Before we can begin colorizing different sections of our photo, we first need to create the sections, and for that, we'll use Photoshop's guides. Guides may not be the most exciting part of working with Photoshop, but they can definitely make your life easier. To divide our photo into four sections of equal size, we're going to need three guides. Let's add our first one. Go up to the View menu at the top of the screen and choose New Guide. This brings up the New Guide dialog box. We want to create vertical guides, so select Vertical for the Orientation option. Then, at the bottom of the dialog box, type in 25% for the Position value:

Click OK when you're done to exit out of the dialog box. If we look at our image in the document window, we can see that we've added our first guide running vertically from top to bottom, sitting at exactly one quarter of the way across the image from left to right:

Step 2: Add A Second Vertical Guide Set To 50%
Let's add our second guide. Go back up to the View menu at the top of the screen and once again select New Guide. When the New Guide dialog box appears, make sure Vertical is selected for the Orientation option and this time, enter a value of 50% for the Position option:
Click OK to exit out of the dialog box, and we can see in our document window that we've now added a second vertical guide, this one running straight down the middle of the photo:
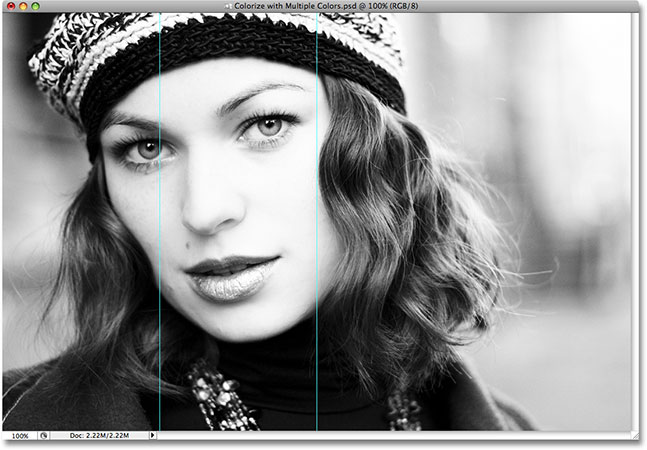
Step 3: Add A Third Vertical Guide Set To 75%
Go back up to the View menu, select New Guide, and this time, enter a value of 75% for the Position option in the New Guide dialog box. Again, make sure Vertical is selected for the Orientation option:
Click OK to exit out of the dialog box, and we now have our third guide, this one running from top to bottom three quarters of the way across the image:

Thanks to the three guides we've added, one at 25%, one at 50%, and one at 75% of the way across the image, our photo is now divided up into four sections of equal size. We can now begin colorizing each section, which we'll do next!
Step 4: Make Sure "Snap To Guides" Is Turned On
In a moment, we're going to begin dragging selections around our four sections using the Rectangular Marquee Tool, and to make things easier for us, Photoshop is going to snap our selections directly to the guides we've created. Or at least, it will if we have the Snap To Guides option enabled. Go up to the View menu at the top of the screen and select Snap To. A submenu will appear with the Guides option at the very top of it. Look to the left of the word "Guides". If you see a checkmark beside the word, it means the option is already enabled so there's no need to select it. If you don't see a checkmark, click on the word "Guides" to enable to option:
Step 5: Select The Rectangular Marquee Tool
We can now begin dragging a selection around our first section. Grab the Rectangular Marquee Tool from the top of the Tools palette, or simply press the letter M on your keyboard to select it with the shortcut:
Step 6: Drag A Selection Around The First Section On The Left
With the Rectangular Marquee Tool chosen, start in the top left corner of the photo and drag a selection around the first section on the left of the image. You'll notice that as you move close to the first guide, the selection will snap to it thanks to that Snap To Guides option we enabled. If you find it difficult to place your cursor in the top left corner of the image while working in a document window, press the letter F on your keyboard to switch to Full Screen mode, then drag the selection. It's a bit hard to see in the screenshot, but when you're done, you should have a selection around the entire first section of the image:

Step 7: Add A Hue/Saturation Adjustment Layer
With the selection active, click on the New Adjustment Layer icon at the bottom of the Layers palette and choose a Hue/Saturation adjustment layer from the list:
This brings up the Hue/Saturation dialog box. Before we do anything with it though, let's take a quick look at what's happened in the Layers palette. We now have a Hue/Saturation adjustment layer sitting above our image on the Background layer, but more importantly, look at the layer mask preview thumbnail on the right of the adjustment layer. Notice how it's filled with black except for a white section on the left:

That's because we added the adjustment layer while we had a selection active in the document. Photoshop used the selection to alter the adjustment layer's mask. The white section on the left is the area we selected in our image, and the white means that whatever we do with our Hue/Saturation adjustment layer will be visible in that section of the image. The rest of the layer mask is black, which means that the rest of the image will not be affected by anything we do with our adjustment layer. This is what's going to allow us to colorize each section independently of the others.
If you want to learn more about how layer masks work, be sure to check out our full Understanding Layer Masks tutorial in the Photoshop Basics section of the website.
Step 8: Select The "Colorize" Option In The Hue/Saturation Dialog Box
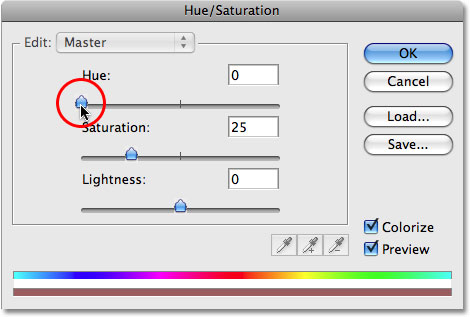
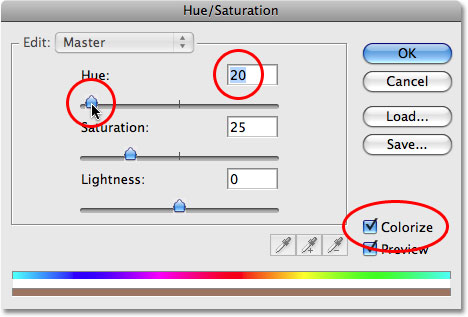
Now that we've taken a look at the Layers palette, let's use the Hue/Saturation dialog box to colorize our first section. First, we need to tell Photoshop that we want to colorize the image, so select the Colorize option in the bottom right corner of the dialog box:
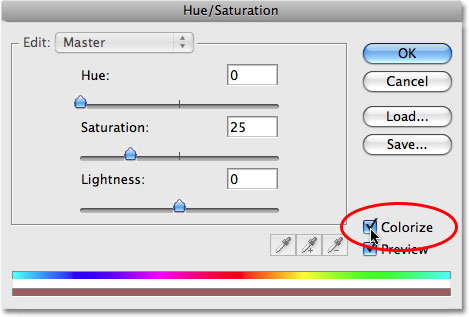
Step 9: Choose A Color With The Hue Slider
With the Colorize option selected, choose whichever color you want to use by dragging the Hue slider either left or right while keeping an eye on your image until you find the color you want to use. The default color is red, which I think works well with my image, so I'm going to simply leave the Hue slider alone for now and accept the default color. Of course, you may want to choose a different color for your image:
Click OK once you've found the color you want to use to exit out of the Hue/Saturation dialog box. If we look at the image in the document window, we can see that the first section on the left is now colorized with the chosen color:

Step 10: Change The Blend Mode Of The Adjustment Layer To "Color"
Let's make sure we're affecting only the color in the image, not the brightness (luminosity) values. For that, all we need to do is change the blend mode of the adjustment layer. You'll find the layer blend mode options in the top left corner of the Layers palette. By default, layers are set to the "Normal" blend mode. Change the blend mode to Color:
The difference to your image may be subtle depending on the color you've chosen, but now we know for certain that we're changing only the color in the image. Whatever color we choose will not affect the brightness values. Here's my image after changing the blend mode to Color:

One section down, three to go!
Step 11: Drag A Selection Around The Second Section
Use Photoshop's Rectangular Marquee Tool to drag a selection around the second section. Again, since we enabled the Snap To Guides option back in Step 4, you'll find that your selection snaps to the guides once you're close enough to them. When you're done, your second section should have a selection around it:
Step 12: Add A Hue/Saturation Adjustment Layer
With the second section selected, click on the New Adjustment Layer icon once again at the bottom of the Layers palette and choose a Hue/Saturation adjustment layer, just as we did before:
If we look in the Layers palette, we can see that we now have a second Hue/Saturation adjustment layer, and because we had a selection active when we added the adjustment layer, the area inside the selection appears white in the layer mask, which means that only our selected area will be affected by this second adjustment layer. Everything else is black, which means the rest of the photo will not be affected:
Step 13: Click The Colorize Option And Choose A Second Color With The Hue Slider
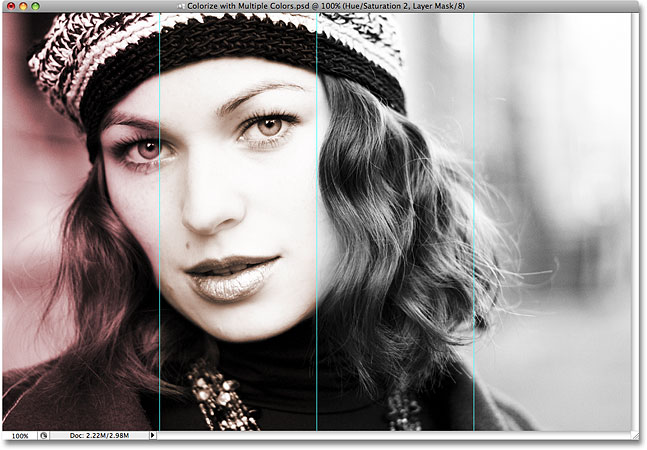
Let's choose a color for our second section. First, select the Colorize option in the bottom right corner of the Hue/Saturation dialog box, then drag the Hue slider either left or right while keeping an eye on your image to select a color. Again, the color you choose is completely up to you. I want my colors to be fairly similar to each other, so I'm going to drag my Hue slider a little to the right until the value in the Hue input box reads 20. This gives me a reddish-orange color:
Click OK once you've chosen a color to exit out of the dialog box. The second section of the photo is now colorized:
Step 14: Change The Blend Mode Of The Adjustment Layer To "Color"
Once again, let's make sure that we're affecting only the color in the image by changing the blend mode of our second Hue/Saturation adjustment layer from "Normal" to Color:
Step 15: Repeat Steps 11-14 For The Remaining Two Sections
We now have two of our sections colorized. To colorize the remaining two sections, simply repeat Steps 11-14 for each section. First, drag a selection around the section using the Rectangular Marquee Tool, then click on the New Adjustment Layer icon at the bottom of the Layers palette and select Hue/Saturation from the list. When the Hue/Saturation dialog box appears, select the Colorize option in the bottom right corner, then drag the Hue slider either left or right to select a color for the section. Click OK when you're done to exit out of the dialog box. Finally, change the blend mode of the Hue/Saturation adjustment layer to Color.
When you're done, you should have four Hue/Saturation adjustment layers in your Layers palette, one for each of the four sections:
Here's my image after colorizing all four sections. As I mentioned a moment ago, I want all four of my colors to be fairly similar to each other. Your colors may be completely different from each other, it's up to you. If you want to use the same colors I've used, I set my Hue value to 40 for the third section and 60 for the fourth section:
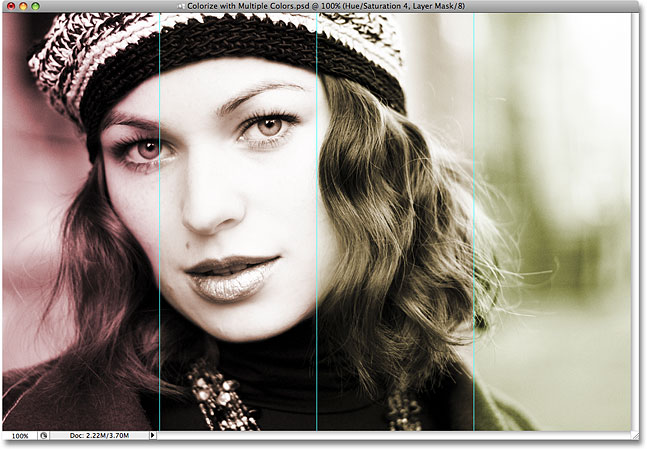
If you find, as I do, that the colors in your image are looking a little dull, don't worry. We'll see how to fix that at the end of the tutorial.
Step 16: Clear The Guides
Now that we've colorized all four sections of our photo, we no longer need the guides, so let's get rid of them. Go up to the View menu at the top of the screen and choose Clear Guides:

The guides have now disappeared, giving us a better view of our image:

Let's add a stroke around each of the four sections to make them more distinguishable from each other. We'll do that next, and then we'll see how to quickly change all four colors at once!
Step 17: Add A Stroke To One Of The Sections
If you look in the Layers palette, you'll see that you most likely have the Hue/Saturation adjustment layer at the top of the Layers palette ("Hue/Saturation 4") selected, since it's the last one you added (the currently selected layer is highlighted in blue). Click on it to select it if it's not selected. This adjustment layer controls the color of the section on the far right of the image. We're going to add a black stroke around this section. Click on the Layer Styles icon at the bottom of the Layers palette and select Stroke from the bottom of the list of layer styles that appears:
This brings up the Layer Style dialog box set to the Stroke options in the middle column. First, lower the Size of the stroke down to 1 px, then set the Position of the stroke to Inside. Finally, click on the color swatch at the bottom of the options, which brings up Photoshop's Color Picker, and select black as the stroke color, then click OK to close out of the Color Picker:
When you're done changing the options, click OK to exit out of the Layer Style dialog box. If we look at our image, we can see that we now have a thin black stroke around the section on the far right:

Step 18: Copy The Stroke Layer Style
Now that we've added the stroke around one of the sections, we can simply copy the layer style and quickly paste it onto the other three sections! Go up to the Layer menu at the top of the screen, choose Layer Style, and then choose Copy Layer Style:
Step 19: Select The Other Three Hue/Saturation Adjustment Layers
Click on the third Hue/Saturation adjustment layer in the Layers palette (the one directly below the top one) to select it, then hold down your Shift key and click on the first Hue/Saturation adjustment layer (the one directly above the Background layer). This will select all three remaining adjustment layers at once. You'll see all three of them highlighted in blue:

Step 20: Paste The Stroke Onto The Adjustment Layers
With all three remaining adjustment layers selected, go back up to the Layer menu at the top of the screen, choose Layer Style once again, and this time, select Paste Layer Style:
And just like that, the stroke is now applied to all four sections, separating them from each other a bit better:
And with that, our main photo effect is complete! Let's finish things off by looking at an easy way to change all four colors at once, as well as how to brighten up the colors if needed. We'll do that next!
Step 21: Add Another Hue/Saturation Adjustment Layer Above All The Others
So far, we've been using Hue/Saturation adjustment layers to colorize each section of the photo. Now that we've completed the initial effect, we can use yet another Hue/Saturation adjustment layer to quickly change all four colors at once! Of course, if you're happy with the colors you've chosen, you may not want to change anything, but if you do want to change them, here's a quick way to do it. First, select the adjustment layer at the top of the Layers palette ("Hue/Saturation 4"). Then click on the New Adjustment Layer icon at the bottom of the Layers palette and once again choose Hue/Saturation from the list. This will add a new Hue/Saturation adjustment layer above all the others. Notice how this time, the layer mask preview thumbnail for the adjustment layer is filled completely with white. That's because we did not have a selection active when we added it. With the entire layer mask filled with white, whatever we do with this adjustment layer is going to affect the entire photo:
Step 22: Drag The Hue Slider To Change All Four Colors At Once
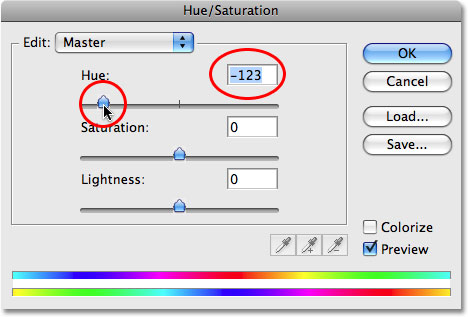
This time, we do not want to colorize the image. Colorizing it would replace all the colors we've just added with a single color, so leave the Colorize option in the Hue/Saturation dialog box unchecked. Instead, simply drag the Hue slider either left or right. As you drag it, you'll see all four colors in your image changing to different colors! For example, here I've dragged my Hue slider to the left to a value of -123:
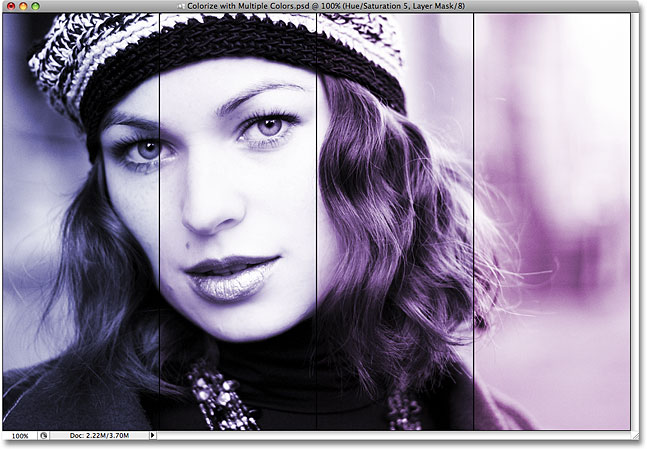
The colors in my effect have now shifted from reds and yellows to blues and purples:
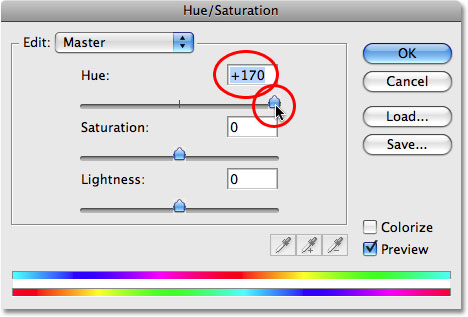
This time, I'll drag the Hue slider over to the right to a value of +170:
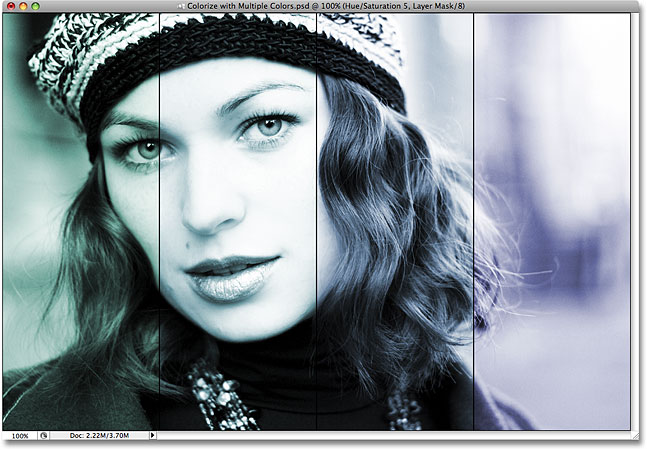
The colors in my image have now shifted to greens and blues:
What if you're happy with the colors you've chosen but you want to brighten them up a bit? Here's my image once again with the original colors I chose:
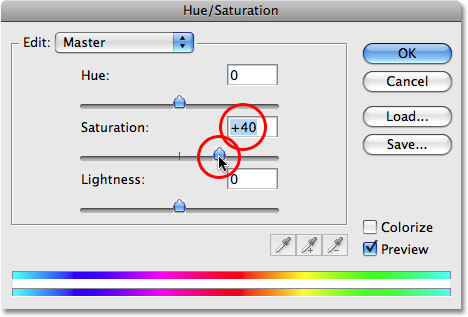
You can use the Hue/Saturation adjustment layer we added to quickly brighten all four colors in the effect simply by dragging the Saturation slider. Drag the slider to the left to decrease color saturation, reducing the intensity of the colors, or drag it to the right to increase saturation. Since I want to make my colors brighter, I'm going to drag the Saturation slider to the right to a value of around +40:
The colors in my effect now appear brighter and more intense: