
Creative Focus with Lens Blur In Photoshop
In this Photoshop Effects tutorial, we're going learn how to add creative focus to an image using Photoshop's Lens Blur filter, which has been available in Photoshop since Photoshop CS (which means you'll need Photoshop CS, CS2 or CS3 for this tutorial). When most people think of adding a blurring effect to an image in Photoshop, they immediately think of the Gaussian Blur filter, which has been around in Photoshop since the days of the dinosaurs (they used Photoshop BC back then). While Gaussian Blur is still a great filter with plenty of uses, it doesn't offer us much in terms of control over the blurring effect and usually needs to be paired up with a layer mask for it to be of any real use. Photoshop's Lens Blur filter, on the other hand, offers an incredible amount of control over the effect (more than you'll most likely ever need), and when used with an easy-to-create Depth Map, as we'll see in this tutorial, we can specify exactly how much blurring to apply to different areas of the image, giving us complete creative control over which areas are in focus and which are not.
We're not going to be covering every single option of the Lens Blur filter in this tutorial, since a) that would be boring, and b) there's really only a couple of options you need to know about to get great results with it, and those are the ones we'll look at here. This is a great filter to use with all kinds of photos, including wedding photography, landscape photos, and really any photo where you want to bring attention to a certain part or parts of the image by adjusting the focus.
Here's the image I'll be using for this Photoshop tutorial:
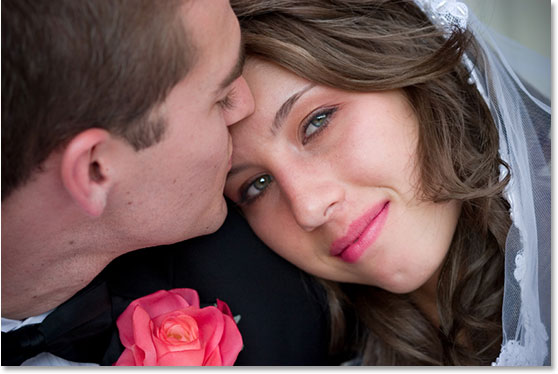
I want to bring more attention to the woman's face, especially her eyes, so I'm going to be using the Lens Blur filter to bring only those areas into focus, blurring out the rest of the image. The blurring effect we're going for here is fairly subtle, but once you're comfortable with the basics of the Lens Blur filter, you'll find yourself coming up with all sorts of wild and imaginative uses for it:

This tutorial is from our Photo Effects series. Let's get started!
Step 1: Duplicate The Background Layer
With our image open in Photoshop, the first thing we need to do for this effect is duplicate our Background layer, which is the only layer we currently have in our Layers palette and contains our original image:

We need to make a copy of this layer so that we avoid doing anything to our original image information. To make a copy of the layer, use the keyboard shortcut Ctrl+J (Win) / Command+J (Mac). Photoshop duplicates the layer for us, places the copy above the original Background layer in the Layers palette, and names the copy "Layer 1":

Step 2: Add A New Channel
At the beginning of this tutorial, I mentioned that we can use something called a Depth Map with the Lens Blur filter to specify how much blurring to apply to different areas of the image, and we're going to begin creating our Depth Map right now. The term "Depth Map" is really nothing more than a cool name for what is essentially just a selection in Photoshop, and to create one, we first need to add a new channel, so switch over to your Channels palette which you'll find by default grouped in beside the Layers palette:

In the Channels palette, you'll see what looks like four layers, except that these are channels, not layers, and there's really only three of them. The one at the top, named "RGB", is just the composite of the three color channels below it, named "Red", "Green", and "Blue". The Red, Green and Blue channels combine to create all the colors we see in our image, and that's already more than we need to know for this tutorial, but if you want to learn more about them, be sure to check out our RGB and Color Channels Explained tutorial.
We need to add a new channel, so click on the New Channel icon at the bottom of the Channels palette (it's the icon directly to the left of the trash bin icon):

Photoshop adds a new channel for us below the other channels and names it "Alpha 1":

As soon as you add the new channel, you'll see your image turn completely black, and that's because what we're now looking at is the new channel, not the image, and the channel is currently filled with black. What we've just added here is called an alpha channel, as opposed to the color channels above it, which is why Photoshop named it "alpha 1". If alpha channels are new to you, don't worry about them. We'll cover alpha channels fully in another tutorial, but for now, alpha channels are just selections, the same as if you were creating a selection with the Rectangular Marquee Tool or the Lasso Tool. This is just a fancier way of making a selection, but it's still just a selection. In fact, if you were to drag out a selection with, say, the Lasso Tool and then save your selection, it would be saved as an alpha channel. We're going to be using this alpha channel to tell Photoshop where we want the blurring effect to be applied at full strength, where we want it to be applied at less than full strength, and where we don't want any blurring to be applied at all, and we're going to do that by painting on our alpha channel with white using the Brush Tool, as we'll do next.
Step 3: Select The Brush Tool
As I mentioned, we're going to be painting on our new alpha channel with white to create our Depth Map, and to do that, we need the Brush Tool, so select it from the Tools palette:

Step 4: Lower The Opacity Of The Brush To 50%
With the Brush Tool selected, go up to the Options Bar at the top of the screen and lower the brush's Opacity to 50%:

When creating our Depth Map, any areas we leave as pure black in the alpha channel will have the blurring effect applied to them at full strength. Any areas we paint with pure white will not have any blurring applied to them at all, and any areas we paint with some shade of gray will have blurring applied to them at various strengths depending on how close that shade of gray is to black (full strength blurring) or white (no blurring). By setting our brush to 50% opacity, this allows us to slowly build up areas of blurring and non-blurring as we paint on the alpha channel, instead of just saying "I want 100% blurring here and 0% blurring here" with nothing in between.
Step 5: Turn The RGB Channel On
Currently, our image is filled with black, which makes it a little difficult to see what we're painting over in the image, so let's fix that. While still in the Channels palette and with "Alpha 1" still active (you know it's active because it's highlighted in blue), click inside the empty box to the left of the "RGB" Channel at the top. When you do, you'll see the eyeball icon appear inside the box (it will also appear in the empty boxes of the Red, Green and Blue channels since, as I mentioned earlier, the RGB channel is just the composite of the other three channels), which tells us that the channel is now visible:

With the RGB channel visible, if we look back at our image, we see that it is no longer filled with solid black. Instead, it's overlayed with red which allows us to see our image underneath:

Don't worry, our image is not actually covered in red. We're still looking at the alpha channel, not the image itself. The red just makes it easier for us to see what we're doing. The areas overlayed with red at full strength (which at the moment is the entire image) represent areas filled with pure black on the alpha channel. As we paint with white on the alpha channel with our brush, which we'll do in a moment, we won't see white appearing in the image. Instead, the red will begin to disappear in the areas we paint over, as if we're erasing the red with our brush, revealing more of the original image in those areas. The less red there is covering an area, the less blurring will be applied there when we go to use the Lens Blur filter.
If we were to paint with white with our brush set to 100% opacity, we would be completely removing the red from any area we paint over, which would mean that no blurring at all would be applied to those areas, while 100% blurring would be applied everywhere else, giving us an "all or nothing" situation. But since we've lowered the opacity of our brush to 50%, the more times we paint over the same area, the more white we'll be adding to that area on the alpha channel and the more the red will disappear in that area in the image. This gradual build-up of white on the alpha channel (and gradual lessening of the blurring effect applied to the image) is what gives us so much control with the Lens Blur filter, much more than we could ever get using the Gaussian Blur filter, at least not without using a layer mask (although technically, the Lens Blur filter's Depth Map and a normal layer mask are really the same thing, but we'll save that for another tutorial).
Step 6: Paint With White On The Alpha Channel To Control The Blurring Effect
With my Brush Tool selected and my brush opacity lowered to 50%, I'm going to make sure my Foreground color is set to white so that I'll be painting with white, and then I'll begin creating my Depth Map by painting on the alpha channel to control how much blurring will be applied to different areas of the image.
For this image, I want to reduce the amount of blurring that will be applied to the woman's face in general, so with a large, soft-edged brush, I'm simply going to click once over her face:

To change the size of your brush, use the left and right arrow keys on your keyboard. The left bracket key makes the brush smaller and the right one makes it larger. To make the edges of your brush nice and soft, hold down your Shift key and press the left bracket key a few times. Holding Shift and pressing the right bracket key a few times makes the brush edges harder.
It's a bit hard to see in the image, but after clicking once over the woman's face, which added some white to that area on the alpha channel, some of the red in that area has disappeared. The area I clicked on will now have a bit less of a blurring effect applied to it when we go to use the Lens Blur filter. The rest of the image will have blurring applied at a full 100%.
I want to reduce the blurring amount even further over her eyes, nose and mouth, so I'm going to press my left bracket key a few times to reduce the size of my brush and then I'm going to paint in one continuous motion over her eyes, nose and mouth, making sure not to release my mouth button at any point while I'm painting so I maintain the same level of white across that whole area, which will maintain the same reduced blurring amount:

It's now becoming a bit easier to see that the red is disappearing from the areas I've painted on, as I increase the amount of white in those areas on the alpha channel. I think I want to reduce the amount of blurring even further over her lips and eyes, so I'm going to keep my brush the same size and just paint once again over those areas:

We can now definitely see the original image showing through the red in those areas, which means they will receive the least amount of blurring, and since we're using a soft-edged brush, we'll get smooth transitions between the different levels of blurring.
Finally, I want to really bring focus and attention to the woman's eyes so I don't want any blurring being applied to them at all. To make sure no amount of blurring is applied to them, I'm going to simply click a few times with my brush over each eye, filling those areas with pure white on my alpha channel and removing any hint of red from them in the image:

I've now completed the work on my alpha channel and I can go ahead and use it as my Depth Map with the Lens Blur filter, which I'll do next, but before we do that, if I want to see what my alpha channel really looks like, all I need to do is click once again on the eyeball icon to the left of the RGB channel in the Channels palette to turn the channel off again, which will leave only the "Alpha 1" channel visible, and I can now see exactly where I've painted with white on it at various opacity levels. The two areas that appear brightest on the alpha channel are where I clicked several times over her eyes:

We have our Depth Map. Now let's put it to work.
Step 7: Select The RGB Channel And Then Switch Back To The Layers Palette
Still in the Channels palette, click directly on the RGB channel at the top to actually select it rather than simply making it visible. This will turn off the alpha channel at the same time, and we'll see our image once again as we normally would in the document window:

Once you've selected the RGB channel, switch back to the Layers palette and make sure that "Layer 1" is currently selected. Just as with channels, the currently selected layer is highlighted in blue. Click on "Layer 1" to select it if it isn't already selected.
Step 8: Apply The Lens Blur Filter
We're ready to blur our image with the Lens Blur filter. To do that, go up to the Filter menu at the top of the screen, choose Blur, and then choose Lens Blur, which brings up Photoshop's rather large Lens Blur filter dialog box, with a large preview area for the image on the left and a column of options on the right. As I mentioned at the beginning of this tutorial, we won't be covering all of these options since there's only a few you really need to know about, and one of these options you need to know about is how to select the depth map we just created. At the top of the options column on the right, just below the "Preview" options where you can select from a faster preview or a more accurate preview depending on how powerful of a computer you have, you'll see the words Depth Map along with a Source option. This is where we select our alpha channel to use as the depth map. To do that, click on the down-pointing arrow to the right of the word "None" and choose Alpha 1 from the list:

By default, the Lens Blur filter will use the alpha channel in exactly the opposite way from what we wanted. The areas in the image where the alpha channel was filled with black will have no blurring applied to them while areas painted on with white will have blurring applied. That's not what we wanted. Fortunately, all we need to do to fix that is click inside the checkbox to the left of the word Invert to select that option, which tells Photoshop to treat our alpha channel the way we expected, blurring out the black areas, applying no blurring to white areas, and reducing the amount of blurring over gray areas:

To fine-tune the amount of blurring being applied to the image overall, simply adjust the Radius value by dragging its slider bar left or right, which is exactly what we would do if we were using the standard Gaussian Blur filter. Increasing the Radius value increases the amount of blurring, and decreasing the value reduces the blur amount. I'm going to set mine to about 10. You may want to set yours to a different amount depending on your image and the effect you're going for:

When you're happy with the results, click OK in the top right corner to exit out of the Lens Blur dialog box, and you're done! Here, after creating my depth map, selecting it in the Lens Blur filter and adjusting the overall blurring amount in the image with the Radius value, is my final result, with much more attention now being placed on the woman's eyes:
And there we have it! As I said, once you've used the Lens Blur filter a few times, there's no telling how many creative and imaginative uses you'll come up with for it! Visit our Photo Effects section for more Photoshop effects tutorials!