
Photo Effects With The Dissolve Blend Mode In Photoshop
If you were to round up a group of long-time Photoshop users and ask them to name a feature in Photoshop that they've never found a use for, there's a good chance the Dissolve blend mode would be mentioned over and over again. While other layer blend modes like Screen, Multiply and Overlay are some of the most important and often used features in all of Photoshop, the Dissolve blend mode, which creates a seemingly random "speckled" pattern as it blends layers together, is usually ignored.
Since no one likes to be the unpopular kid, I thought it would be fun to look at a couple of ways the Dissolve blend mode can be used to quickly add more interest to a photo. First, after applying a simple sepia tone effect to our image, we'll add a bit more of an artistic look to it by combining the Dissolve mode with one of Photoshop's filters. Then we'll see how to use Dissolve to easily create a speckled photo border! I'll be using Photoshop CS4 for this tutorial, but any recent version will work just fine.
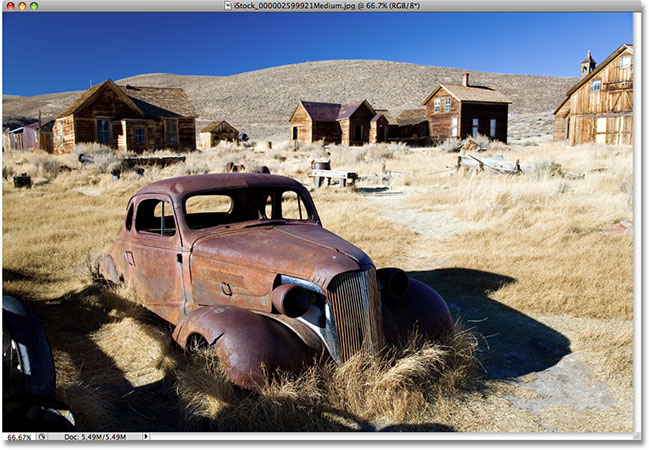
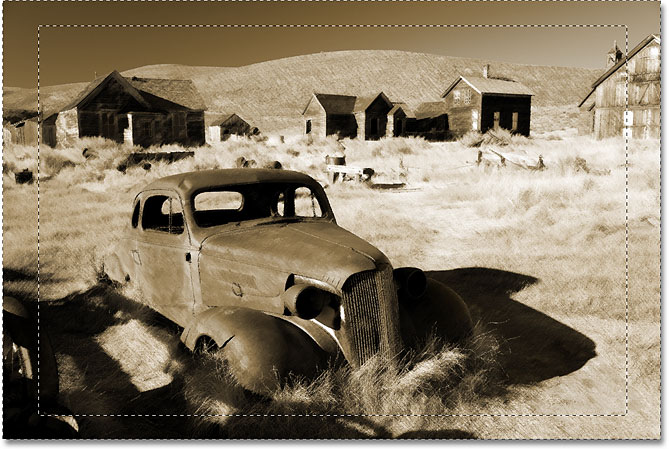
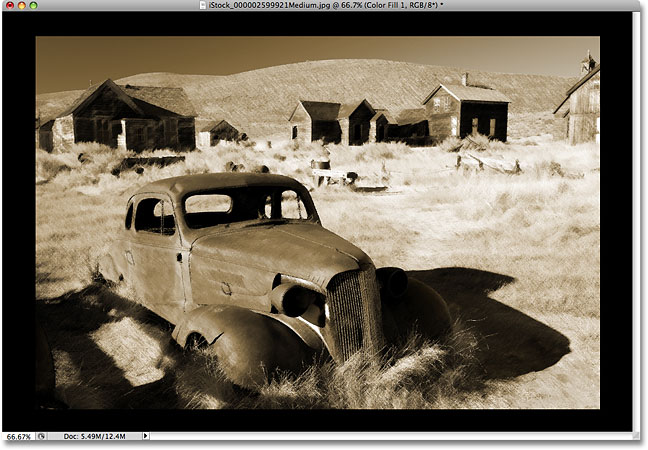
Here's the image I'll be using:
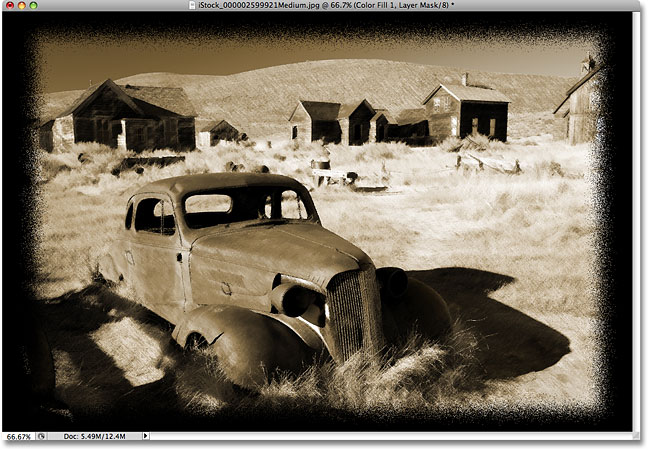
Here's how it will look when we're done:
How To Create Photo Effects With The Dissolve Blend Mode
Step 1: Duplicate The Background Layer
As usual, the first step in creating our photo effect is to duplicate the Background layer so that we don't damage our original image. To do that, go up to the Layer menu at the top of the screen, choose New, and then choose Layer via Copy. Or, for a much faster way to duplicate a layer, simply press the keyboard shortcut Ctrl+J (Win) / Command+J (Mac):
Either way tells Photoshop to create a copy of the Background layer, and if we look in the Layers palette, we can see that we now have two layers. The original image is sitting safely on the Background layer on the bottom, while a copy of the image is sitting directly above it. Photoshop has automatically named the new layer "Layer 1":
Step 2: Add A Hue/Saturation Adjustment Layer
Before we get around to using the Dissolve blend mode, let's first convert our color photo to a sepia tone. We can do that quickly and easily using a Hue/Saturation adjustment layer. Click on the New Fill Or Adjustment Layer icon at the bottom of the Layers palette. It's the circle split diagonally between black and white. Then choose Hue/Saturation from the list of adjustment layers that appears:
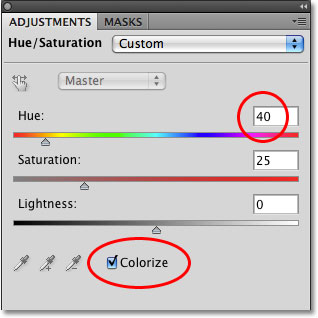
If you're using Photoshop CS3 or earlier, this will bring up the Hue/Saturation dialog box. If you're using Photoshop CS4 as I am here, the Hue/Saturation options will appear in the Adjustments Panel, which is new to Photoshop CS4. If we wanted to simply convert the image to black and white, we could do so by dragging the Saturation slider all the way to the left, which would remove all of the color, leaving us with a black and white photo. I'd rather make things a bit more interesting by adding a sepia tone effect. To do that, select the Colorize option at the bottom of the dialog box or Adjustments Panel, which will colorize the entire image using a single color. Then set the Hue value to around 40, either by dragging the Hue slider or by typing the value directly into the input box:
Step 3: Change The Blend Mode Of The Adjustment Layer To "Color"
Your image should now be colorized with a sepia tone. Let's make sure we're affecting only the colors in the image, avoiding any changes to the brightness values, by changing the blend mode of the adjustment layer. You'll find the Blend Mode option in the top left corner of the Layers palette. By default, it's set to Normal. Click on the word "Normal" or on the small arrows to the right of the word to bring up a list of all the available blend modes and choose the Color blend mode from down near the bottom of the list:
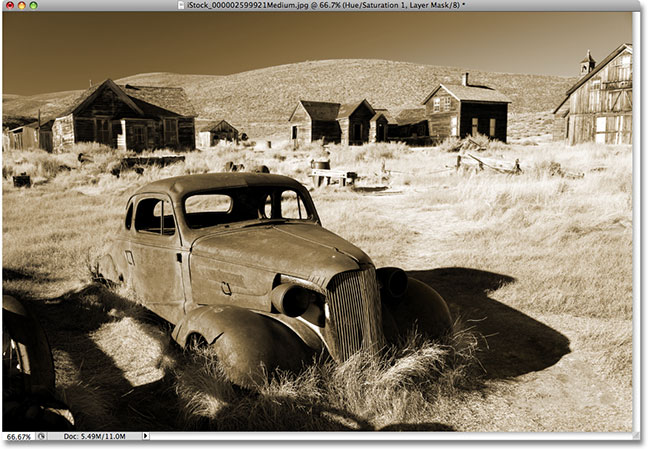
As we looked at in much more detail in our Photoshop's Five Essential Blend Modes For Photo Editing tutorial, the Color blend mode blends only the colors from the selected layer with the layer or layers below it. The brightness, or "luminosity" values, are left untouched. Here's my image after adding the sepia tone and changing the blend mode:
Now that we've added our sepia effect, let's add more of an artistic feel by combining the Dissolve blend mode with one of Photoshop's filters. We'll do that next!
Step 4: Select "Layer 1"
Currently, the Hue/Saturation adjustment layer is selected in the Layers palette. We know that because it's highlighted in blue. We're going to be applying one of Photoshop's filters to the copy of our image on "Layer 1", but before we can do that, we need to make "Layer 1" the selected layer. Click on it in the Layers palette to select it:
Step 5: Apply The "Angled Strokes" Filter
With "Layer 1" now selected, go up to the Filter menu at the top of the screen, choose Brush Strokes, and then choose Angled Strokes:
This brings up Photoshop's large Filter Gallery set to the Angled Strokes options along the right column. Set the Direction Balance, which controls the direction of the brush strokes, to 50, the Stroke Length to 15 and the Sharpness to 3 (these are the default settings so you may not have to change them at all):
Click OK to exit out of the Filter Gallery and apply the Angled Strokes filter to the image. The photo now appears more like a painting created by a series of diagonal brush strokes:
Step 6: Lower The Opacity of "Layer 1"
With "Layer 1" still selected, go up to the Opacity option at the top of the Layers palette and lower the layer's opacity down to 50%. This will blend the brush strokes in with the original image on the Background layer:
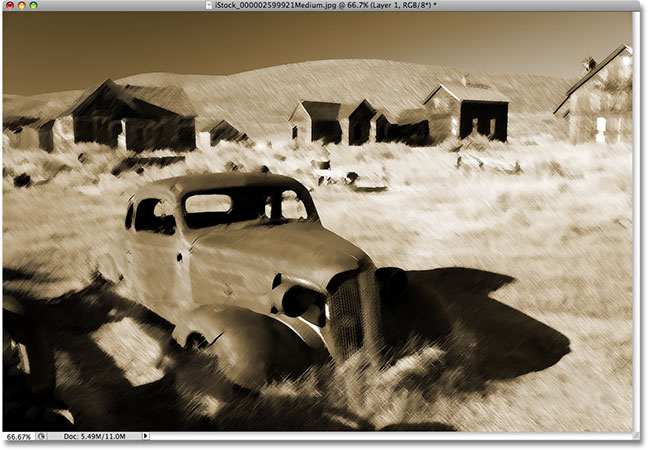
Step 7: Change The Blend Mode To "Dissolve"
Finally, go back up to the Blend Mode option at the top of the Layers palette and change the blend mode for "Layer 1" from Normal to Dissolve:
With the blend mode set to Dissolve, the brush strokes effect now has a speckled appearance, adding to the old fashioned look of the image (the speckles will be easier to see with your own image open in Photoshop than they are in the small screenshot):

Step 8: Select The Hue/Saturation Adjustment Layer
To create our speckled photo border, we're going to add a Solid Color fill layer which will serve as the color of the border. We need to place the fill layer above all of the other layers in the image. By default, Photoshop adds new layers directly above the currently selected layer, and at the moment, "Layer 1" is currently selected, which means that if we were to add a new layer right now, Photoshop would place it between "Layer 1" and our Hue/Saturation adjustment layer. That's not what we want. We want the new layer to be placed above the adjustment layer, which means we first need to select the adjustment layer by clicking on it in the Layers palette:
Step 9: Drag Out A Rectangular Selection
Before we add the Solid Color fill layer, let's select the area that we want to use as the photo border. First, we'll drag out a rectangular selection around the area of the photo that we want to appear inside the border. To do that, grab the Rectangular Marquee Tool from the Tools palette, or simply press the letter M on your keyboard to select it with the shortcut:
Then, with the Rectangular Marquee Tool selected, click inside the image and drag a selection around the area that you want to remain visible inside the border. The area outside of the selection will become the border. Try to keep the same amount of space around all four sides as you drag out the selection. If you need to reposition the selection as you're dragging it out, hold down your spacebar, drag the selection around with your mouse to reposition it, then release the spacebar and continue dragging:

Step 10: Invert The Selection
We now have the area that we want to appear inside the border selected. Problem is, what we really need is for the border area itself to be selected. Fortunately, all we need to do is invert the selection, which will deselect everything that's currently selected (the area inside the border) and select everything that's not currently selected (the border area). Go up to the Select menu at the top of the screen and choose Inverse, or use the handy keyboard shortcut for inverting a selection, Shift+Ctrl+I (Win) / Shift+Command+I (Mac):
It may not seem at first like anything has happened since the original selection outline still remains, but if you look closely, you'll see that a second selection outline has now appeared around the edges of the photo. The area between the two selection outlines is now selected and ready to become our photo border, while the area to appear inside the border is now deselected:
Step 11: Add A Solid Color Fill Layer
Click once again on the New Fill Or Adjustment Layer icon at the bottom of the Layers palette and this time, choose a Solid Color fill layer from the top of the list:
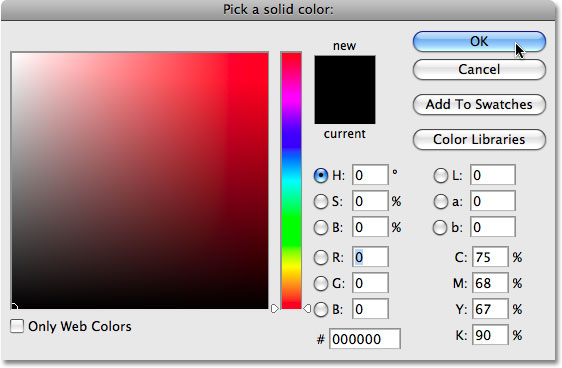
This brings up Photoshop's Color Picker, allowing us to select the color that we want to fill the layer with. I'm going to stick with the default color of black, so I'll just click OK to accept black as my fill color and exit out of the dialog box:
Normally, a Solid Color fill layer would fill the entire image with our chosen color, but because we had the border area around our photo selected when we added the fill layer, only the border area was filled with black:
Step 12: Select The Layer Mask
One of the great things about fill and adjustment layers in Photoshop is that they each come with a built-in layer mask. In fact, it's the layer mask for the Solid Color fill layer that's causing the solid black color to appear only in the photo border area. If we look in the Layers palette, we can see that the Solid Color fill layer (which Photoshop has named "Color Fill 1") contains a layer mask preview thumbnail. Notice how the large rectangular area in the center of the thumbnail is filled with black while the area around it is filled with white. The white represents the area in our document window where the fill layer is visible (the photo border). The black represents the area where the fill layer is not visible (the area inside the photo border).
To create our speckled border effect, we'll need to blur the edges of our photo border, which means we'll need to blur the layer mask. To do that, we'll need the layer mask selected, so click directly on the layer mask preview thumbnail in the Layers palette to select it. You'll know it's selected because a white highlight border will appear around the thumbnail:
Step 13: Change The Layer Blend Mode To "Dissolve"
Go back up to the Blend Mode option at the top of the Layers palette and change the blend mode for the Solid Color fill layer from Normal to Dissolve:

Step 14: Apply The "Gaussian Blur" Filter
With the layer mask now selected and the blend mode for the layer set to Dissolve, go up to the Filter menu once again, choose Blur, and then choose Gaussian Blur:
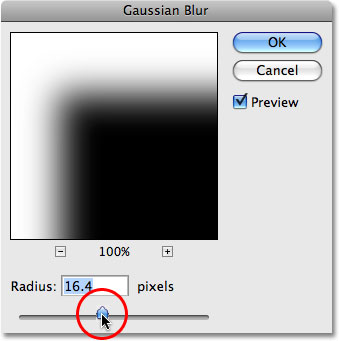
This brings up Photoshop's Gaussian Blur dialog box. Click on the Radius slider at the bottom of the dialog box and drag it towards the right to increase the amount of blurring that's applied to the layer mask, or drag it towards the left to decrease the blur amount. What we're doing here is blurring the edges of our photo border, and because we've set the layer's blend mode to Dissolve, the blurred edges will appear as a random speckled pattern. Keep an eye on your image in the document window as you drag the slider to judge the results. The more blurring you apply, the wider the speckled border will appear. The amount you end up using will depend entirely on your own personal preference. I'm going to set my Radius value to around 16 pixels, but again, your value may be different:
Click OK to exit out of the dialog box and apply the blurring to the layer mask. And with that, you're done! Here is my final result after adding the speckled photo border effect:
Photoshop's Dissolve blend mode may not be the most popular kid on the block, especially when it comes to serious photo editing, but as we've seen with a couple of examples in this tutorial, it does have potential when creating special effects. The next time you're looking for an interesting way to blend layers together, give the Dissolve blend mode a try and see what you come up with! Just remember that Dissolve only works with semi-transparent pixels, so you'll need to either be working with a layer mask as we did here when we created our photo border or you'll need to lower the opacity of the layer before you'll see any results with the Dissolve blend mode.