Film Strip Photo Collage in Photoshop – Part 1
In this two-part Photoshop photo effects tutorial, we'll learn how to create a fun photo collage using a simple film strip shape as a photo frame for multiple images.
In this first part of the tutorial, we'll draw the actual film strip itself using Photoshop's shape tools, then we'll save it as a separate document so we can easily re-use it any time we want without having to draw it all over again. In the second part of the tutorial, we'll use several copies of the film strip to create our photo collage.
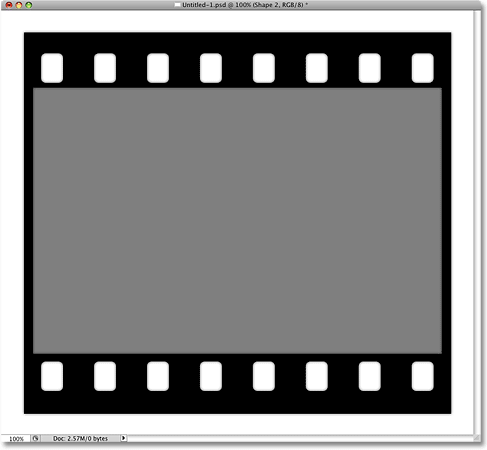
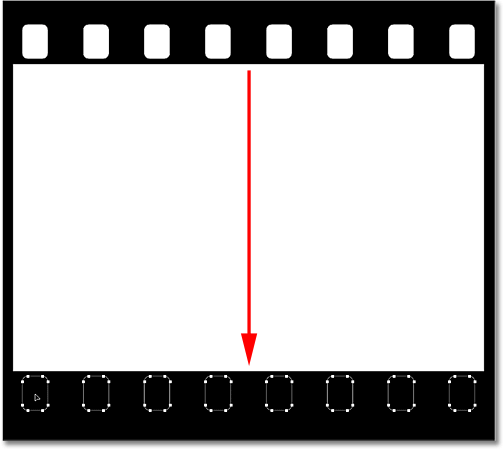
Here's the film strip shape we'll be drawing in this part of the tutorial. The gray area in the center is where we'll be adding our photos in part two of the tutorial:
How To Create A Film Strip Photo Collage
Step 1: Create A New Photoshop Document
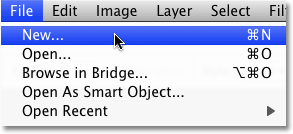
To begin, let's create a new Photoshop document by going up to the File menu at the top of the screen and choosing New, or press Ctrl+N (Win) / Command+N (Mac) to open a new document with the handy keyboard shortcut:
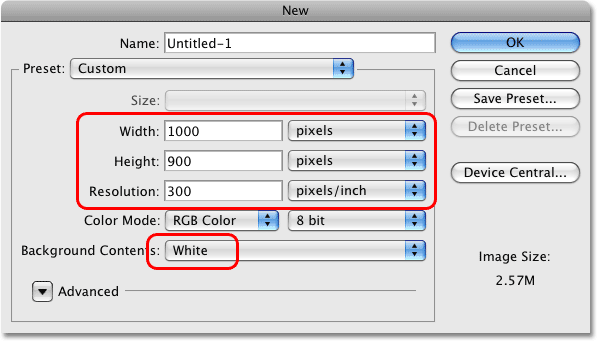
This brings up the New Document dialog box. Enter a value of 1000 pixels for the Width and 900 pixels for the Height, which should give us a good width-to-height aspect ratio for our film strip. Set your Resolution to 300 pixels/inch and make sure the Background Contents option is set to White:
When you're done, click OK in the top right corner of the dialog box to exit out of it. Your new document window will appear on your screen.
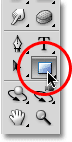
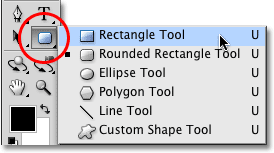
Step 2: Select The Rectangle Tool
To draw our film strip, we'll use Photoshop's shape tools, which allow us to draw vector-based shapes that can be easily resized as needed without any loss in quality. Since our film strip needs to be rectangular, select the Rectangle Tool from the Tools panel (not to be confused with the Rectangular Marquee Tool which is a selection tool, not a shape tool):
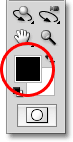
Step 3: Set Your Foreground Color To Black
When we draw a shape, Photoshop will initially set the color of the shape to our current Foreground color. We want the color of our film strip to be black, so before we draw the shape, let's set our Foreground color to black. Black is actually the default color for the Foreground, so yours may already be set to black. If not, press the letter D on your keyboard to quickly reset your Foreground and Background colors to their defaults. You'll find the Foreground and Background color swatches near the bottom of the Tools panel. The swatch in the upper left (the Foreground color) should now be showing black:
Step 4: Make Sure The "Shape" Option Is Selected
Photoshop gives us three different ways that we can use the various shape tools. We can use them to draw vector shapes (which is what we'll be doing here), we can draw paths, which are basically just outlines of shapes, or we can draw pixel-based shapes. We can select from these three options by clicking on the appropriate icon in the Options Bar at the top of the screen. Since we want to be able to resize our film strip as needed without any loss in image quality, we need to draw a vector shape, so click on the Shape layers icon in the Options Bar (the icon on the left):

Step 5: Drag Out A Large Rectangular Shape
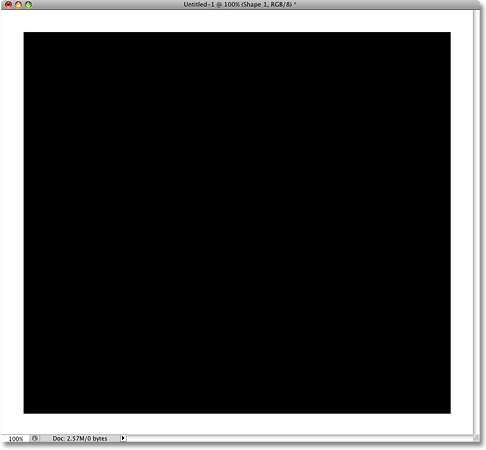
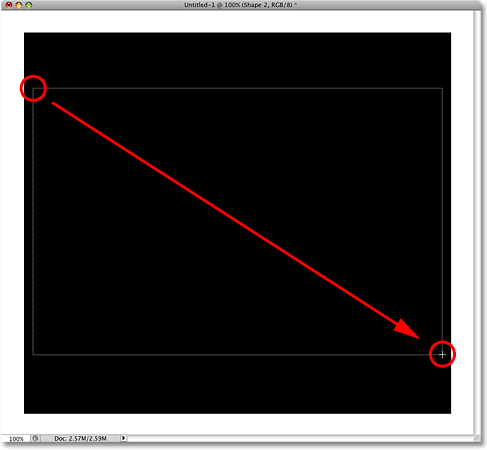
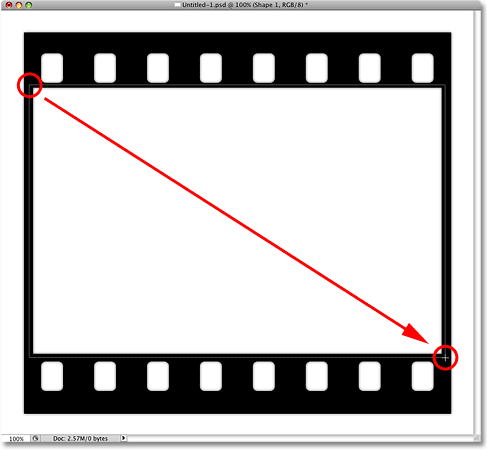
With the Rectangle Tool selected, black as our Foreground color and the Shape layers option selected in the Options Bar, we're ready to begin drawing our film strip. Click near the top left corner of the document window and, while holding your mouse button down, drag towards the bottom right corner. You'll see an outline of your shape appearing as you drag:

Try to keep an equal amount of space around the edges of the shape as you drag. When you get near the bottom right corner, release your mouse button. Photoshop draws the rectangle shape and fills it with black:
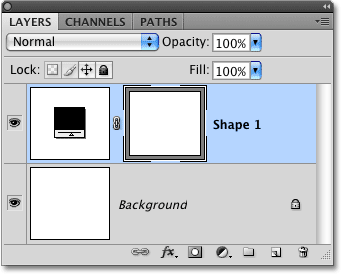
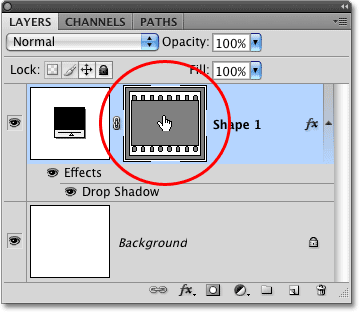
If we look for a moment in our Layers panel, we can see that we now have a brand new shape layer named "Shape 1" sitting above the Background layer. Vector shapes always appear on their own layers so there's no need to add a new layer first before drawing a shape:
Step 6: Switch To The "Subtract From Shape Area" Mode
Now that we have our initial rectangle shape, we need to cut some holes out of it to make it look more like a film strip. First, we'll cut out a large rectangular hole in the center which will serve as the main photo area. If you look up in the Options Bar, you'll see a row of five icons, each showing a different layout of squares. The icon in the middle is the Subtract From Shape Area option. Click on it to select it:

Step 7: Draw Another Rectangular Shape In The Middle Of The Initial Shape
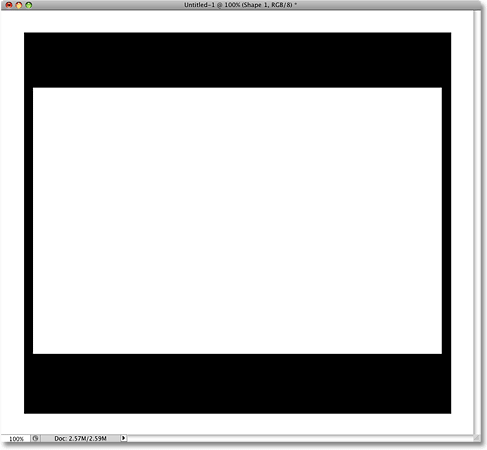
The "Subtract From Shape Area" option allows us to remove part of our existing shape. With the Rectangle Tool still selected, draw a second rectangular shape, this time in the center of the existing rectangle. Just as we did a moment ago, click once to set the top left corner of the rectangle, then keep your mouse button held down and drag towards the bottom right corner. You'll see an outline of the shape appearing as you drag. This is the area that will be cut out:
Release your mouse button when you're done. This time, rather than adding a new shape to the document, Photoshop cuts a hole in the initial rectangle, creating the main area where our photos will appear later:
Step 8: Select The Rounded Rectangle Tool
To draw the notches along the top and bottom of the film strip, we'll use the Rounded Rectangle Tool, which is similar to the Rectangle Tool except that, as its name implies, the corners are rounded rather than sharp. Normally, we select tools from the Tools panel, but whenever we have a shape tool selected, we can easily select any of Photoshop's other shape tools directly from the Options Bar. Click on the Rounded Rectangle Tool icon in the Options Bar to select it:

Step 9: Set The Radius Value To 10 px
We can control the roundness of the corners with the Radius value in the Options Bar. The higher the radius, the more rounded the corners will be. Set your Radius value to 10 px (pixels):

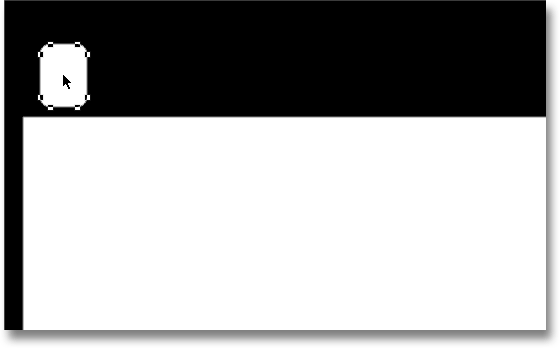
Step 10: Draw A Rounded Rectangle Shape To Create The First Notch
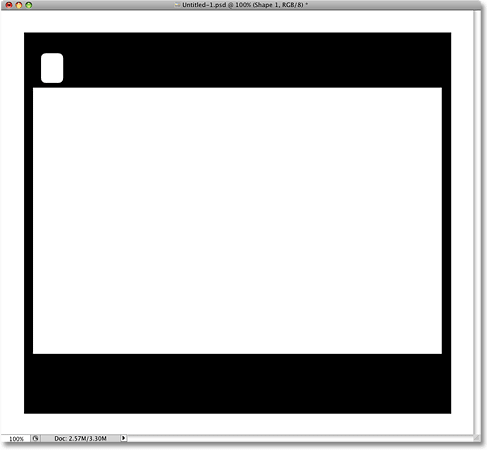
Make sure the "Subtract From Shape Area" option is still selected in the Options Bar, then click and drag out a small rounded rectangle shape in the left of the black border area along the top of the film strip:

Release your mouse button when you're done. Photoshop uses the shape to knock out the first notch in the film strip:
Step 11: Select The Path Selection Tool
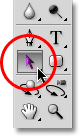
Now that we've drawn our first notch, we can use it to add all the other notches along the top and bottom of the film strip without having to actually draw any of them! Select the Path Selection Tool from the Tools panel (the black arrow). You can also quickly select it by pressing the letter A on your keyboard:
With the Path Selection Tool selected, click inside the notch we just added. This will select the shape. You'll see a thin outline, along with anchor points (little squares) appear around it letting you know that the shape is selected:
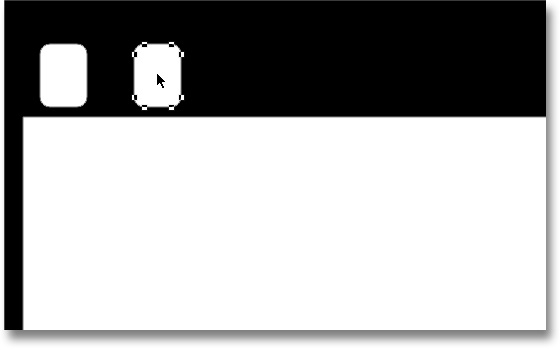
Step 12: Drag Out A Copy Of The Shape
With the shape selected, hold down Shift+Alt (Win) / Shift+Option (Mac) and drag towards the right. The Alt / Option key tells Photoshop to create a copy of the shape as you drag, while the Shift key limits the direction you can drag in, making it easier to drag straight to the right and not on some weird angle. When you're done, release your mouse button to create a second notch along the top of the film strip:
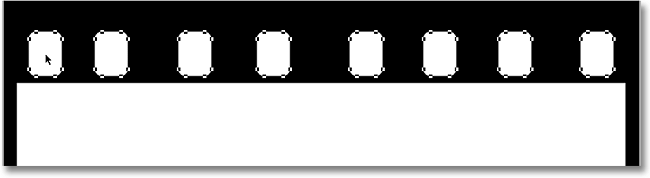
Step 13: Drag Out Six More Copies Of The Shape
Continue dragging out more copies of the shape to create the remaining notches along the top of the film strip by holding down Shift+Alt (Win) / Shift+Option (Mac), clicking on the last shape you added, dragging a copy of it towards the right, then releasing your mouse button. Don't worry about the spacing for now, we'll fix that in a moment. You should have a total of eight notches along the top of the film strip when you're done:

Step 14: Select All Notches Along The Top Row
Once you've added all eight notches along the top row, hold down your Shift key and, with the Path Selection Tool still selected, click on each notch until you have all of them selected at once:
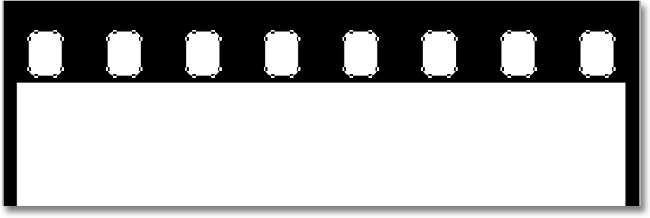
Step 15: Click The "Distribute Horizontal Centers" Option
With all notch shapes selected, click on the Distribute Horizontal Centers option up in the Options Bar:
This distributes the shapes evenly across the top of the film strip, correcting any spacing problems:
Step 16: Copy The Row Of Shapes Down To The Bottom Of The Film Strip
With all the notch shapes along the top row still selected, hold down Shift+Alt (Win) / Shift+Option (Mac) and drag the shapes down to the bottom border area of the film strip. Once again, the Alt / Option key tells Photoshop to make a copy of the shapes as we drag, while the Shift key limits the direction we can drag in, making it easy to drag straight down. You'll see an outline of the shapes appearing as you drag:
Once you have the shapes along the bottom border area, release your mouse button. Photoshop knocks the shape areas out of the bottom of the film strip, creating our second row of notches:
If we look at the shape layer in the Layers panel, we can see a thumbnail showing us a preview of what our shape looks like. This is called a vector mask thumbnail. You'll see a white highlight border around it, which tells us that the shape is currently selected. Click directly on the thumbnail to deselect the shape since we're done drawing it at this point. The white highlight border around the thumbnail will disappear:
Step 17: Add A Drop Shadow
Our basic film strip shape is now complete, but let's give it a bit of depth by adding a slight drop shadow. Click on the Layer Styles icon at the bottom of the Layers panel and select the Drop Shadow style from the top of the list that appears:

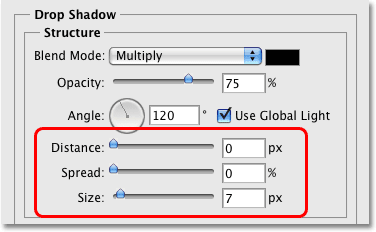
This brings up Photoshop's Layer Style dialog box set to the Drop Shadow options in the middle column. Set the Distance of the shadow to 0 px, the Spread to 0% and the Size of the shadow to 7 px:
Click OK in the top right corner of the Layer Style dialog box when you're done to exit out of it. The film strip now appears with a faint shadow behind it, although it will be easier to see in your document than it is in the small screenshot here:

Step 18: Select The Rectangle Tool Once Again
To finish off our film strip, we'll add a final rectangle shape which will be used to define the area where the photos will appear when we add them later. Select the Rectangle Tool once again from the Tools panel. Since we had the Rounded Rectangle Tool selected a moment ago, you'll need to click on the Rounded Rectangle Tool in the Tools panel, then hold your mouse button down for a second or two until a fly-out menu appears showing the other tools available in that slot. Select the Rectangle Tool from the top of the fly-out menu:
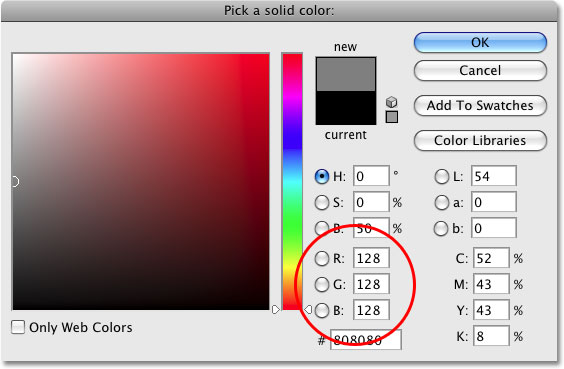
Step 19: Change The Color Of The New Shape To A Medium Gray
Before we add the new shape, let's change it's color to something other than black so we'll be able to see it against the black film strip. We already know that we can change a shape's color by changing Photoshop's Foreground color, but we can also change the color directly from the Options Bar when we have a shape tool selected. Click on the color swatch in the Options Bar:
This brings up Photoshop's Color Picker. Let's use a medium gray for the color. Enter a value of 128 for the R, G and B options in the bottom center of the Color Picker dialog box. This will give us our medium gray. Click OK when you're done to exit out of the Color Picker:
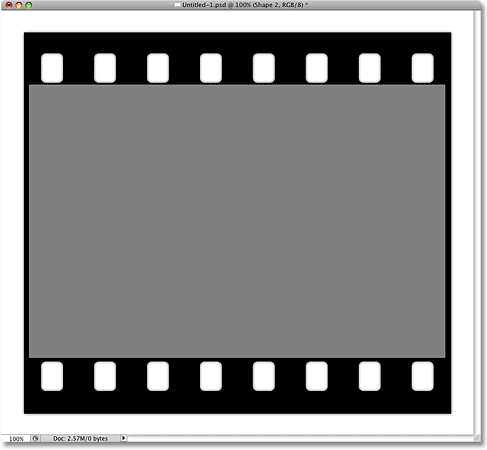
Step 20: Draw A Rectangle Shape To Cover The Main Photo Area
With the Rectangle Tool selected and gray as our shape color, draw another rectangle shape, this time slightly larger than the main photo area in the center of the film strip. Make sure, though, that the new shape doesn't extend over the notches along the top and bottom. We only want to cover the main photo area. Click just above and to the left of the main photo area to set the starting point for the shape, then keep your mouse button held down and drag to just below and to the right of the bottom right corner of the photo area:
Release your mouse button to have Photoshop draw the shape and fill it with the medium gray color we selected. The main photo area is now completely covered, while the notches along the top and bottom of the film strip remain visible:
Step 21: Delete The Drop Shadow From The New Shape
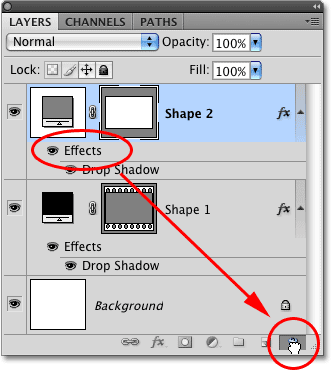
If we look in the Layers panel, we can see that our second shape has appeared on its own layer above the main film strip shape. And if we look directly below the shape layer, we can see that Photoshop has automatically applied the same Drop Shadow layer style that we added to the film strip. We don't need the shadow for our new shape, so let's get rid of it. Click on the word Effects, which will select all layer styles applied to a layer (even though in this case, we only have one), then keep your mouse button held down and drag it down on to the Trash Bin icon at the bottom of the Layers panel. Release your mouse button when the cursor is over the Trash Bin to delete the layer styles:
Step 22: Drag The New Shape Below The Film Strip
Currently, the second shape is appearing above the film strip. We need it to appear below the film strip, as if it's acting as a placeholder for the photos we'll be adding in later, which means we need to drag the shape's layer below the film strip layer. To do that, click on "Shape 2" in the Layers panel, then keep your mouse button held down and drag the layer directly between the Background layer and the film strip layer. You'll know you're in the right place when you see a highlight bar appear between the two layers:
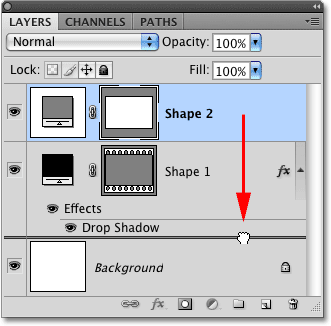
Release your mouse button when the highlight bar appears. The gray shape has now been moved below the film strip as we needed:
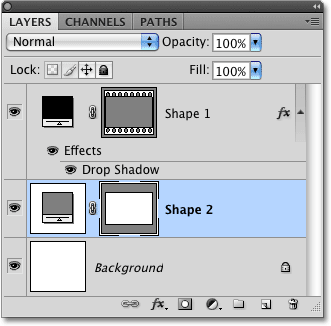
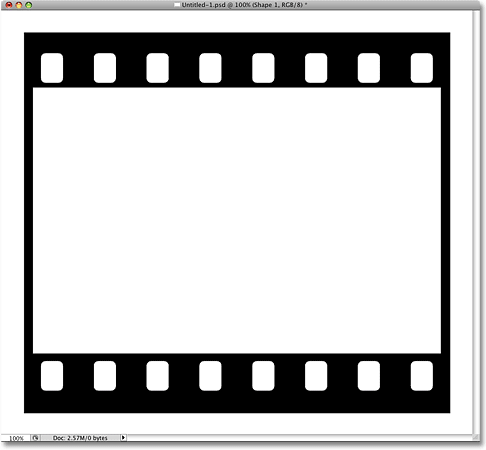
Click on the vector mask thumbnail for "Shape 2" in the Layers panel to deselect the shape, and we're done! Our film strip is now complete:
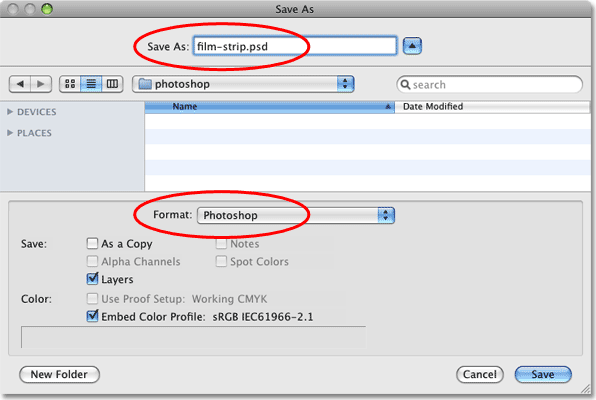
Step 23: Save The Film Strip As A Photoshop .PSD File
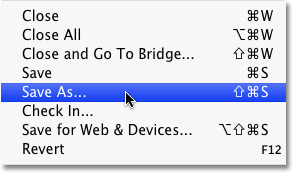
Unless you're getting paid by the hour, you probably won't want to redraw the film strip every time you want to use it, so let's save it as its own Photoshop document. This way, we'll be able to open it up and use it again any time we want. Go up to the File menu at the top of the screen and choose Save As:
This brings up Photoshop's Save As dialog box. I'm going to name my document "film-strip.psd". Make sure you choose Photoshop as the format, then save the file to a location that you can easily remember. I'm going to save mine to a "photoshop" folder I have on my desktop. Click the Save button when you're ready to save the file: