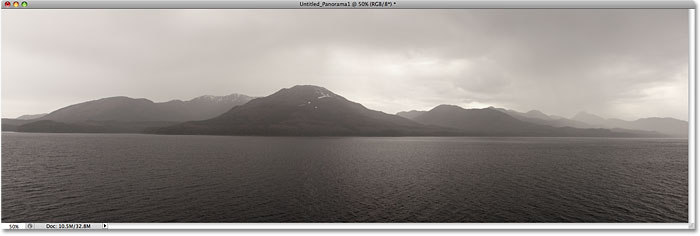
Create Cinematic Panoramas With Photomerge In Photoshop CS4
In this Photoshop tutorial, we'll look at how easy it is to create a seamless, cinematic-style panorama from multiple images using Adobe Bridge and Photoshop CS4. Photoshop has been somewhat capable of creating panoramas for quite a while now, but it wasn't until Photoshop CS3 came along with its dramatically improved Photomerge command that its ability to stitch photos together really began to shine.
Photoshop CS4 takes things even further with some additional new features, including the ability to remove vignetting from photos, a common problem with wide angle images that used to result in panoramas having different brightness values as you moved across them from left to right.
To get the most out of Photoshop's Photomerge command, it's highly recommended that you use a tripod when taking your photos, although it's not entirely necessary as long as you remain standing in the same spot as you snap the images and don't wander around. You'll want to lock in your exposure, focus and focal length so they remain constant in each photo. It's also very important that you overlap each image by at least 25% so that Photoshop has enough detail to compare between images when trying to stitch them together.
If you're shooting with a wide angle or fish eye lens where a lot of geometric distortion occurs in the images, you'll want to double or even triple that amount since Photoshop will need much more information to work with. Finally, keep in mind that the more photos you're stitching together, the more memory Photoshop will require since it needs to open all the images at once. If your digital camera shoots massive-size files, it may be a good idea to save smaller versions of the photos first and work with those, otherwise Photoshop may slow to a crawl or may even run out of memory before the panorama is completed.
Lastly, while it is possible to do everything we're about to do directly in Photoshop, it's easier and more convenient to first select the images you want to use inside Adobe Bridge and then select the Photomerge command also from inside Bridge, so that's what we'll be doing in this tutorial.
How To Create Panoramas With Photomerge
Step 1: Select The Photos Inside Adobe Bridge
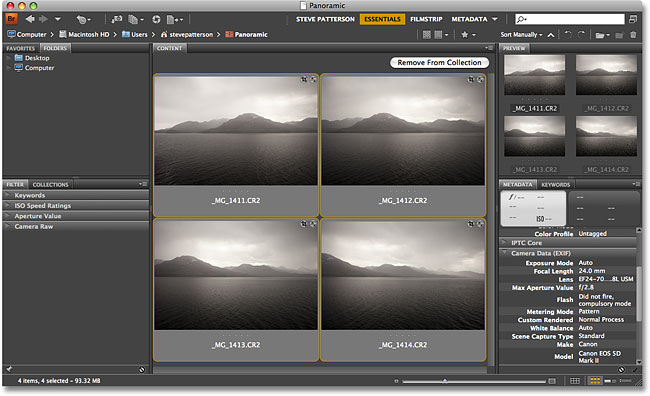
Before we can stitch any images together, we first need to select the ones we want to use. Open Adobe Bridge if it's not open already and navigate to the folder or collection than contains your images. Select all of the images at once by clicking on the first one to select it, then holding down your Ctrl (Win) / Command (Mac) key and clicking on the others until you have them all selected. Or, if all of the images you want to use are in a row one after the other, simply click on the first one to select it, then hold down your Shift key and click on the last image. This will select the first and last images plus all the ones in between. In my case, I have four images that I want to stitch together, so I'll select all four of them:
Step 2: Select The Photomerge Command
With all the images now selected, go up to the Tools menu at the top of the screen (while still inside Adobe Bridge), choose Photoshop to view some Photoshop-specific options, and then choose Photomerge:

Step 3: Select Your Options In The Photomerge Dialog Box
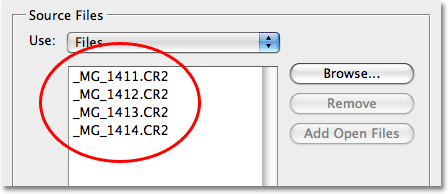
Photoshop will open automatically at this point if it wasn't open already and the Photomerge dialog box will pop open on your screen. If you look in the top center of the dialog box, where it says Source Files, you'll see a list of all the images we selected in Adobe Bridge, which means they're already loaded into the Photomerge command for us and ready to go. If we had selected Photomerge from inside Photoshop, which we could have done by going up to the File menu, choosing Automate and then choosing Photomerge, we would have had to click on the Browse button and then navigate to the images to select them, so we saved ourselves a bit of time with Bridge.
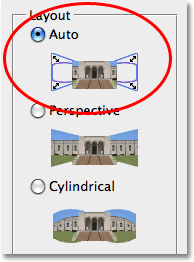
Along the left side of the Photomerge dialog box are the Layout options, which are basically different ways that Photoshop can try to align the images together. In most cases, the Auto option at the top works great so you'll definitely want to try that one first. If, for some reason, the Auto option doesn't give you the results you expected, you can always undo the command and try again with one of the other options, with Perspective, Cylindrical and Spherical usually being the three best choices. However, since Auto works almost every time and it's selected by default, you usually won't even have to worry about these Layout options:
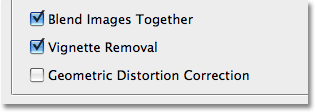
Finally, at the bottom of the Photomerge dialog box are three important options. The first one, Blend Images Together, is selected by default because it tells Photoshop not only to stitch the images together but also to blend their tone and colors. You'll always want this option selected. New to Photoshop CS4 is the Vignette Removal option which removes any shading in the corners or around the edges of the images most commonly caused by wide angle lenses. Vignetting used to create problems with panoramas because you ended up with different brightness levels as you moved from left to right, creating a "lighter, darker, lighter, darker" effect. If the images you're using have even a subtle amount of vignetting, you'll want to check this option to select it, otherwise you can leave it turned off. My images do have some vignetting so I'll select it. The third and final option, Geometric Distortion Correction, should be enabled if you shot your images with an extreme wide angle or fish eye lens, since they cause obvious distortion that needs to be dealt with. I don't have that problem with my images so I'll leave it unchecked:
Step 4: Run The Photomerge Command
Once you have all your options selected, click the OK button in the top right corner to exit out of the Photomerge dialog box and run the command. Photomerge in Photoshop CS3 and CS4 is really nothing more than a combination of two other commands, Auto-Align and Auto-Blend, both of which were introduced in Photoshop CS3, and as you wait patiently for Photoshop to do its thing, you'll first see your images appearing on separate layers in the Layers palette, followed by small dialog boxes appearing telling you that Photoshop is first aligning the images and then blending them together.
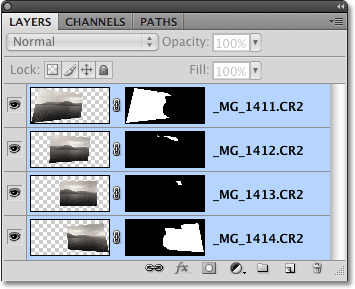
When it's done, if you look in your Layers palette, you'll see each of your images on its own separate layer, and each one now has its own layer mask created automatically by Photoshop when aligning the images:
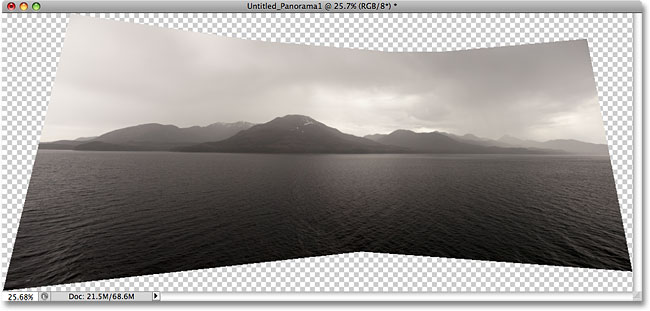
Your newly created panorama will appear in a new document window. We'll need to do some cropping in a moment to clear away all the weird looking sections, but Photoshop CS4 did a fantastic job of stitching everything together to create one seamless image:
Step 5: Crop Away The Unwanted Areas
All that's left to do now is crop away the unwanted areas. For that, we'll need Photoshop's Crop Tool so either grab it from the Tools palette or press the letter C on your keyboard to select it with the shortcut:

Then, with the Crop Tool selected, simply drag out a selection around the area you want to keep. Once you've dragged out an initial crop box, you can use the handles (the little squares) on the top, bottom, sides and corners to fine-tune the selection:
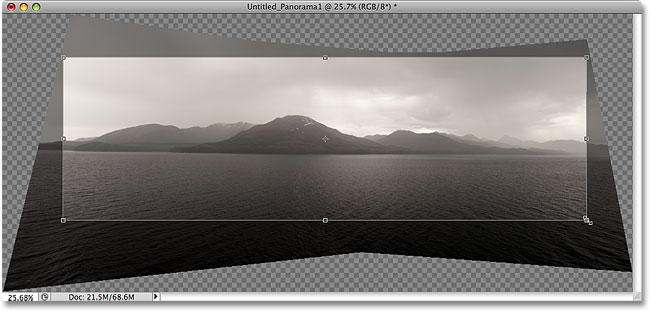
When you're done, press Enter (Win) / Return (Mac) to have Photoshop crop the image, keeping only the area you selected and throwing away everything else. And with that, you're done! Here, after only a few minutes worth of work and very little effort thanks to the amazing abilities of Photoshop CS4, is my final panorama:
