
Blend Photos Like A Hollywood Movie Poster With Photoshop
In this Photoshop Effects tutorial, we're going to learn how to blend photos together like a Hollywood movie poster. Blending photos is easy to do in Photoshop thanks to layer masks, yet finding two photos with similar colors isn't always so easy, and you end up with a photo effect that doesn't really seem to look right because the colors don't match.
With this technique, you don't need to worry about the colors in the images at all because we'll be removing them completely and adding our own colors to blend the two photos seamlessly. Any recent version of Photoshop will do, but Photoshop CC and CS6 users in particular will want to check out the updated version of this tutorial.
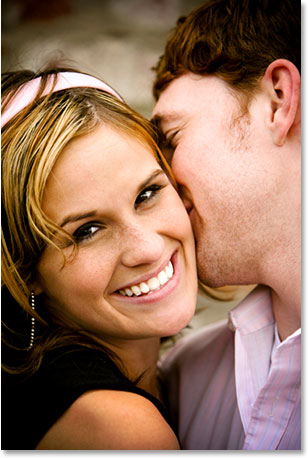
Here's the first photo I'll be using:
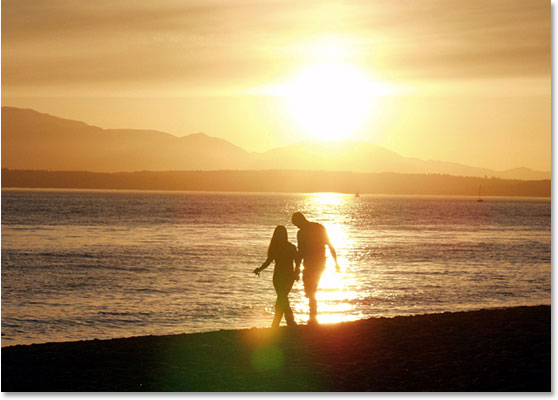
Here's the image I want to blend it with:
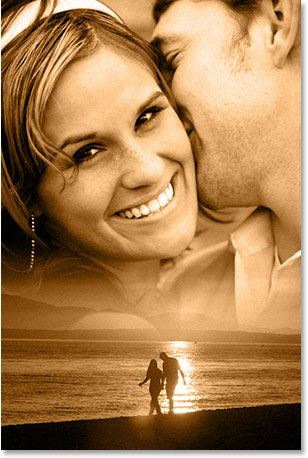
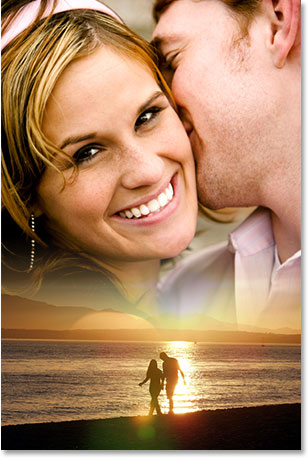
And here's what the final effect will look like:
This tutorial is from our Photo Effects series. Let's get started!
Step 1: Drag One Image Into The Document Window Of The Other Image
The first thing we need in order to blend our two images together is for them to both be in the same document. To do that, with both of my images open on the screen in their own separate document windows, I'm going to grab my Move tool from the Tools palette, or I could press the letter V on my keyboard to quickly select it:

Then with my Move tool selected, I'm going to click anywhere inside the image of the couple walking on the beach to make that document window active, and I'm simply going to drag the image into the other document window:

When I release my mouse button, both images appear inside the same document, one on top of the other:

I can also see both images now on their own separate layers in the Layers palette:

Step 2: Resize And/Or Reposition The Images As Needed
Now that I've dragged the beach photo into the other document, I need to resize it, and I can do that easily with Photoshop's Free Transform command. With the beach photo layer selected in the Layers palette, I'm going to use the keyboard shortcut Ctrl+T (Win) / Command+T (Mac) to bring up the Free Transform box and handles around the image.
Problem is, this image is in "landscape" mode, meaning its width is longer than its height, and I've dragged it into a document containing an image that's in "portrait" mode (its height is longer than its width), so even though Photoshop has placed the Free Transform box and handles around my image, I can't see any of the corner handles because the sides of the image are extending out beyond the viewable area of the document.
To fix that, all I need to do is press Ctrl+0 (Win) / Command+0 (Mac) to fit everything onto the screen:

Now that I can see my corner handles, I can resize my image by dragging any of the corner handles inward in order to fit more of the image into the viewable document area. Since I don't want to distort the image, I'm going to hold down my Shift key as I'm dragging the handles to constrain the width and height proportions:

When I'm happy with the new size of my image, I'm going to press Enter (Win) / Return (Mac) to accept the transformation.
The beach image looks good, but the image of the couple behind it needs to be moved up higher. Again, there's a slight problem. The image is on the Background layer:

If I select the layer in the Layers palette and then click inside the document and try to drag the image up with my Move tool, Photoshop is going to complain and give me this pop-up message:

The warning message is telling me that Photoshop can't move the image because the layer is locked, and the reason it's locked is because it's the Background layer. Photoshop treats Background layers differently from normal layers, and one of the things you can't do with images on the Background layer is move them. To get around that problem, all we need to do is rename the Background layer, and the quickest way to do that is to simple hold down Alt (Win) / Option (Mac) and double-click directly on the word "Background". Photoshop will automatically rename the layer "Layer 0":

Just like that, the layer is no longer a special Background layer, and we're now free to move the image on the layer. With my Move tool still selected, I'm going to click inside the document and drag the photo of the couple up higher. Since I want to make sure I'm dragging straight up and not accidentally dragging the image a little off to either side, I'm going to once again hold down my Shift key as I'm dragging:

Step 3: Add A Layer Mask
Once you've resized and/or repositioned your photos in the document the way you like them, we can begin blending them together. The first thing we need is a layer mask, and we're going to add it to the layer on top ("Layer 1"), which is my case is the layer containing the beach photo, so I'm going to click on that layer in the Layers palette to select it. Then, click on the Add A Layer Mask icon at the bottom of the Layers palette:
We can now see the layer mask thumbnail added to the top layer:

Notice that the layer mask thumbnail has a white highlight border around it. That's telling us that the layer mask, not the layer itself, is currently selected, which is what we want.
Step 4: Drag Out A Black to White Gradient On The Mask To Blend The Two Images
Select your Gradient tool from the Tools palette, or press G to quickly access it with the keyboard shortcut:

Then, up in the Options Bar at the top of the screen, click on the down-pointing arrow to the right of the gradient preview area, which will bring up the Gradient Picker. Click on the black to white gradient in the top row, third from the left to select it:

Click anywhere else on the screen to close out of the Gradient Picker once you've selected the gradient. Then, back in your document, hold down your Shift key and drag out a black to white gradient to blend the two images together. Because you're dragging the gradient on the layer mask, not the layer itself, you won't see your gradient. Instead, you'll see the two images blend together. Start at the top of where you want the transition from one image to the other to begin, which in my case is the top of the beach photo, and drag down to the point where you want the transition to end. I want my transition to end where the water and land meet, so I'm going to click just below the top of my beach photo and drag straight down to just above the water line:

Release your mouse button, and the two images blend together at the location where you dragged out the gradient:
If you're not happy with how your two images have blended together, simply press Ctrl+Z (Win) / Command+Z Mac to undo and try dragging the gradient again.
Related tutorial: 3 Ways To Blend Images Together In Photoshop
Step 5: Merge Both Layers Onto A New Layer
With "Layer 1" still selected in the Layers palette, press Shift+Ctrl+Alt+E (Win) / Shift+Command+Option+E (Mac) to merge both layers onto a new layer above it, which Photoshop will name "Layer 2":

Step 6: Desaturate The Layer
We're going to remove all the color from the image at this point so we can add our own color, which we'll do in a moment. To remove the colors, press Shift+Ctrl+U (Win) / Shift+Command+U (Mac) to desaturate the layer:

Step 7: Add Noise
Let's add a little noise to the image to help the two photos blend more seamlessly together. Go up to the Filter menu at the top of the screen, choose Noise, and then choose Add Noise. This brings up the Add Noise dialog box. Set the Amount to somewhere between 2-6% depending on the pixel dimensions of your image. I'm working on a low resolution image for this tutorial, so I'm going to set mine to 2% just to add a hint of noise. Make sure Distribution is set to Gaussian, and also make sure the Monochromatic option at the very bottom is checked:

Step 8: Add A Solid Color Adjustment Layer
All that's left to do is add our own color to the image. For that, we're going to use a Solid Color fill layer. Click on the New Fill Or Adjustment Layer icon at the bottom of the Layers palette:
Then select Solid Color from the top of the list that appears:

Photoshop's Color Picker will appear. Choose the color that you want to use for your image. I'm going to select a light orange for my color:

Click OK once you've chosen a color to exit out of the Color Picker. Don't worry about choosing the "right" color at the moment because you can always change it later.
Step 9: Set The Layer Blend Mode To "Color"
After clicking out of the Color Picker, your image will now be filled completely with the color you chose, which isn't exactly what we wanted. To fix that, with the new Solid Color fill layer selected in the Layers palette, go up to the Blend Mode option in the top left corner of the Layers palette, click on the down-pointing arrow to the right of the word "Normal", and select Color from the list:

Your image will now be colorized with your chosen color rather than being blocked from view by it. If you decide you're not happy with the color you chose, just double-click on the Solid Color fill layer's color swatch icon in the Layers palette. When you do, the Color Picker will pop back up and you can choose a different color. Since the Solid Color fill layer is already set to the "Color" blend mode, you'll be able to see a live preview of how your current color choice looks with your image.
I'm going to stick with my initial color selection, and here, after changing the blend mode to "Color", is my final result:
And there we have it! That's how to blend photos like a Hollywood movie poster with Photoshop! Visit our Photo Effects section for more Photoshop effects tutorials!