
Adding Rain To A Photo With Photoshop
This step-by-step tutorial shows you how to create a rain effect in Photoshop that can easily be addded to any photo. Works with any version of Photoshop. For all skill levels.
Most of us would prefer to avoid being caught in the rain if possible, especially if we have our cameras with us. But what if you're one of a large number of people who enjoy taking photos of weather? Even if weather photography isn't your main interest, there's no denying that rain adds a whole new dimension to your images. So how do you capture photos of rain without getting your camera all wet?
Easy! Wait till it stops raining, take the picture, then add the rain back in using Photoshop, which is exactly what we're going to learn how to do.
This version of the tutorial is for Photoshop CS5 and earlier. Photoshop CC and CS6 users will want to check out our fully updated Photoshop Rain Effect tutorial.
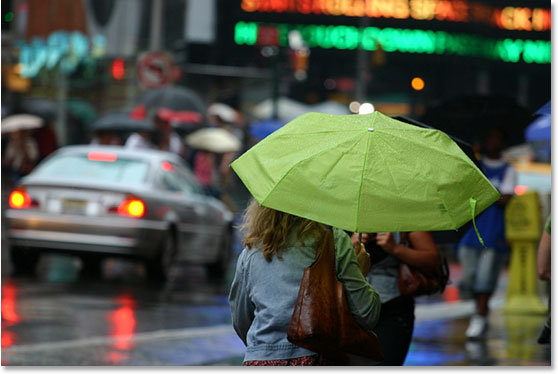
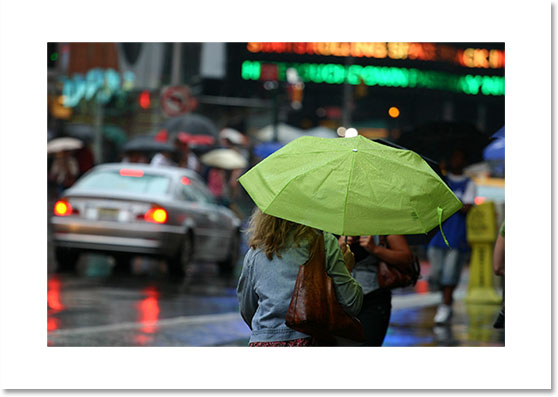
Here's the photo I'll be working with for this effect:
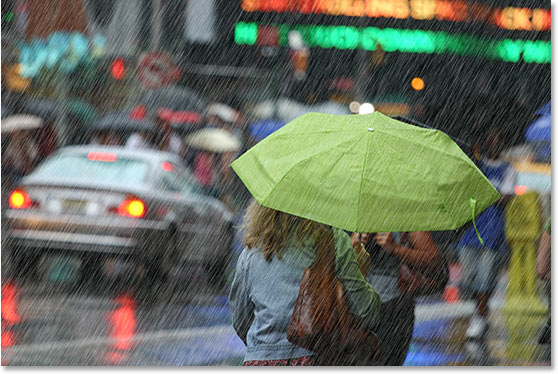
And here's the same image after adding the rain in Photoshop. It's really coming down out there!
This tutorial is from our Photo Effects series. Let's get started!
How To Create A Rain Effect With Photoshop
Step 1: Duplicate The Background Layer
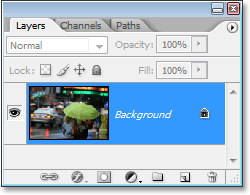
The first thing we need to do for this effect is duplicate our Background layer. With our image open in Photoshop, we can see in the Layers palette that we currently have one layer, which is named Background. This layer contains our original image:
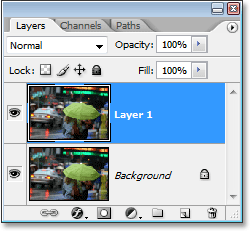
We need to create a copy of this layer, so let's use the quick keyboard shortcut, Ctrl+J (Win) / Command+J (Mac). Nothing will seem to have happened in the document window, but if we look again in our Layers palette, we can see that we now have two layers - the original Background layer on the bottom, and a copy of it, which Photoshop has named "Layer 1", above it:
Step 2: Add Some Extra Canvas Space Around The Image
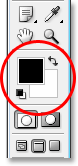
The next thing we're going to do is add some extra canvas space around the image. The reason is because we're going to be using the "Motion Blur" filter on the image, and the Motion Blur filter tends to run into problems when dealing with edges, so we're going to make things easier on it by giving it a little more space around the edges to work with. You'll see what I mean later on, but for now, let's add some extra canvas space. Before we do that though, let's reset our Foreground and Background colors in Photoshop by pressing D on the keyboard. This sets black as the Foreground color and white as the Background color. We can see this in the color swatches near the bottom of the Tools palette:
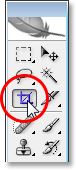
Now let's add our canvas space. For that, we'll use the Crop Tool. Select it from the Tools palette, or simply press C on your keyboard:
Then, with the Crop Tool selected, click and drag a selection around the entire image. If you're working with your image displaying inside a document window, press F on your keyboard to switch Photoshop to Full Screen Mode With Menu Bar, which will make things easier. Then just click outside the top left corner of the image and drag down below the bottom right corner.
When you release your mouse button, you'll see little square handles all around the image. Hold down the Alt (Win) / Option (Mac) key and drag either the left or right handle outward to add space on both sides of the image. Holding down Alt or Option tells Photoshop to move the handles on both sides at once, which makes things easier for us. Add an extra inch or two on the sides. Then do the same thing for the top and bottom. Hold down Alt/Option and drag either the top or bottom handle to add the same amount of space above and below the image. Don't worry about adding too much space because we'll be cropping it away later anyway. For now, it's better to add too much than not enough:

When you're done dragging out the handles, press Enter (Win) / Return (Mac), and Photoshop will fill the extra space with our current Background color which is white:
Step 3: Add A New Blank Layer
We need to add a new blank layer to our document at this point, so with the top layer selected in the Layers palette (you can tell which layer is selected by which one is highlighted in blue), click on the New Layer icon at the bottom of the Layers palette:
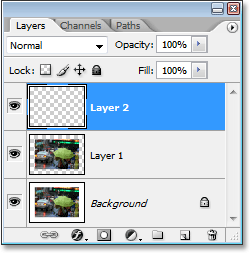
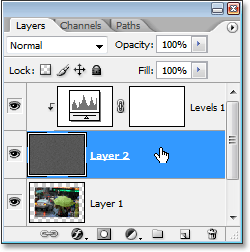
Photoshop adds a new blank layer for us above our other two layers. Again, nothing appears to have happened to the image itself, and that's because our new layer is currently blank, but we can see the new layer at the top of the Layers palette. Photoshop names it "Layer 2":
Step 4: Fill The New Layer With Black
We're going to fill the new layer with black. Since black is currently our Foreground color, we can use the easy keyboard shortcut Alt+Backspace (Win) / Option+Delete (Mac), which tells Photoshop to fill the layer with our Foreground color.
The image will now appear filled with solid black, temporarily hiding our photo from view.
Step 5: Add Noise To The Layer
Go up to the Filter menu at the top of the screen, choose Noise, and then choose Add Noise. This brings up Photoshop's "Add Noise" filter dialog box. Drag the Amount slider to the right to add a lot of noise to your image. There's no exact value to enter, just add a lot. I'm going to drag my amount to around 150%. Also, make sure the Monochromatic option at the bottom is checked:
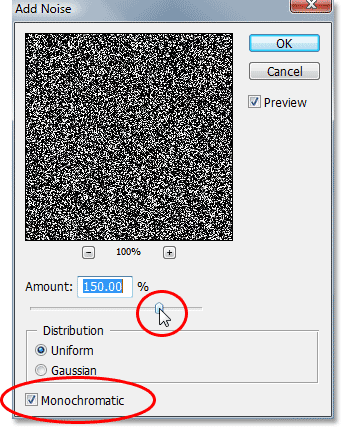
Click OK when you're done to apply the noise to the image and exit out of the dialog box.
Step 6: Apply The Gaussian Blur Filter To The Noise
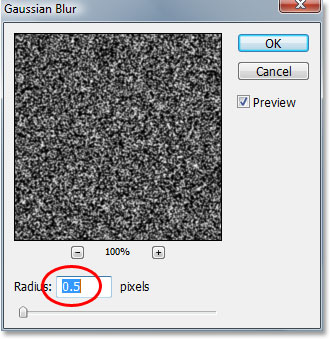
We need to add a small amount of blurring to the noise, so go back up to the Filter menu and this time choose Blur and then Gaussian Blur. This brings up the "Gaussian Blur" filter dialog box. All we need is a slight amount of blurring, so enter a value of about 0.5 for the Radius value, then click OK to exit out of the dialog box:
Step 7: Add A Levels Adjustment Layer
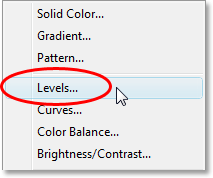
Remember how I just finished telling you to add a lot of noise to the image? Well, now we have way too much, but we're going to fix that using Levels. We're going to use an adjustment layer though so that we can go back and change the settings in Levels any time we want. We also want to make sure that our Levels adjustment layer is only affecting the noise layer and has no effect on any other layers, so to do that, hold down your Alt (Win) / Option key and click on the New Adjustment Layer icon at the bottom of the Layers palette:
Then drag your mouse up and select Levels from the list of adjustment layers:
Since we held down our Alt/Option key, Photoshop will pop up the New Layer dialog box before adding the adjustment layer. This is where we tell Photoshop that we only want this Levels adjustment layer to affect the layer below it, which will be the noise layer. To do that, click inside the checkbox to the left of where it says Use Previous Layer to Create Clipping Mask:
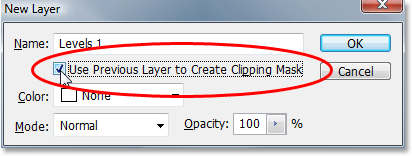
Click OK in the top right corner to exit out of the dialog box, and Photoshop adds the Levels adjustment layer for us. It also brings up the Levels dialog box, which we'll look at next.
Step 8: Reduce The Amount Of Noise And Increase Its Contrast
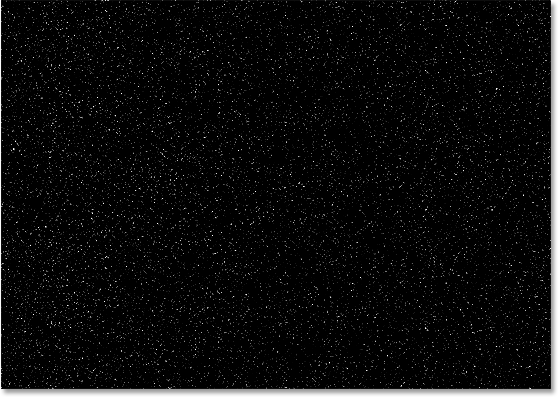
We're going to use Levels to both reduce the amount of noise we have and to boost the contrast in the noise that's left over. With the Levels dialog box open, you'll see a large graph in the top half. This is called a Histogram. We don't need to get into details about it here, but directly below the histogram, you'll see three sliders - a black one on the left, a white one on the right, and a gray one in the middle. Click on the black one on the left and begin dragging it towards the right.
As you do, you'll start to see some of the noise disappearing in the image. Then click on the white one on the right and begin dragging it towards the left, which will increase the contrast in the noise that's left over:
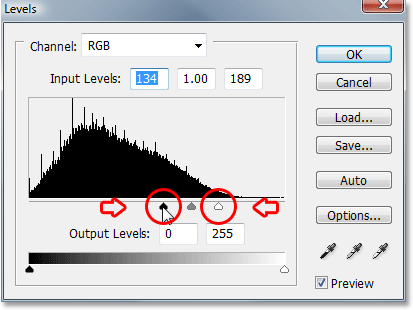
Don't worry about the gray slider in the middle. It will move on its own as you drag the black and white ones. You can use the screenshot above as a guide on how far to move the black and white sliders, or simply experiment on your own until your image looks less like a whole bunch of noise and more like a starry night:
Click OK in the top right of the Levels dialog box when you're done to exit out of it.
Step 9: Apply The Motion Blur Filter To The Noise
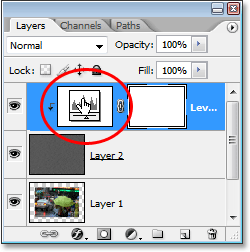
All of this noise that's left over in our image is going to become our rain. It doesn't look much like rain yet, but we're going to help it out by applying the "Motion Blur" filter, which is going to give our rain some movement and direction. Before we can apply the filter to the noise though, we first need to select it in the Layers palette, since we currently have the Levels adjustment layer selected. Click on "Layer 2" to select it:
Now that we have the correct layer selected, go back up to the Filter menu at the top of the screen, select Blur, and then select Motion Blur, which brings up the "Motion Blur" dialog box. You can set the direction that the rain is falling by adjusting the Angle option. I'm going to set my angle to about 60°. Then enter a value of about 50 pixels for the Distance, although you may need to experiment a little with that value depending on the size of your image, but 50 pixels works well for a standard 4x6 photo:

Click OK to exit out of the dialog box.
Step 10: Re-Adjust The Black And White Sliders In Levels As Needed
Depending on how far you dragged your black and white sliders in the Levels dialog box earlier, your noise may have now disappeared completely in your image after applying the Motion Blur filter. To bring it back, simply re-adjust the sliders by double-clicking directly on the thumbnail for the Levels adjustment layer in the Layers palette:
This brings back the Levels dialog box, and since we're using an adjustment layer, we can go back to re-adjust the sliders as often as we want without damaging our image. You'll probably need to drag the black slider back a little towards the left in order to bring your noise back into view, and you may want to drag the white slider a bit more to the left as well to add more contrast:
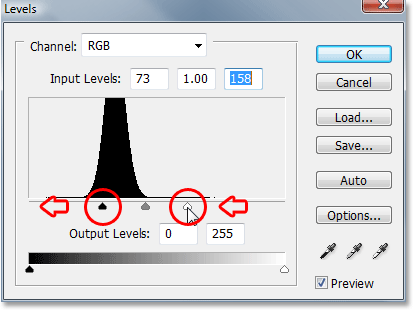
Again, you can use the screenshot above as a guide, but you're better off experimenting with the sliders while keeping an eye on your image. Once you've managed to bring the noise back, click OK to again exit out of the dialog box. Your image should now look something like this:

If you look closely along the top and bottom edges of the image, you'll see that things look a little strange, and that's because of the problem I mentioned at the beginning of the tutorial with the Motion Blur filter having trouble around edges. No worries though because we added extra space around the edges, so none of that problem area is going to affect our photo. In fact, we'll be cropping it away in the very next step.
Step 11: Crop Away The Extra Canvas Space
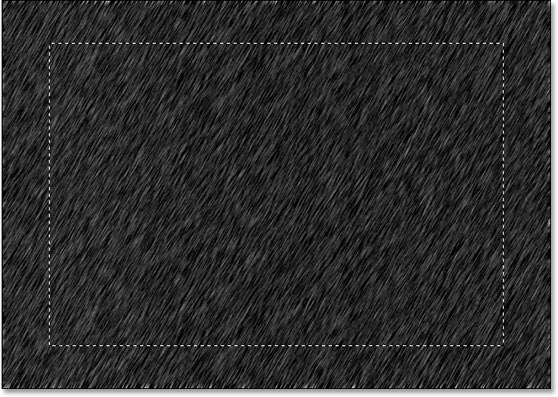
Now that we've applied our Motion Blur filter, we can crop away the extra canvas space we added earlier. To do that, right-click (Win) / Control-click (Mac) directly on the thumbnail for "Layer 1" in the Layers palette:
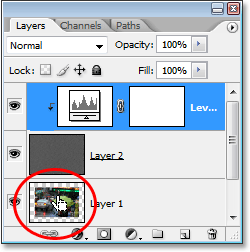
Layer 1 is the copy of our Background layer and it contains our original image before we added the extra canvas space. When you right-click (Win) or Control-click (Mac) on its thumbnail, you'll see a selection appear inside the document which is the exact size of our original image:
All we need to now is go up to the Image menu at the top of the screen and select Crop. Photoshop will crop the image around the selection, removing the extra canvas space and bringing our image back to the size it was when we started.
Once you've cropped the image, press Ctrl+D (Win) / Command+D (Mac) to remove the selection from the screen.
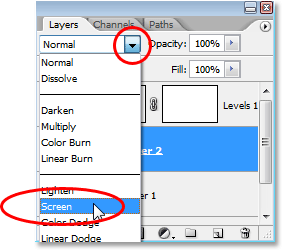
Step 12: Change The Blend Mode Of The Noise Layer To "Screen"
We're almost done. The only problem remaining is that the noise layer is still blocking our original image from view. To blend it in with the image and give us our rain effect, all we need to do is change the noise layer's blend mode. Select the noise layer ("Layer 2") in the Layers palette. Then go up to the top left corner of the Layers palette, click on the down-pointing arrow to the right of the word "Normal", which is the default blend mode, and select Screen from the list:
As soon as you change the blend mode, the original photo becomes visible in the document and our motion-blurred noise becomes the rain!
If you want to fine-tune the rain effect, simply double-click once again on the Levels adjustment layer's thumbnail in the Layers palette to bring back the Levels dialog box and re-adjust the black and white sliders until you're happy with the rain effect. Click OK when you're done to exit out of it.
Here is my final rain effect:
And that's how to add rain to a photo in Photoshop and avoid damaging your camera! Visit our Photo Effects section for more Photoshop effects tutorials!