
Giving A Photo Rounded Corners In Photoshop
Download the PDF: Giving A Photo Rounded Corners
In this Photoshop tutorial, we're going to look at how easy it is to create rounded photo corners. As with most things in Photoshop, there's about 17 different ways to create rounded corners, but we're going to make things interesting by looking at a way to do it using something in Photoshop that many people don't even know about - vector masks! What's a vector mask? Well, if you think layer masks are fun (you do think layer masks are fun, right?), you're going to love vector masks!
New Photoshop 2024 version here: How to Round Corners in Photoshop
Any graphic designer knows that one of the ways to get people feeling a certain way when they look at a design is through the use of shapes. Different shapes have different effects on us. Some shapes appear warm, friendly and fun, while others seem cold, rigid, more serious. You don't need to be a design expert though to experience this for yourself. Just grab a pencil and a piece of paper, draw yourself a square, then a circle, and ask yourself which one seems more appealing to you. Chances are, unless you're the type of person who enjoys spending Saturday nights reorganizing your filing cabinet (not that there's anything wrong with that), you'll pick the circle. People love circles. They're the "warm, friendly and fun" shapes. In fact, it doesn't even have to be a complete circle. You can take a square or a rectangle with its harsh, right-angled corners, which normally doesn't seem very fun to us at all, give it rounded corners instead, and suddenly it will seem like the life of the party!
Okay, so that may be exaggerating things a bit, but rounded corners definitely look more appealing to us than sharp right angles. It's a bit unfortunate then that every time we take a photo, even if it's a photo of a kid's birthday party with balloons and party hats, the photo still ends up with sharp corners. That may be fine if we're simply getting the photos printed, but what if we want to use the photo in a design or a collage? How do we convert those sharp corners into round ones?
The answer? Very easily, especially when we use a vector mask! In fact, not only can we give the photo
rounded corners, we have complete control over just how rounded they are!
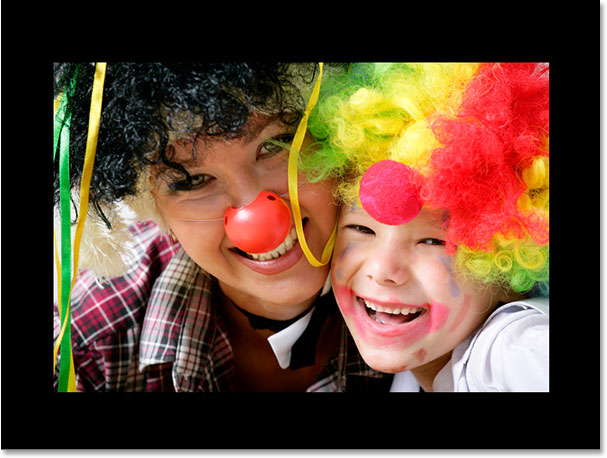
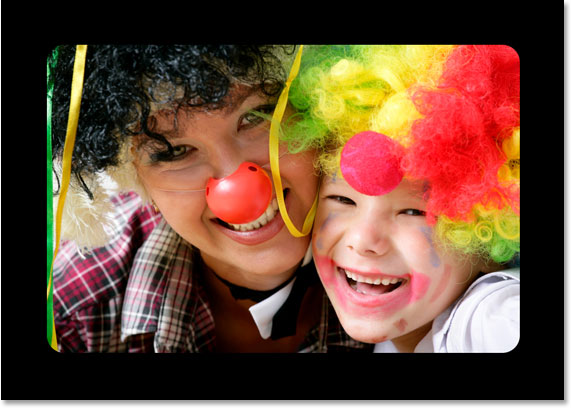
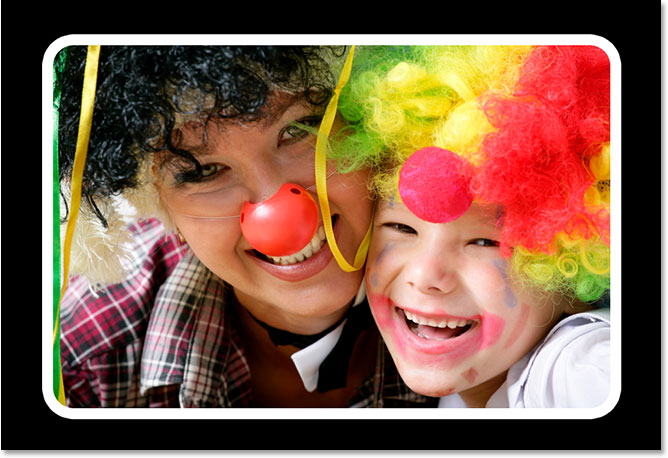
Here's the image I'll be using for this Photoshop tutorial:

This tutorial is from our Photo Effects series. Let's get started!
Step 1: Add A Layer Mask
I've opened a new blank Photoshop
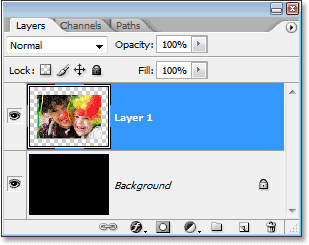
document, filled the Background layer with black to help make it easier for us to see what's happening, and then dragged my photo into the new document. We can see the document here, showing the photo in front of the black background:
And if we look in the Layers palette, we can see the photo sitting on its own layer, "Layer 1", above the Background layer:
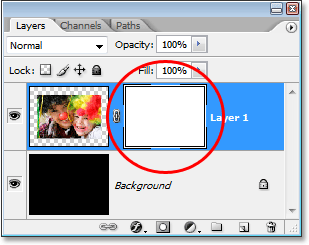
With "Layer 1", or whichever layer your photo happens to be on, selected, click on the Layer Mask icon at the bottom of the Layers palette:
Nothing will appear to have happened in your document, but if we look at the layer in the Layers palette, we can see that we now have a layer mask thumbnail to the right of the layer's preview thumbnail:
We won't be covering layer masks in this tutorial since we won't be using them, but if you want to learn more about layer masks, be sure to check out our full Understanding Layer Masks tutorial in our Photoshop Basics section.
Step 2: Add A Vector Mask
Okay, so if we're not going to be using the layer mask, why did we just add it? Well, we're about to do something that many people never do. We're going to see something that many people never see. Why? Because we're not "many people". We're different from them. Those people click on an icon once, see what it does, and then take a nap. It never occurs to them that maybe, just maybe, if they were to click on that exact same icon a second time, well, there's at least a slim chance that something else might happen! And it's too bad for them because in this case, something else will happen!
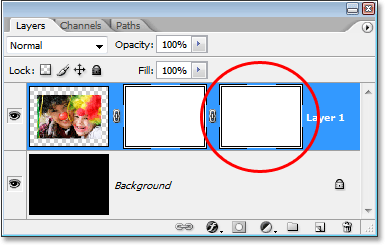
I know it sounds crazy, but now that we've added our layer mask, click once again on that exact same Layer Mask icon:
If you have "Show Tool Tips" enabled in your Photoshop Preferences, you may already have noticed something a little different when you hovered your mouse over the icon. No longer does the tool tip say "Add layer mask" like it normally does. Instead, it now says "Add vector mask", and as soon as we click on the icon, if we look at the layer in the Layers palette, we get what appears to be a second layer mask thumbnail to the right of the first one. The difference is, it's not a second layer mask thumbnail. It's a vector mask thumbnail:
Both the layer mask thumbnail on the left and the vector mask thumbnail on the right look exactly the same, but there's a big difference between a layer mask and a vector mask. Both are used to show and hide different parts of the layer, but the way they go about it is completely different. With a layer mask, we paint on it, usually with the Brush Tool, to make different parts of the mask either white, black, or some shade of gray in between. White makes that part of the layer visible, black hides it, and gray makes that area partially visible depending on how light or dark the shade of gray is.
Vector masks, on the other hand, don't require any painting at all. In fact, you can't paint on them because Photoshop won't let you. Instead, we use shapes to control which parts of the layer are visible or hidden. In fact, we're going to use a shape right now to create our rounded corners!
Step 3: Select The Rounded Rectangle Tool
With our vector mask now added, go over to the Tools palette and select the Rounded Rectangle Tool. By default, it's nested in with the normal Rectangle Tool, so click on the Rectangle Tool and hold your mouse down for a second or two. You'll see a fly-out menu appear. Select the Rounded Rectangle Tool from the list:
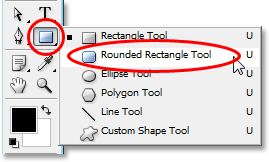
Don't confuse these tools with the Marquee Tools at the top of the Tools palette, like the Rectangular Marquee or the Elliptical Marquee Tool. Those are selection tools and they're used to drag out selections. The tools we're selecting here are Shape tools and they're used to draw shapes.
With the Rounded Rectangle Tool selected, go up to the Options Bar at the top of the screen. You'll see a group of three icons over on the left. These three icons determine how our Shape tool will work. We want to draw shapes with our Shape tool (sounds fairly obvious, doesn't it?), so click on the icon on the left, which is the Shape layers icon:

Then, if you move further towards the right, you'll come to the Radius option. This option determines how rounded our corners will be. The higher the number, the more rounded they'll be. Lower number, less rounded. Simple stuff. The problem is, you'll never really know for sure what number to enter in for the Radius value until you try one, start drawing the shape, look at how rounded the corners are, and then decide whether you're happy with the result or whether the corner needs to be more or less rounded. I usually start with a value of somewhere between 10-20 pixels, then drag out my shape and decide if I like the corners. Usually I won't, and you probably won't either on your first try, so just enter in a value to start with, drag out the shape, and if you're not happy with the roundness of the corners, simply press Ctrl+Z (Win) / Command+Z (Mac) to undo the shape, then enter a different value into the Radius option and try again.
I've already experimented with this a few times, and I know that a Radius value of about 30 pixels is going to give me the corners I want, so I'm going to enter "30 px" (the "px" stands for "pixels") into the Radius option:

Step 4: Select The Vector Mask Thumbnail In The Layers Palette
We have our Rounded Rectangle Tool selected, we've selected the "Shape layers" option in the Layers palette, and we've entered in a "Radius" value that will determine how rounded our corners will be. We're ready to drag out our shape. First though, we need to make sure the vector mask is selected, so back in the Layers palette, click on the vector mask thumbnail to select it. You'll see a white highlight box appear around the thumbnail, which let's us know that the vector mask is selected:

Step 5: Drag Out The Shape
All we have to do now is drag out our shape. Even though it's going to look to us like we're drawing the shape on the image itself, what we're really doing is drawing it on the vector mask, and when we're done, the only part of our photo that will remain visible is the area inside the shape. Everything outside of the shape will be hidden. Go ahead and drag out your rounded rectangle shape. If you want to keep everything in the photo and simply round off the corners, start in the top left corner of the photo and drag your mouse down to the bottom right. If you'd rather use the shape to crop away part of the photo as well as give it rounded corners, simply drag your shape around the area you want to keep.
If you need to reposition your shape as you're dragging, hold down your spacebar, then drag the shape into its new location. Release the spacebar when you're done and continue dragging out the shape.
Here, I've dragged out my rounded rectangle just inside the edges of the photo. You can see the rounded corners of the shape, which will become the rounded corners of the photo itself in a moment:

Release your mouse button when you're happy with your shape, and instantly, your photo is "masked" to the shape thanks to the vector mask, and the corners of the photo are now rounded:
Let's finish things off by adding a border to our shape.
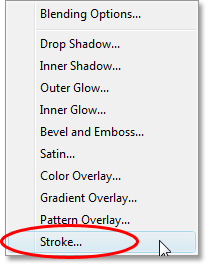
Step 6: Add A White Stroke To Create A Photo Border
Just because the corners of our photo are now rounded doesn't mean we can't still add a photo border to it. It just means the corners of the border will be rounded as well! To add a border, click on the Layer Styles icon at the bottom of the Layers palette:
Then select Stroke from the bottom of the list of layer styles that appears:
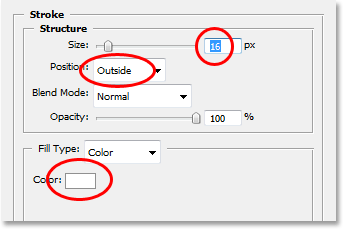
This will bring up Photoshop's Layer Style dialog box set to the "Stroke" options in the middle column. I'm going to increase my stroke Size to about 16 pixels. You may want to set yours to a different value depending on the size and resolution of your image. I'm going to leave the Position option set to Outside, which is going to place the stroke entirely on the outside of the shape edges. Finally, I'm going to click on the color swatch for the Color option at the bottom, which by default is set to red (because Adobe thinks everyone will naturally want red as their stroke color), and from the Color Picker that appears, I'm going to select white as my stroke color. Click OK to exit out of the Color Picker once you've chosen white:
When you're done, click OK to exit out of the Layer Style dialog box and apply the stroke! Here' after applying my stroke to create my photo border, is my final result:
And there we have it! That's how incredibly easy it is to give a photo rounded corners in Photoshop using a vector mask and the Rounded Rectangle Tool! Visit our Photo Effects section for more Photoshop effects tutorials!