
Add A Sparkle Trail To A Photo With Photoshop
Before we begin... This version of our Sparkle Trail tutorial was written for Photoshop CS5 and earlier. If you're using Photoshop CC or CS6, you'll want to follow along with our updated and expanded Photoshop Sparkle Brush And Motion Trail Effect tutorial.
In this Photoshop Effects tutorial, we'll learn how to add a sparkle trail to a photo using a custom Photoshop sparkle brush we'll be creating. I got the idea for this tutorial after seeing the poster for the movie "Mr. Magorium's Wonder Emporium", but of course sparkle trails have been around since the days of Peter Pan and Tinkerbell, and I'm sure even long before that. Fortunately, Photoshop makes them extremely easy to create thanks to the powerful brush controls that were introduced in Photoshop 7, which are still just as powerful and useful today!
Here's the image I'll be starting with:
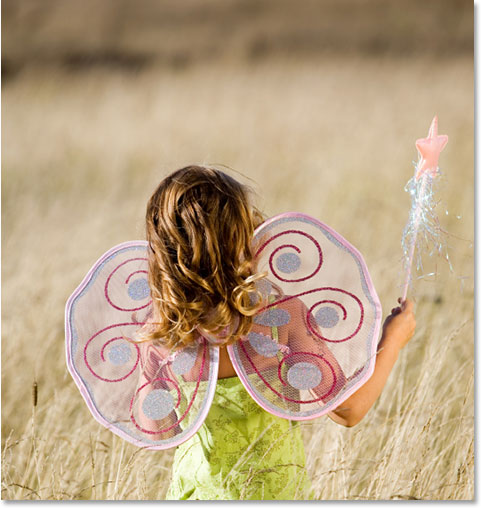
I'm going to make her magic wand look a little more magical by adding a sparkle trail. Here's how it will look when we're done:
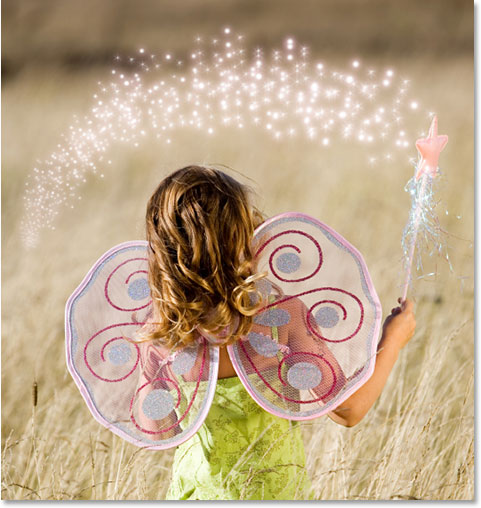
This tutorial is from our Photo Effects series. Let's get started!
Step 1: Open A New Photoshop Document
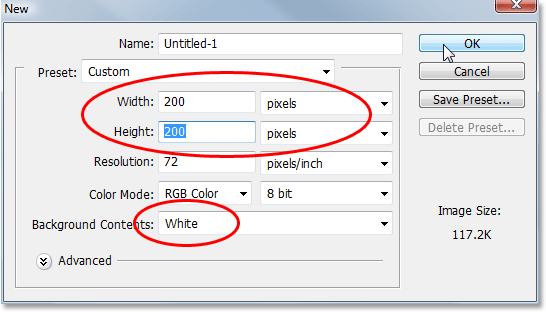
As I mentioned, we'll be creating our sparkle trail using a custom made Photoshop "sparkle" brush, and the first thing we need to do is create our brush. To begin, go up to the File menu at the top of the screen and choose New, which brings up Photoshop's New Document dialog box. You can also access the New Document dialog box using the keyboard shortcut Ctrl+N (Win) / Command+N. Enter 200 pixels for the Width and 200 pixels for the Height, and make sure the Background Contents option near the bottom is set to White so our new document has a white background, then click OK:
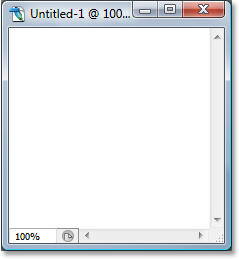
Photoshop opens a new 200x200 document with a solid white background:
Step 2: Select The Brush Tool
With our new document created, select the Brush Tool from the Tools palette, or simply press the letter B on your keyboard to access it with the shortcut:

Step 3: Set Your Foreground Color To Black
We need black as our Foreground color, which is the color Photoshop uses to paint with when we have the Brush Tool selected, so if black is not currently your Foreground color, press the letter D on your keyboard to quickly reset your Foreground and Background colors, which sets black as your Foreground color (white becomes your Background color). We can see our current Foreground and Background colors in the color swatches near the bottom of the Tools palette (the swatch in the upper left is the Foreground color and the one in the bottom right is the Background color):

Step 4: Select the "Star 70 Pixels" Brush
The "sparkle" brush we're creating is really just a combination of several other brushes that ship with Photoshop, and you can experiment on your own if you like with different brush combinations to create your own unique "sparkle" brush, since there's several brushes that would work well for this effect.
I'm going to start with the Star 70 pixels brush, so switch over to your Brushes palette, click on words Brush Presets in the top left corner to see a list of preset brushes on the right, then scroll down the list until you get to the "Star 70 pixels" brush.
Click on it to select it:
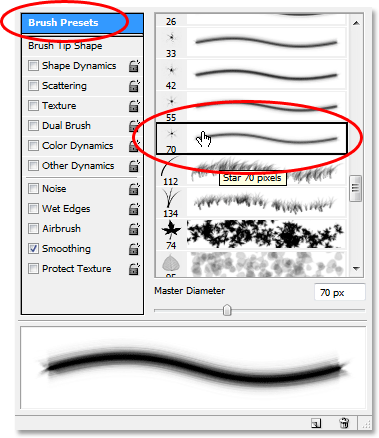
Step 5: Click In A Few Random Spots Inside The Document With The Brush
With the "Star 70 pixels" brush selected, click in a few random spots inside the document to add our first few "sparkles". Three or four clicks should do the trick:
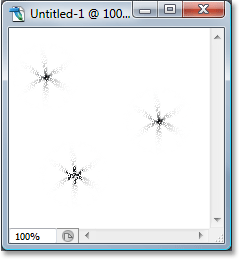
Step 6: Select the "Airbrush Soft Round 17" Brush
After you've added the first few sparkles, switch back to the Brushes palette and scroll up the list of preset brushes until you come to the Airbrush Soft Round 17 brush. Click on it to select it:
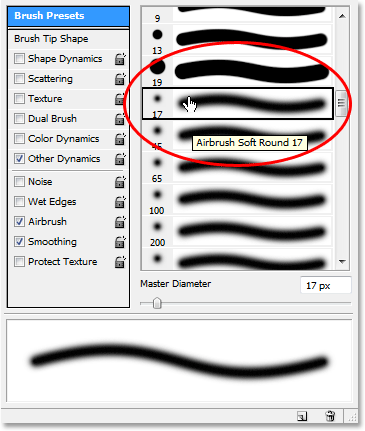
Step 7: Click In A Few Random Spots Inside The Document With The New Brush
Just as we did with the previous brush a moment ago, click in three or four random spots inside the document with the new brush. This adds more "sparkles", as well as a little variety to them:
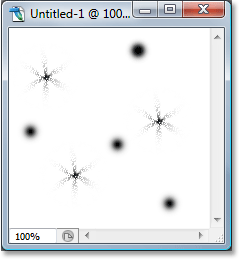
Step 8: Select The "Assorted Brushes"
Switch back to the Brushes palette once again, and this time, click on the small right-pointing arrow at the top of the palette to access the drop-down menu and select Assorted Brushes from the list of additional brushes at the bottom:
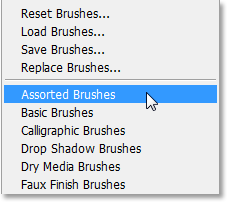
Photoshop will pop up a message asking if you want to replace the existing brushes with the new brushes. Click the Append option to have Photoshop simply add the new brushes in with the existing brushes rather than replacing them:

Step 9: Select the "Starburst - Small" Brush
With the Assorted Brushes added in the Brushes palette, scroll down the list until you come to the Starbust - Small brush and click on it to select it:
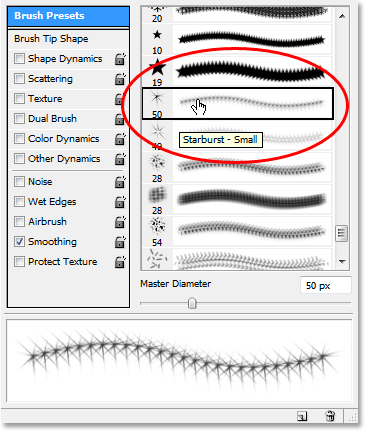
Step 10: Click In Three Or Four Random Spots Inside The Document
With the "Starburst - Small" brush selected, click in another three or four random spots inside the document to add the rest of our sparkles:
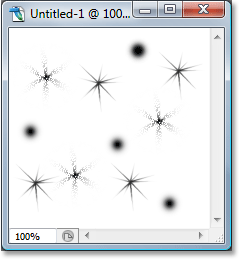
Step 11: Define A New Brush Preset
We've added all of our sparkles. All we need to do now is save them as a brush. To do that, go up to the Edit menu at the top of the screen and choose Define Brush Preset. Photoshop will pop up a dialog box asking you to name the brush. I'm going to name mine "Sparkle Brush":

Click OK after you've entered in a name and your new brush is created! You can close out of the brush document at this point, since we no longer need to have it open. No need to save it when Photoshop asks, since the brush is already created.
Step 12: Open A Photo And Add A New Blank Layer
With our "sparkle brush" now created, we can add our sparkle trail to a photo, so go ahead and open the photo you want to use if it isn't open already. Then click on the New Layer icon at the bottom of the Layers palette to add a new blank layer above the Background layer, which is the layer that contains our image. Photoshop will automatically name the new layer "Layer 1". Double-click directly on the name and rename it to "Sparkles":
Step 13: Select The Brush Tool Once Again
We need to select the "Sparkle Brush" we just created, but in order to select it, we first need to have the Brush Tool selected, so go ahead and either select it from the Tools palette or press B on your keyboard:

Step 14: Set Your Foreground Color To White
Our sparkle trail wouldn't look very impressive it we created it in black, so we need to set our Foreground color to white. To do that, simply press X on our keyboard to swap your current Foreground and Background colors, which will set white as your Foreground color (black becomes your Background color). Again, we can see this in the color swatches near the bottom of the Tools palette:

Step 15: Select the Sparkle Brush
Switch back over to your Brushes palette, click once again on the words "Brush Presets" in the top left corner of the palette if the option isn't already selected, then scroll all the way down to the bottom of the list of preset brushes on the right. Your "Sparkle Brush" (or whatever you named it) will appear at the bottom:
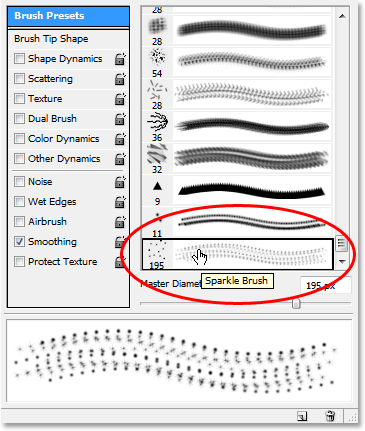
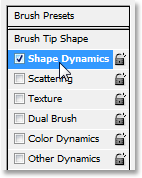
Step 16: Select The "Shape Dynamics" Option
Click directly on the words Shape Dynamics on the left of the Brushes palette to select the "Shape Dynamics" options, which will appear on the right of the palette. Make sure you click directly on the words and don't just click inside the checkbox on the left:
Step 17: Set The "Size Control" To "Fade"
With "Shape Dynamics" selected, if you look in the top right of the Brushes palette, you'll see a "Size Jitter" option, and directly below that, you'll see a Control option. This "Control" option is technically the "Size Control" option and it allows us to specify what, if anything, will affect the size of the brush as we paint with it. Click on the down-pointing arrow and choose Fade from the list, then enter 25 in the box beside it:

By setting the Size Control option to "Fade", Photoshop will gradually fade the diameter of our brush down to zero when we paint a brush stroke, and it will do so using the number of "steps" we've specified, which in this case is 25. You'll most likely need to experiment with the number of steps to get your sparkle trail to fade out properly with your image, but 25 is a good place to start.
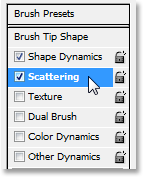
Step 18: Select The "Scattering" Option
Click directly on the words Scattering on the left of the Brushes palette, below the words "Shape Dynamics", to bring up the "Scattering" options. Again, make sure you click directly on the words and don't just click inside the checkbox on the left. We want the "Scattering" options to appear on the right of the Brushes palette and for that, we need to click directly on the words:
Step 19: Set The Scattering Options
When the Scattering options appear on the right of the Brushes palette, enter 110% for the Scatter Amount, then enter 3 for the Count option and 35% for the Count Jitter:
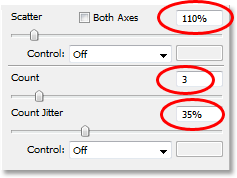
Once again, you'll most likely find you need to experiment with these values a little, since your image will be different.
Step 20: Set The Brush "Spacing" To 50%
Click directly on the words Brush Tip Shape in the top left of the Brushes palette, below the words "Brush Presets". Then, down near the bottom of the Brushes palette, set the Spacing option to about 50%:
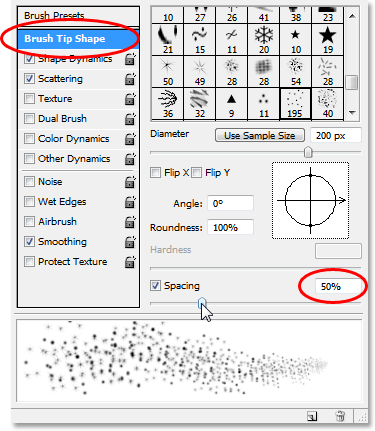
In this case, the "Spacing" option determines the maximum length of our brush stroke (our "sparkle trail"), and as with the "Shape Dynamics" and "Scattering" options, some experimenting may be necessary to get your sparkle trail to the proper length for your image.
Step 21: Drag Out Your Sparkle Trail
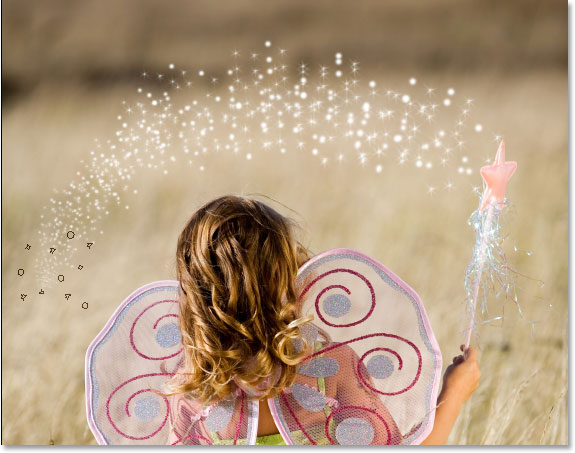
Our "Sparkle Brush" has been created and the options have been set in the Brushes palette, so with white as our Foreground color, we can go ahead and add our sparkle trail! To do that, click either or or just beside the object that's creating the sparkle trail (the girl's magic wand in my image) and then drag out a brush stroke in the direction you want the sparkle trail to be coming from. You'll probably need to resize your brush first, and the easiest way to do that is by using the left and right bracket keys on your keyboard. The left bracket key makes the brush smaller and the right bracket key makes it larger.
I'm going to click just to the left of the girl's magic wand and then drag my brush over her head and down the right side, as if the sparkle trail was created by her waving the wand. Notice how Photoshop fades the size of the brush as the brush stroke gets further and further from the starting point, until the brush eventually fades to nothing, thanks to the options we set in the Brushes palette:
Step 22: Duplicate The Sparkles Layer
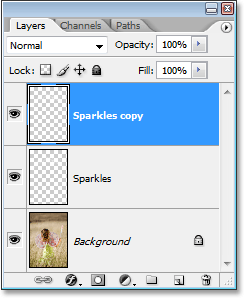
With the "Sparkles" layer selected in the Layers palette, use the keyboard shortcut Ctrl+J (Win) / Command+J (Mac) to duplicate the layer. A copy of the layer will appear above the original in the Layers palette:
Step 23: Apply The "Gaussian Blur" Filter
We're going to add a bit of a glow to our sparkles, and we'll do that by adding a slight blurring effect to the duplicate layer we just created. Go up to the Filter menu at the top of the screen, choose Blur, and then choose Gaussian Blur. When the Gaussian Blur dialog box appears, enter a Radius value of about 4 pixels:
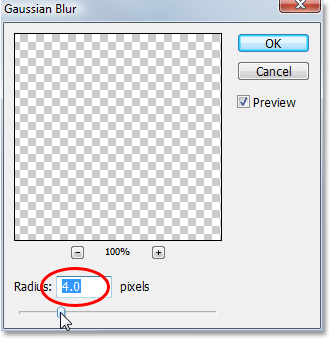
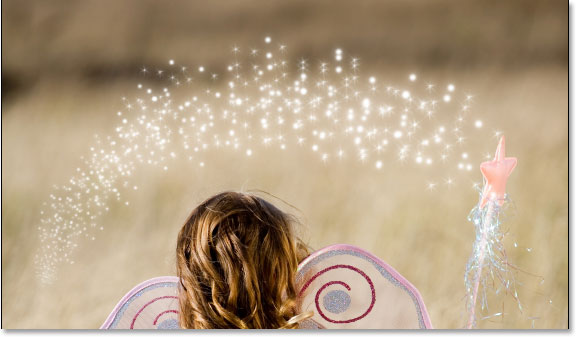
You may want to go a bit higher if you're using a high resolution image. The idea is simply to add enough of a blur that the sparkles appear to have a faint glow around them:
Step 24: Duplicate The "Sparkles Copy" Layer
To increase the brightness of our sparkles, with the "Sparkles copy" layer selected, once again use the keyboard shortcut Ctrl+J (Win) / Command+J (Mac) to create a duplicate of it, which appears at the top of the Layers palette:
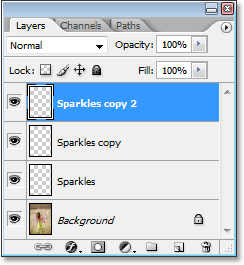
Step 25: Add An "Outer Glow" Layer Style
To complete the effect, let's add a bit of color to the glow around the sparkles. To do that, with the top layer selected in the Layers palette, click on the Layer Styles icon at the bottom of the Layers palette (the icon that looks like the letter "f") and select Outer Glow from the list:
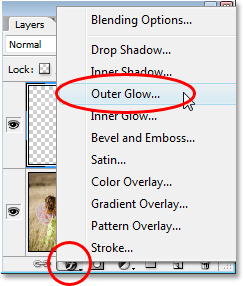
This brings up the Layer Style dialog box with the Outer Glow options in the middle column. Choose a color for your glow by clicking on the color swatch directly below the word "Noise" and choosing a color from Photoshop's Color Picker. I'm going to choose a pinkish-red color for mine. Then decrease the intensity of the color by lowering the Opacity of the glow. I'm going to lower mine to about 60%:
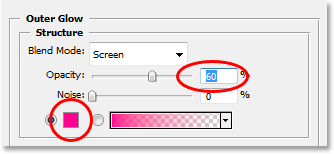
Click OK to exit out of the Layer Style dialog box, and you're done! Here, after adding some color to the glow around the sparkles, is my final result:

And there we have it! That's how to add a sparkle trail to a photo using a custom brush in Photoshop! Visit our Photo Effects section for more Photoshop effects tutorials!