
Mapping A Texture To A Face With Photoshop
In this Photoshop Effects tutorial, we'll learn how to use the Displace filter and a displacement map to add an interesting texture to a person's face in a photo. The displacement map will allow us to wrap the texture around the shape and contours of the face, rather than having it look like we simply pasted a flat texture on to the photo.
Displacement maps were first introduced way back in Photoshop 2.0, so unless you're still using the same version of Photoshop you bought 20 years ago, you should be fine. I'll be using Photoshop CS4 throughout this tutorial, but any recent version will work.
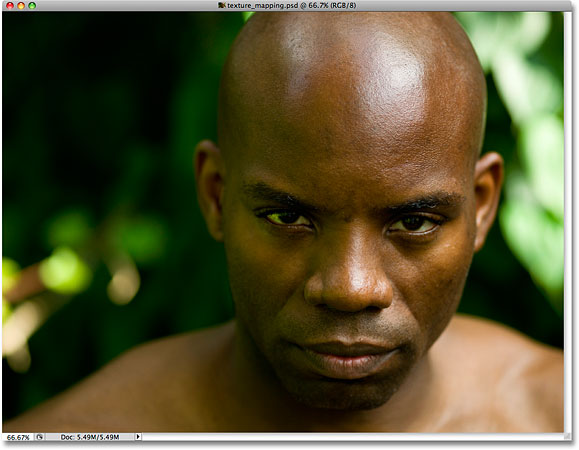
To create the texture effect, you'll need two images - the main photo that you want to apply the texture to and a photo to use as the texture itself. Here's the image I'll be applying my texture to:
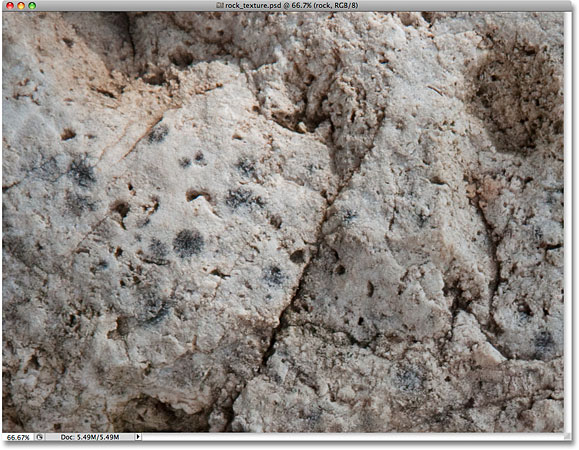
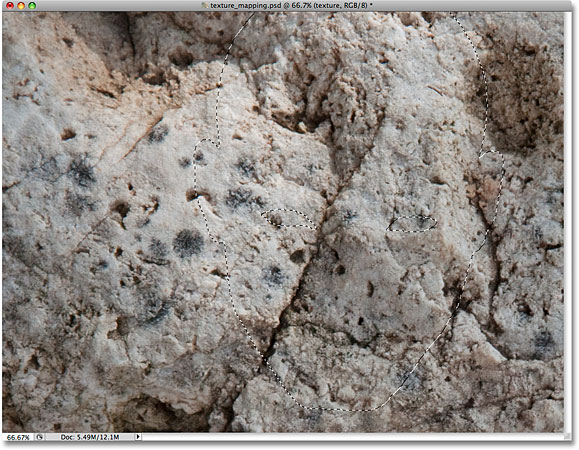
Here's the image I'll be using for my texture, a simple close up of a rock that I snapped outside:
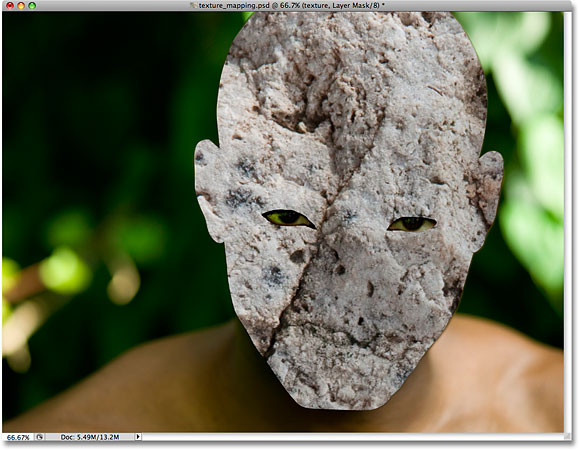
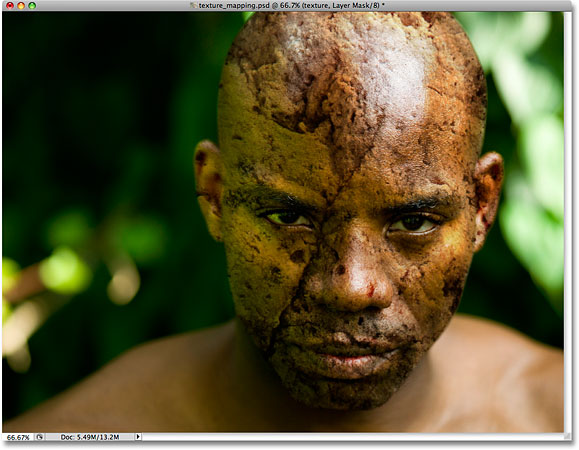
Here's how it will look after we've mapped the texture on to the man's face:

How To Map A Texture To A Face With Photoshop
Step 1: Select The Channel With The Best Image Contrast
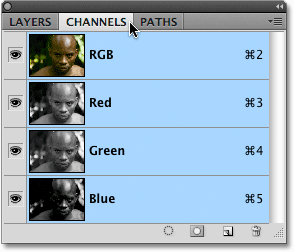
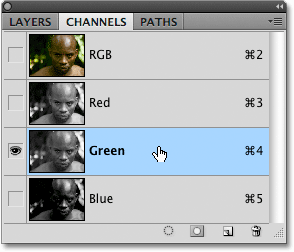
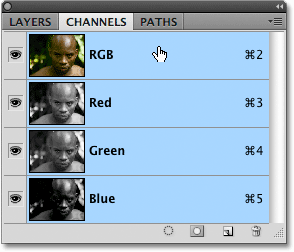
Let's begin with the photo we'll be applying the texture to. Switch over to your Channels panel for a moment. You'll find the Channels panel grouped in with the Layers and Paths panels ("panels" are called "palettes" in earlier versions of Photoshop). Click on the Channels name tab at the top of the group to select it. You'll see three color channels listed - Red, Green, and Blue - along with a composite RGB channel at the top:
To learn more about color channels and the RGB color mode in Photoshop, be sure to check out our full RGB and Color Channels In Photoshop Explained tutorial. We're going to use one of these three channels (Red, Green or Blue) to create our displacement map, which will then be used to map our texture to the contours of the person's face.
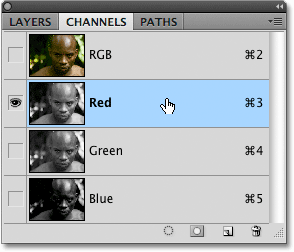
We need to select the channel that will give us the highest amount of image contrast, since the more contrast we have, the better the results we'll achieve with our displacement map. Click on each individual channel (Red, Green, then Blue) in the Channels panel. Here, I'm clicking on the Red channel to select it. The currently selected channel will appear highlighted in blue:
As you click on each channel, you'll see a black and white version of the photo appear in the document window. Each channel will give us a different black and white version depending on how prominent that color is in the photo. We need to pick the channel that gives us the best image contrast in the person's face. Here's what each of my three channels looks like, with Red on the left, Green in the middle and Blue on the right:
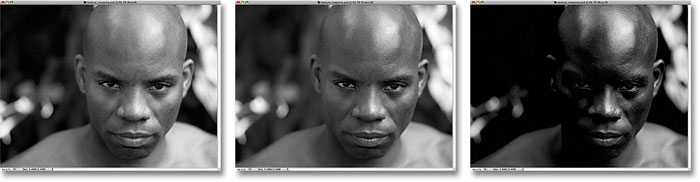
Typically when dealing with skin tones, the Red channel will be too bright and washed out to use as a displacement map (since skin always contains lots of red), so you'll usually end up choosing either the Green or Blue channels. In my case here, the Blue channel is much too dark, so it's out. The Red channel actually contains more detail that I'd normally expect, but I think the Green channel contains the greatest amount of contrast, with some bright highlights and dark shadows, so I'm going to use the Green channel for my displacement map.
Step 2: Duplicate The Channel
Once you've determined which channel you're going to use for your displacement map, make sure you have it selected in the Channels panel. I'm using the Green channel, so I'll click on it to select it:
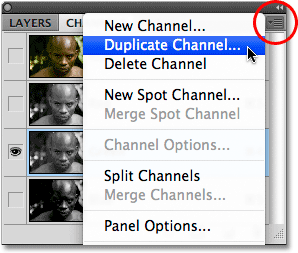
Then click on the menu icon in the top right corner of the Channels panel and select Duplicate Channel from the menu that appears:
This will bring up the Duplicate Channel dialog box. Select New for the Document option in the Destination section of the dialog box, which will open the copy of the channel as a separate Photoshop document. Don't worry about naming it:
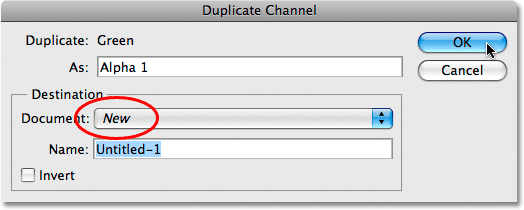
Click OK to exit out of the dialog box. The black and white image will appear in a separate document window:

We'll prepare our image for use as a displacement map next!
Step 3: Apply The Median Filter To The Displacement Map Image
For these next few steps, we'll be working on the displacement map image that we just created, so ignore the original image for now. We need to remove much of the detail from the person's face, otherwise all of the little pores, bumps, stubble and small skin imperfections will cause problems. We'll use a couple of Photoshop's filters to smooth things out for us. The first one that we'll apply is the Median filter, which is great at reducing small details while keeping the edges that define an object intact. Go up to the Filter menu in the Menu Bar at the top of the screen, choose Noise, and then choose Median:

This will bring up the Median filter's dialog box. Keep an eye on your image in the document window as you drag the Radius slider at the bottom of the dialog box. The slider determines how much detail is removed from the image. The further you drag the slider towards the right, the more detail you'll remove. The idea is to remove as much detail from the person's face as possible while still keeping important edges intact. There's no specific setting to use here since it will depend on the size of the image you're working on, but I'm going to set my Radius value to around 8 pixels:
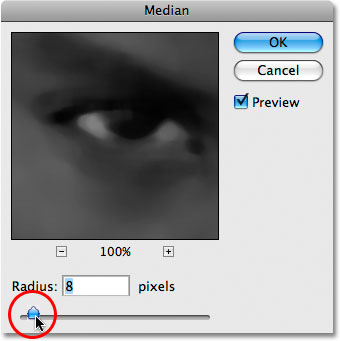
Click OK to exit out of the dialog box. Here we can see that I've managed to reduce the detail in the man's face significantly while still keeping the defining edges nice and sharp:

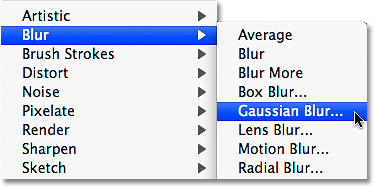
Step 4: Apply The Gaussian Blur Filter
Next, we'll apply the Gaussian Blur filter to finish off our displacement map. Go back up to the Filter menu and this time, choose Blur, then choose Gaussian Blur:
When the Gaussian Blur dialog box appears, use the Radius slider at the bottom of the dialog box the same way you used it with the Median filter a moment ago, keeping an eye on your image in the document window as you drag the slider towards the right to apply more blurring to the image. Again, there is no specific setting to use here since it will depend on your image, but the goal is to apply enough blurring to smooth things out while still being able to make out important details (eyes, nose, mouth, etc). I'm going to increase my Radius value to around 13 pixels:
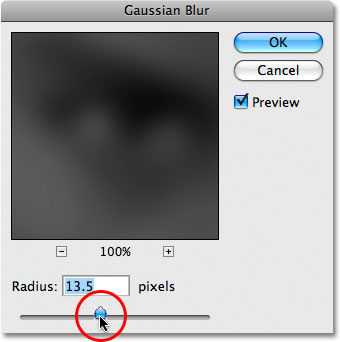
Click OK when you're done to exit out of the dialog box. Photoshop applies the blurring to the displacement map:
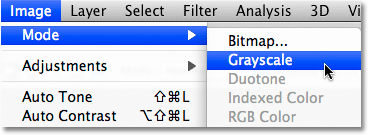
Step 5: Convert The Image To Grayscale
Finally, let's convert our displacement map image to the Grayscale color mode. Technically, this isn't absolutely necessary since Photoshop can use displacement maps saved in other color modes as well, but you can run into problems if your displacement map contains too many channels, so converting the image to Grayscale, which limits the image to a single channel, is a good way to avoid those problems. Go up to the Image menu at the top of the screen, choose Mode (which is short for Color Mode), then choose Grayscale:
Step 6: Save The Image As A Photoshop .PDF File
Now that we've prepared our image for use as a displacement map, we need to save it, and we need to save it specifically as a Photoshop .PSD file. This is the only file type that Photoshop can use for displacement maps, although I have no idea why that is. Sometimes, you just have to accept things, and this is one of those times. Go up to the File menu at the top of the screen and choose Save As:
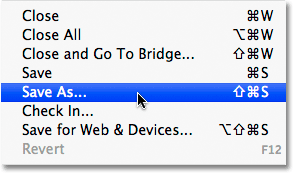
This brings up the Save As dialog box. Give the file a descriptive name. I'm going to name mine "displace.psd", and make sure you select Photoshop for the Format option so it's saved as a .PSD file. I find that the easiest place to save displacement maps is in a "displacement maps" folder that I've created on my desktop, so that's where I'll save my file to:

Click the Save button when you're done to save the file. You can now close out of the displacement map's document window.
Step 7: Select The Person's Face In The Photo
We're done working on our displacement map at this point, so switch back over to your original photo (the one you're going to apply the texture to). If you're still seeing the image in black and white in the document window, it's because we still have a single channel selected in the Channels panel. Click on the RGB channel at the top of the Channels panel to bring back the full color version of the image. The RGB channel isn't really a channel at all, it's simply the composite of the three individual channels and it's what allows us to see the image in full color:
Switch back over to the Layers panel as well by clicking on the Layers name tab at the top of the panel group. We need to select the area of the photo that we want to map the texture to. Since we want to map the texture only to the person's face, we'll first need to select it. Use the selection tool of your choice (Lasso Tool, Pen Tool, etc.) to draw a selection around the area you need. In my case, I'll use the Lasso Tool to draw a selection around the man's face and the top of his head:

The only problem is, if I was to apply the texture right now, his eyes would be covered by the texture since they're currently inside the selected area. I need to remove his eyes from the selection, and the easiest way to do that is to simply hold down my Alt (Win) / Option (Mac) key, which temporarily places the Lasso Tool in Subtract From Selection mode, indicated by a small minus sign ("-") in the bottom right corner of the lasso icon. Drag a selection around each eye to remove them from the selected area. When you're done, you should see selection outlines around the person's head and their eyes. Only the area between the selection outlines is now selected, which means the eyes will no longer be affected:

Be sure to check out our Full Power Of Basic Selections tutorial for more information on working with selections in Photoshop.
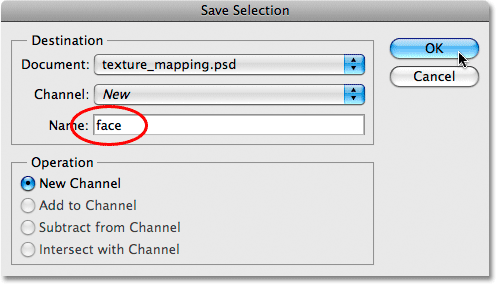
Step 8: Save The Selection
We don't need our selection at this very moment but we will need it soon, so let's save it. Go up to the Select menu at the top of the screen and choose Save Selection:
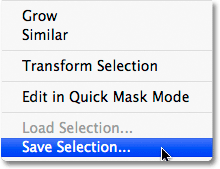
This brings up the Save Selection dialog box. I'm going to name my selection "face", then I'll click OK to save the selection for later use:
Once you've saved the selection, press Ctrl+D (Win) / Command+D (Mac) to quickly deselect the selection, removing the selection outlines from the image.
Step 9: Copy The Texture Image Over To The Original Image
Open the photo you're going to use for your texture. In my case, I'm using the rock texture photo that we saw at the beginning of the tutorial. You should now have your original image and the texture photo open in their own separate document windows on your screen.
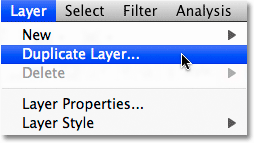
Make sure you have the texture photo selected by clicking on it anywhere inside its document window. Then go up to the Layer menu at the top of the screen and choose Duplicate Layer:
This brings up the Duplicate Layer dialog box. I'm going to name my copied layer "texture", although the name isn't that important. What is important is that you select the original image's document as the Destination for the copied layer so that our texture photo appears inside the original photo's document. My original photo is named "texture_mapping.psd", so I'll select it as my destination:
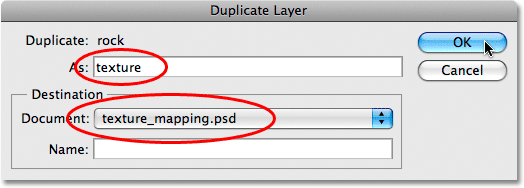
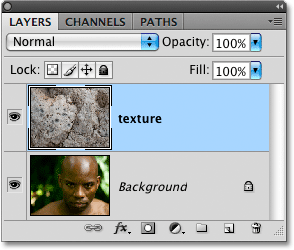
Click OK when you're done to exit out of the dialog box and copy the texture photo over to the original image's document. You can close out of the texture photo's document window at this point, which leaves us with just a single document window open containing both the original photo and the texture photo, with the texture photo now blocking the original image from view. If we look in the Layers panel, we can see that we now have two layers. The original image is sitting on the Background layer, while the texture photo is on a new layer above it:
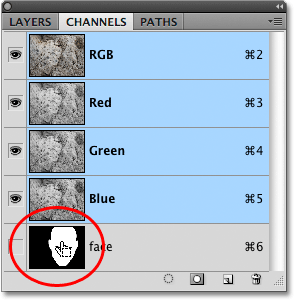
Step 10: Load The Selection
Here's where we need that selection we created and saved earlier. Photoshop actually saves selections as channels, and if we switch back over to the Channels panel, we can see that our selection appears as a separate channel below the RGB channels. My channel is named "face" because that's what I named it when I saved the selection. To quickly load the selection, hold down your Ctrl (Win) / Command (Mac) key and click directly on the channel's thumbnail:
Switch back over to the Layers panel when you're done. You'll see that the selection outlines have reappeared inside the document, although they may be a little hard to see over the texture:
Step 11: Add A Layer Mask
With the selection loaded, make sure the texture layer is selected in the Layers panel (selected layers are highlighted in blue), then click on the Layer Mask icon at the bottom of the Layers panel:
This adds a layer mask to the texture layer, and because we had the person's head selected when we added the mask, only the area of the texture photo that fell within the selection remains visible. The rest of the texture layer is now hidden from view:
Step 12: Change The Blend Mode Of The Texture Layer To Overlay
To blend the texture in with the person's face, go up to the Blend Mode option at the top of the Layers panel and change the blend mode from Normal (the default setting) to Overlay:
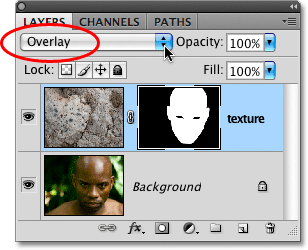
The texture now blends in nicely with the man's face. Feel free to try other blend modes as well, like Multiply or Hard Light, and compare the results you get, but the Overlay mode is often your best choice for this effect:
Step 13: Select The Texture Layer
Things are looking pretty good already at this point, but to add even more realism, we're going to use our displacement map to fit the texture around the contours of the person's face. First, we need to select the texture layer, since we currently have the layer mask, not the layer itself, selected. We can tell which one is selected by looking at the thumbnails in the Layers panel. You'll notice that at the moment, the layer mask thumbnail on the texture layer has a white highlight border around it. This means the layer mask is currently selected. To select the layer itself, click directly on the layer mask preview thumbnail:
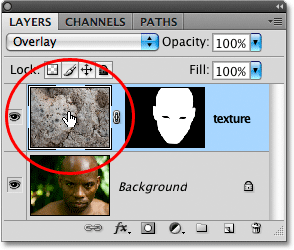
Step 14: Unlink The Layer From The Layer Mask
If we apply our displacement map right now, both the contents of the layer (the texture photo) and the layer mask will be reshaped by the displacement map, and that's because the layer contents and the layer masked are linked together. We can tell that they're linked together by the small link icon between the two thumbnails. To unlink the layer contents from the layer mask so that the mask will not be affected by the displacement map, click on the link icon to remove it:

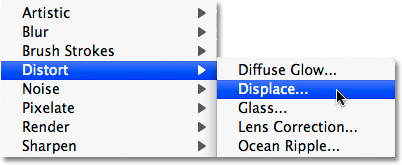
Step 15: Apply The Displace Filter
Finally, we're ready to apply our displacement map, and we do that using Photoshop's Displace filter. Go up to the Filter menu, choose Distort, and then choose Displace:
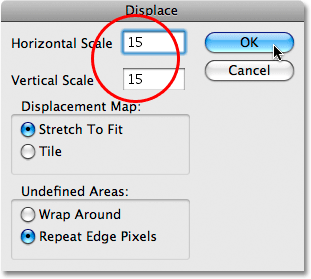
The Displace filter is actually made up of two separate dialog boxes. The first dialog box asks us to set some options, with the two most important options being at the top. The Horizontal Scale and Vertical Scale options determine how much impact the displacement map will have on the image. In other words, they determine how far the pixels in the image will shift horizontally and vertically. Unfortunately, there's no preview available so the Displace filter usually involves some trial and error until you get things right. The default value of 10 for both the Horizontal and Vertical Scale options is a good place to start, but I'm going to increase mine to 15 for a bit more of an impact. The values you end up using will depend both on the size of your image and on your own idea of what looks "right", so be prepared to undo this step a few times and try again. You can leave the Stretch To Fit and Repeat Edge Pixels options in the bottom half of the dialog box selected:
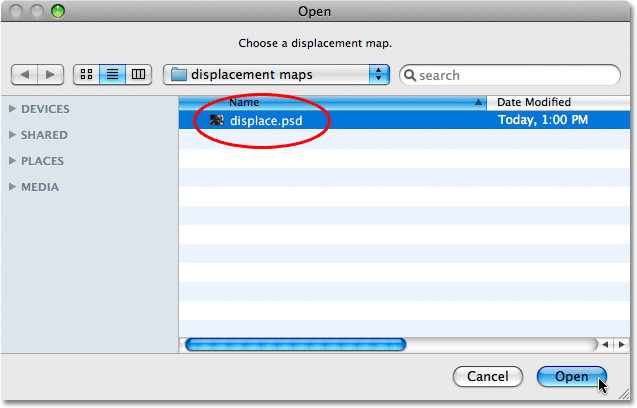
Click OK when you're done to exit out of this first dialog box, which will bring up the second dialog box asking you to choose your displacement map. Navigate to where you saved the displacement map we created earlier. Mine was saved to a "displacement maps" folder on my desktop, so that's where I'll navigate to, then click on the displacement map to select it and click Open:
As soon as you open the displacement map, Photoshop applies it to the texture and maps the texture to the contours of the person's face and head. If you're using a texture with lots of straight lines, like an American flag, for example, you'll see a very noticeable difference in how the texture wraps around the shape of the person's face. If you're using a texture like the one I'm using with lots of randomly shaped lines and cracks, the difference may not be quite as noticeable, although things should still look more realistic after the displacement map has been applied. Or at least, as realistic as a rock texture mapped to a person's face can look. Here's my final result: