
Stroke Text With A Brush In Photoshop
In this Text Effects tutorial, we'll learn how to create interesting designs out of text using Photoshop's brushes to add stroke outlines around the letters! We'll first learn how to create a path from the text, then once we have our path, we'll learn how Photoshop can add a stroke to the path using any brush we choose!
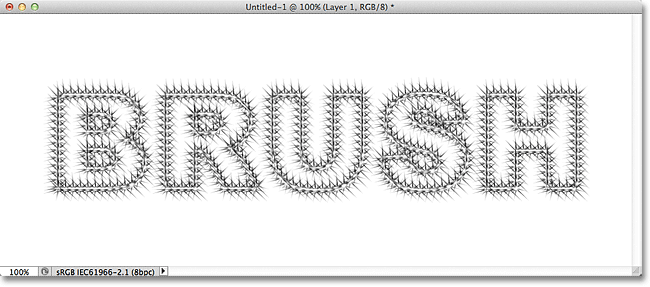
Here's just one example of the effect we'll be creating:

Let's get started!
Step 1: Create A Path From Your Text
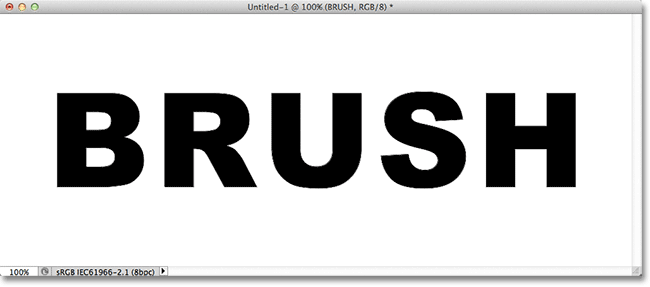
To start things off, I've gone ahead and created a new 1000x400 pixel Photoshop document, filled with white, and since this tutorial is all about how to apply a brush stroke around text, I've added a single text layer containing the word "BRUSH" (I chose Arial Black as the font because this effect tends to work best with thicker letters):
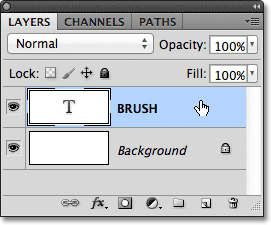
Before we can add a brush stroke around the letters, we first need to convert our text into a path. Right-click (Win) / Control-click (Mac) on the text layer in the Layers panel:
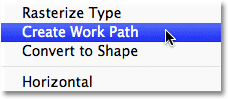
Choose Create Work Path from the menu of options that appears. This will create a path outline of the letters, although you may not be able to see the path just yet (we'll see it more easily in a moment):
Step 2: Add A New Layer
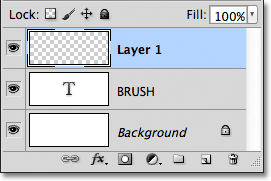
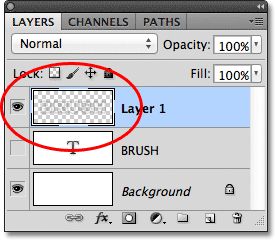
Next, we'll add a new layer for our brush stroke, not only because it's always a good idea to place everything on its own layer but also because in this case, we have no choice. Photoshop won't allow us to use a brush on a text layer. To add the new layer, click on the New Layer icon at the bottom of the Layers panel:
Photoshop adds a new blank layer named "Layer 1" above the text layer:
Step 3: Hide The Text Layer
Let's turn the text layer off in the document since we don't need to see it anymore. With the text hidden, we'll be able to see the path outline we've created. To hide the text, click on its layer visibility icon (the eyeball) on the left side of its layer in the Layers panel:
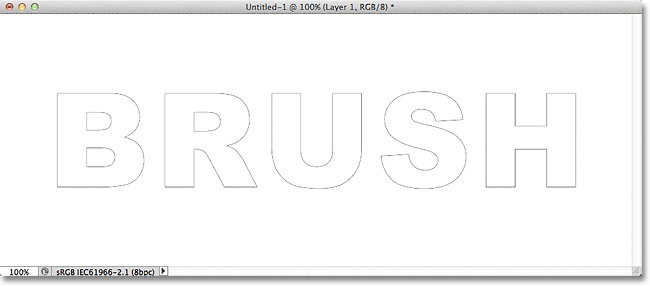
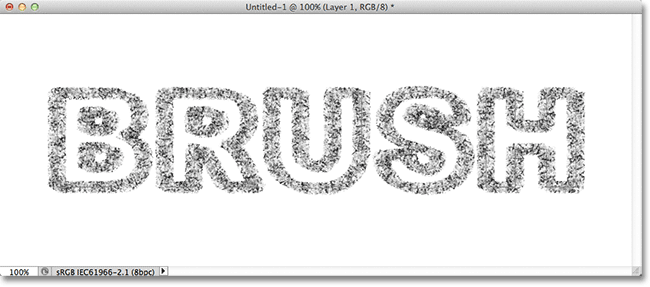
With the text turned off, we can now easily see the path around the letters:
Step 4: Select A Brush
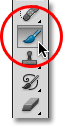
Next, we need to choose a brush. Select the Brush Tool from the Tools panel:
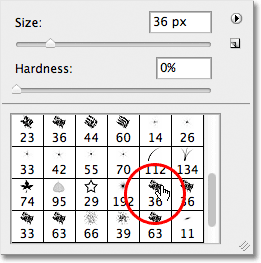
With the Brush Tool selected, to quickly choose a brush, right-click (Win) / Control-click (Mac) anywhere inside the document, which will open the Brush Picker. Use the scroll bar on the right to scroll through the list of available brushes, then double-click on the thumbnail of the one you want to use, which will select the brush and close the Brush Picker. You can try any brush you like. For this tutorial, I'll choose the 36 pixel Chalk brush (if you have Tool Tips enabled in the Photoshop Preferences, you'll see the name of each brush appear as you hover your mouse cursor over them):
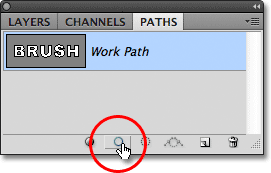
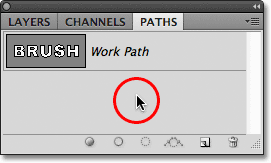
Step 5: Switch To The Paths Panel
We have our path around the letters, we've chosen a brush, and we've added a new layer in the Layers panel for our brush stroke. To apply the brush to the path, we need to switch from the Layers panel to the Paths panel, which is part of the same panel group as the Layers (and Channels) panel. To switch over to the Paths panel, click on its name tab:
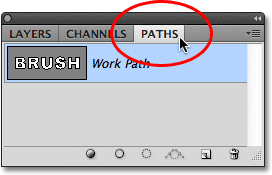
Paths in the Paths panel look very similar to layers in the Layers panel. You'll see the path we just created listed as "Work Path", which means the path is temporary. If we were to create another path, our current path would be replaced by the new one. We could save the path if we wanted to simply by renaming it to something other than "Work Path", but for our purposes here, there's no real need to do that.
Step 6: Stroke The Path With The Brush
To add a brush stroke around the path, click on the Stroke Path With Brush icon on the bottom of the Paths panel (second icon from the left):
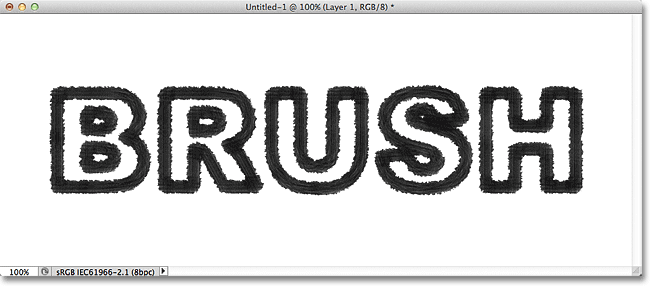
Here's the result I get with the Chalk brush I selected from the Brush Picker:
It can take some trial and error with different brushes and / or brush sizes before you get things looking the way you wanted. If the brush you chose didn't give you the results you were looking for, press Ctrl+Z (Win) / Command+Z (Mac) on your keyboard to undo the step, then right-click (Win) / Control-click (Mac) inside the document, choose a different brush from the Brush Picker, then try again.
If the problem wasn't the brush you chose but the size of the brush, making the stroke appear either too thick or too thin, again press Ctrl+Z (Win) / Command+Z (Mac) to undo the step, then use the left and right bracket keys on your keyboard to quickly adjust the brush size. Each time you press the left bracket key ( [ ), you'll make the brush a bit smaller. Pressing the right bracket key ( ] ) will make it larger. You'll see the size of your brush cursor changing as you press the keys so you can preview the result. With the size adjusted, click on the Stroke Path With Brush icon to try again.
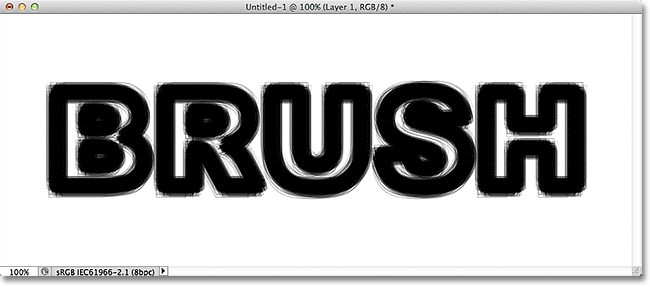
I'll undo my brush stroke and try again with a different brush to see what results I get. Here's the effect using the Rough Round Bristle brush:
And here's the effect using a Spatter brush. Each new brush I choose gives a different look to the text:
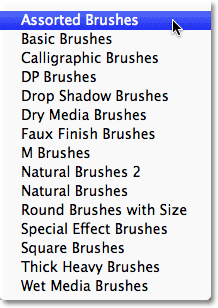
By default, only a few of Photoshop's brushes are available to us, but there are other brush sets that we can load in. Click on the small arrow icon in the top left corner of the Brush Picker:
This opens a menu with various options, and in the bottom section of the menu is a list of additional brush sets that were installed with Photoshop but are waiting for us to load in before we can use them. To load in one of the sets, click on its name in the list. I'll choose the Assorted Brushes set:
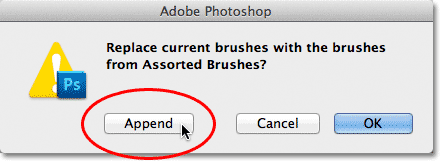
Photoshop will ask if you want to replace the current brushes with the new ones. Click the Append button to keep the current brushes and just add the new ones in after them:
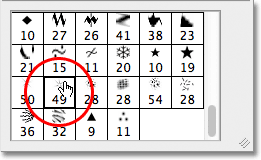
And now, if you scroll down past the original brushes in the Brush Picker, you'll find the newly added brushes. Just as before, double-click on the one you want to select it and close out of the Brush Picker. I'll try the Starburst - Large brush that's part of the set I just loaded:
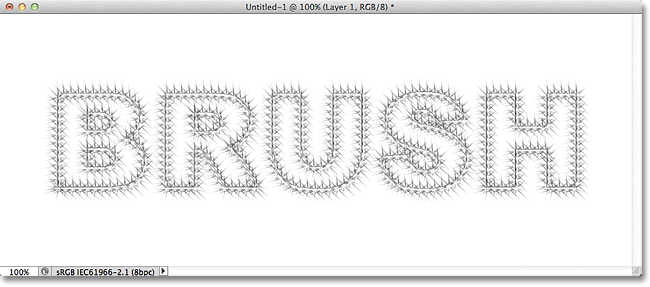
I'll click on the Stroke Path With Brush icon in the Paths panel, and here's my result with the Starburst - Large brush:
If you like the design that the brush created but find that it appears too light, simply click on the Stroke Path With Brush icon again to apply the brush a second time, which will darken the effect:
Finally, when you're happy with the results, you can hide the path in the document so it's not distracting by clicking anywhere in the empty area below the Work Path in the Paths panel:
Switch back over to your Layers panel when you're done by clicking on the Layers name tab at the top of the panel group, and you'll see that the brush stroke effect has been added to Layer 1, which we can see by looking at the layer's preview thumbnail:
Where to go next...
And there we have it! That's how to stroke text with a brush in Photoshop! Check out our Text Effects or Photo Effects sections for more Photoshop effects tutorials!