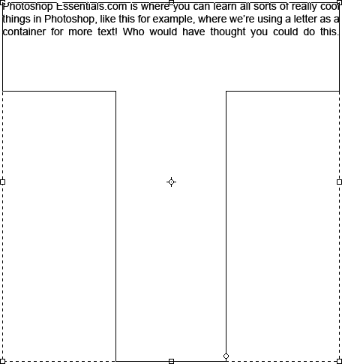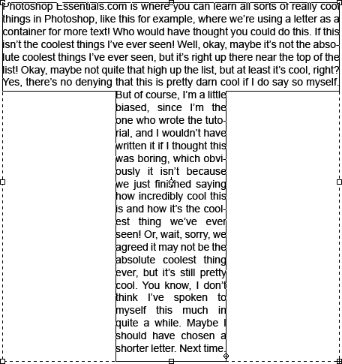
Using Text As A Container For More Text In Photoshop
In this Photoshop text effects tutorial, we're going to learn how to use text as a container for more text! Specifically, we'll fill a single letter with an entire paragraph of text so that the text appears in the shape of the letter.
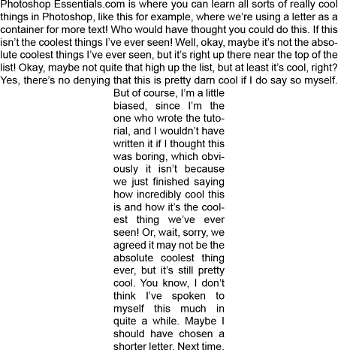
Here's the effect we're going for:
Let's get started!
Step 1: Create A New Document
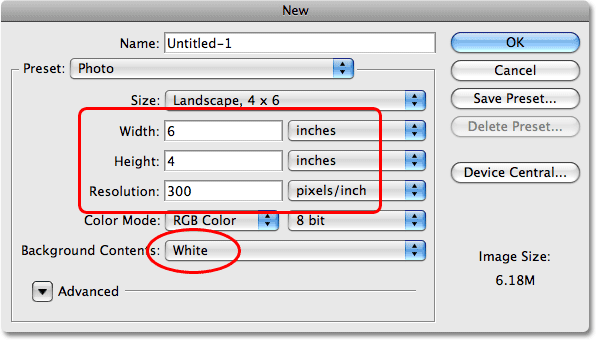
First, we need a document, so go up to the File menu at the top of the screen and choose New..., or use the keyboard shortcut Ctrl+N (Win) / Command+N (Mac) to quickly bring up Photoshop's New Document dialog box. Choose the size you want for your document. I'll set mine to a 6 x 4 inch document, but you can use whichever size you need. Since I want this to look good when I print it, I'll set my Resolution to 300 pixels/inch. Make sure the Background Contents option is set to White, then click OK when you're done to create your new document:
Step 2: Select The Type Tool
Next, in order to add our text, we need to Type Tool. Grab it from the Tools palette or press the letter T on your keyboard to select it with the shortcut:

Step 3: Select Your Font From The Options Bar
With the Type Tool selected, go up to the Options Bar at the top of the screen and choose your font. Since we're going to be using a letter as a container for more text, try to choose a font with thick letters. I'll use Arial Black. Don't worry about the size for now. We'll resize the text as needed in a moment:

Step 4: Type A Letter Into The Document
Click anywhere inside your Photoshop document and type a letter to use as a container for the rest of your text. I'll type "T" since it's a nice, simple shape.
Step 5: Use Free Transform To Resize The Letter As Needed
If you need to resize your letter, press Ctrl+T (Win) / Command+T (Mac) to bring up Photoshop's Free Transform box and handles around the letter, then drag any of the handles (the little squares) to resize it. To avoid accidentally distorting to look of the letter as you resize it, hold down your Shift key as you drag the handles. If you want to resize the letter from its center, hold down the Alt (Win) / Option (Mac) key as well:
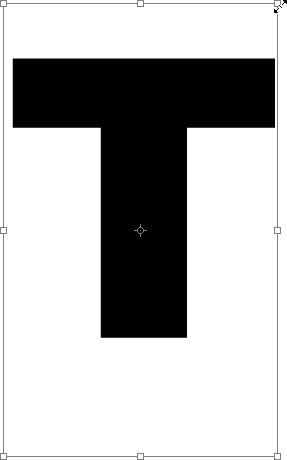
Press Enter (Win) / Return (Mac) when you're done to accept the transformation and exit out of the Free Transform command.
Step 6: Create A Path From The Type
With the Type Tool still selected, right-click (Win) / Option-click (Mac) anywhere inside the document to bring up a sub menu of options for the text. We need to convert our letter into a path which we can use as a container for the rest of our text, so select Create Work Path from the sub menu:
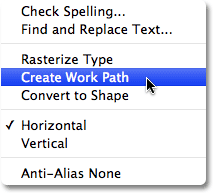
Depending on the color you're using for your text, you may or may not notice an outline around the letter once you've created the path. The outline is the path, and if you can't see it right now, you'll definitely see it in a moment.
Step 7: Hide The Type Layer
If you didn't notice the path around your letter after you selected "Create Work Path", you'll notice it after this step because we're going to hide the text layer from view since we no longer need to see it. On the far left of the text layer in the Layers palette is an eyeball icon. This is the Layer Visibility icon, but most people just refer to it as the "eyeball". When the eyeball is showing, the layer is visible in the document, and when it's not showing, the layer is hidden. Currently, the eyeball is showing, which is why we can see the letter in the document. Click on the eyeball icon with your mouse, which will not only hide the eyeball, it will hide the text in the document as well:
You can click back inside the empty box where the eyeball icon was displayed to make the layer visible again.
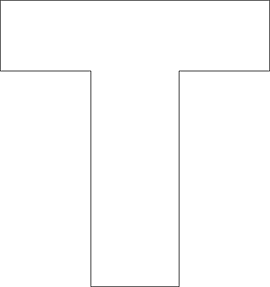
With the text hidden, only the path we created a moment ago is now visible:
Step 8: Click Inside The Path, But Don't Type Just Yet
Our path is now visible, and we're going to use it as a container for our text. We just need to add the text! With the Type Tool still selected, move your mouse cursor anywhere inside the path. You'll see the shape of your cursor change from an I-beam with a dotted square around it to an I-beam with a dotted elliptical shape around it, indicating that if you click the mouse and start typing, you'll be typing inside the path, which is exactly what we want. Go ahead and click anywhere inside the path, but don't start typing just yet.
Step 9: Change Your Font And/Or Font Size If Necessary
You're probably going to want to reduce the size of your font before you start typing, so before you actually type anything, go up to the Options Bar and set your font size to something more appropriate. I'll set mine to 36 pt. You may want to change the font as well. I'll change mine to Arial, rather than Arial Black which is what I used for the letter itself:
Step 10: Select "Justify All" From The Paragraph Palette
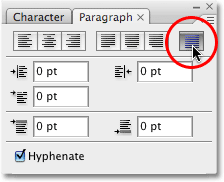
There's one more thing we're going to want to do before we start typing. We want to set the text justification to Justify All so that the text will fill up our shape from left to right. We can access the justification options from the Paragraph palette. If you don't already have the Paragraph palette open on your screen, with the Type Tool still selected, go up to the Options Bar and click on the Character and Paragraph palette toggle button:

By default, Photoshop groups the Character and Paragraph palettes together in the same palette group, both because they work as a team and to save screen space. If the Character palette is the one showing, simply click on the Paragraph palette's name tab at the top of the palette group to bring it to the forefront and send the Character palette to the background. With the Paragraph palette selected, click the Justify All option in the upper right of the palette. This will make sure that our text fills as much of the letter as possible:
Step 11: Type Your Text Inside The Path
All that's left to do now is add our text inside the letter. Go ahead and start typing, and as you do, you'll see your text filling the inside of the letter:
Continue typing until your letter is filled with text.
Step 12: Click On The Checkmark To Accept The Text
When you're done adding your text, click on the checkmark in the Options Bar to accept it:

Step 13: Hide The Path
With the text added, all that's left to do now is hide the path, and we can do that easily with the keyboard shortcut Ctrl+H (Win) / Command+H (Mac). And with that, we're done! Here's the final result, with the text in the shape of a letter T:
Where to go next...
And that's how easy it is to convert a letter into a path and use it as a container for more text in Photoshop! Visit our Text Effects or Photo Effects sections for more Photoshop effects tutorials!
