
Faking Text Wrap In Photoshop
In this Photoshop tutorial, we're going to learn how to create a Photoshop text wrap effect by faking the text wrap feature you'd normally find in a page layout program, allowing us to wrap text around objects. Photoshop may be the world's most popular and most powerful image editor, but it doesn't quite measure up with programs like InDesign or even Illustrator when it comes to text (although Photoshop does offer more text-related options than you'd normally expect to find in a program built for photo editing).
Photoshop doesn't come with an actual text wrap feature, but it does give us the ability to use a path as a container for our text, and as we'll learn in this tutorial, we can use that to wrap text around objects. It's not quite as good or as intuitive as having an actual text wrap feature, but it works.
Here I have an image of a baseball lying in the grass:

I want to add some text to this image, and I want the text to wrap around the baseball. As I said, Photoshop doesn't come with an official "text wrap" option, but thanks to paths and Photoshop's ability to use a path as a container for text, this is going to be easy.
Let's get started!
Step 1: Select The Rectangle Tool
Since we're going to use a path as a container for our text, before we can add our text, we need a path! I'm going to use Photoshop's Rectangle Tool (not to be confused with the Rectangular Marquee Tool) to create a rectangular path, which will become the basic shape of my text container. I'll select the Rectangle Tool from the Tools palette:
I could also press U on my keyboard to quickly select it.
Step 2: Select The "Paths" Option In The Options Bar
Photoshop gives us three ways to use the Rectangle Tool, along with its other shape tools. We can use them to draw vector shapes, we can use them to draw simple paths (which is what we'll be doing here), and we can use them to draw pixel-based shapes. You choose between these three options by clicking on their corresponding icon up in the Options Bar at the top of the screen. I want to use the Rectangle Tool to draw a rectangular-shaped path, so I'm going to click on the Paths icon in the Options Bar, which is the icon in the middle of the three (the one on the left is the vector shapes option and the one on the right is for drawing pixel-based shapes):

Step 3: Drag Out A Rectangular-Shaped Path
With my Rectangle Tool selected and set to draw paths, I'm simply going to drag out a rectangular-shaped path, in the same way that I would drag out a selection with the Rectangular Marquee Tool, and this path will become the container for my text:
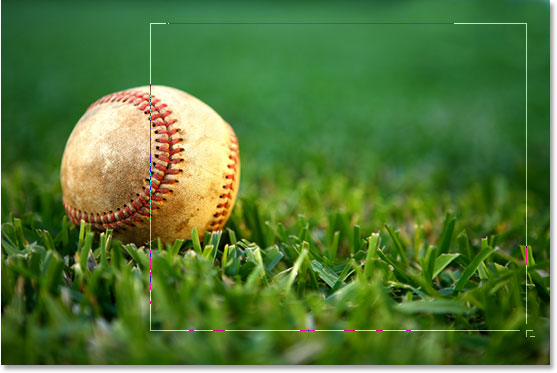
As we can see in the image above, my path is currently running straight through the baseball, which isn't going to help me much when what I really want is for my text to wrap around the right side of the baseball, not flow over top of it. I need a way to reshape my path so that the path itself wraps around the ball. We'll do that next.
Step 4: Select The Ellipse Tool
There's a few ways that we can reshape a path in Photoshop, but in this case the easiest way, since the ball is round, is to use Photoshop's Ellipse Tool to subtract part of the path from around the ball. To do that, I'll select my Ellipse Tool, which by default is hiding behind the Rectangle Tool in the Tools palette, so I'll need to click on the Rectangle Tool, hold my mouse button down for a second or two, and then select the Ellipse Tool from the fly out menu that appears:

Step 5: Set The Ellipse Tool To "Subtract" Mode
With the Ellipse Tool selected, if you look up in the Options Bar, you'll see a group of four icons that look like squares connected together in different ways. These four icons represent four options that determine how the path you're about to draw is going to behave. The one we want is the second one from the left, which is the Subtract from path area icon. I'll click on it to select it:

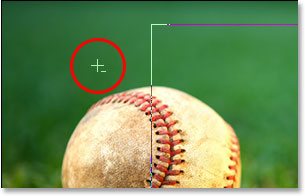
With this option selected, if I drag out an elliptical-shaped path with the Ellipse Tool, which I'll do in a moment, any part of the new path that overlaps my original rectangular path will be subtracted from the original path. Let's see what I mean. I'm going to drag out an elliptical path around the baseball. Before I begin, if I look closely at my cursor, I can see a small minus sign ("-") in the bottom right corner of it, letting me know that I'm in "Subtract" mode:
You can also access the "Subtract" mode simply by holding down your Alt (Win) / Option key before you start dragging out your path, which is a bit faster than selecting the option in the Options Bar (you can release the Alt/Option key right after you begin dragging out your path). I'll go ahead and drag out a path around the baseball. If I need to reposition my path as I'm dragging, which I almost always need to do, I can hold down my Spacebar and move the path around on the screen with my mouse to reposition it, then release the Spacebar and continue dragging out the path. Here's the image with the second path around the baseball:
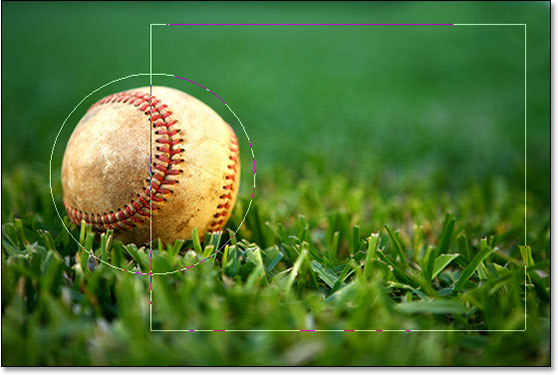
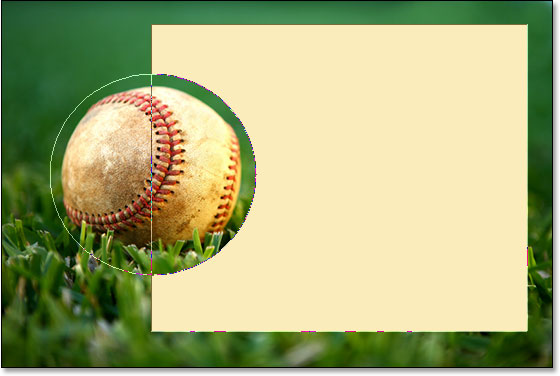
It looks like I have two separate paths in the image at this point - a rectangular one and an elliptical one. But the only active path is the original rectangular one, which now isn't quite as rectangular because, even though Photoshop isn't giving us any visual clues of what's really happening, the elliptical path is now subtracting (or "cutting out", if you prefer)
part of the rectangular path around the baseball. To make it easier to see, I've filled in the remaining active path area in the image below. This is the area where my text will appear. Notice how the rectangular path now wraps nicely around the baseball, which means my text is also going to wrap around it:
Now that we have our path in place, let's add our text.
Step 6: Add Your Text
All that's left to do now is add my text, and for that, I need Photoshop's Type Tool, so I'll select it from the Tools palette:
I could also quickly access the Type Tool by pressing T on my keyboard. Then, with the Type Tool selected, I'll go up to the Options Bar at the top of the screen and select my font, font size and text color. I'll just keep things simple here and go with Times New Roman Bold set to a size of 16pt, with my text color set to white:

To use the path I've created as a container for my text, all I need to do is move my cursor anywhere inside the active path area. When I do that, my Type Tool cursor changes from having a dotted square outline around it to a dotted elliptical outline, indicating that the path will become my text container if I click here and start typing:
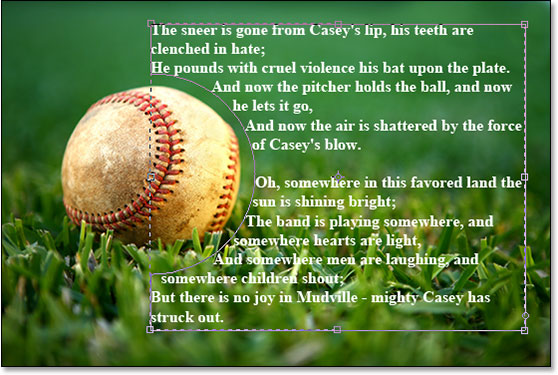
I already have some text saved to my clipboard which I copied from the end of the famous baseball poem "Casey At The Bat" by Ernest Lawrence Thayer, which I thought would be fitting for this image, so to add the text to my image, I'll simply click inside the path and then use the keyboard shortcut Ctrl+V (Win) / Command+V (Mac) to paste the text inside the path. As we can see, not only does the text stay inside the path, it also wraps nicely around the baseball:
To accept the text and exit out of text editing mode, I'll click the checkmark up in the Options Bar:

Finally, to hide the path so it's no longer visible in my image, I'll simply click on the Background layer in the Layers palette:
With my path outlines no longer cluttering up my image, here is my final result:

Where to go next...
And there we have it! That's the basics of how to fake a page layout program's "text wrap" feature in Photoshop! Check out our Text Effects or Photo Effects sections for more Photoshop effects tutorials!