
Textured Text Effect In Photoshop
In this Photoshop tutorial, we'll look at how to create an interesting effect by adding a texture to text. Creating the effect requires nothing more than a photo to use as the texture, a layer mask, a simple image adjustment, and of course, some text! The effect works best when you use a texture that has something to do with the topic of your text, but of course, the final result is up to you.
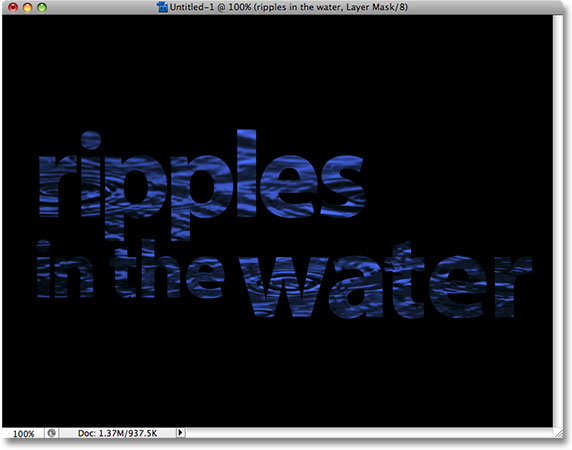
Here's an example of the effect we'll be working towards:

Let's get started!
Step 1: Create A New Document
The first thing we need is a new document to work in. Go up to the File menu at the top of the screen and choose New, or press the keyboard shortcut Ctrl+N (Win) / Command+N (Mac). Either way brings up Photoshop's New Document dialog box. Choose the size you need for your document. For this tutorial, I'll create a document 800 pixels wide by 600 pixels high and since I'm not planning on printing this, I'll leave the resolution set to 72 pixels per inch. Click OK when you're done to exit out of the dialog box. The new document will appear on your screen:
Step 2: Fill The New Document With Black
I'm going to use black as the background for my text effect, which means I'll need to fill the document with black. To do that, go up to the Edit menu at the top of the screen and choose Fill. This brings up the Fill dialog box. Choose Black for the Contents option at the top of the dialog box. Also, make sure the Blending Mode is set to Normal and Opacity is set to 100% (these are the default settings so you probably won't need to change them):
Click OK to exit out of the Fill dialog box. Photoshop fills the new document with solid black:
Step 3: Add Your Text
Select the Type Tool from the Tools palette, or press the letter T on your keyboard to quickly select it with the shortcut:
Once you have the Type Tool selected, the Options Bar at the top of the screen will display options for working with type. Choose the font, font size and text color that you want to use, then click inside the document and add your text. If you want to get a little fancy with your text, you'll find additional options for formatting type, like leading, kerning, tracking, and baseline shift, in Photoshop's Character palette which you can quickly access by clicking on the Character and Paragraph palette toggle icon in the Options Bar:

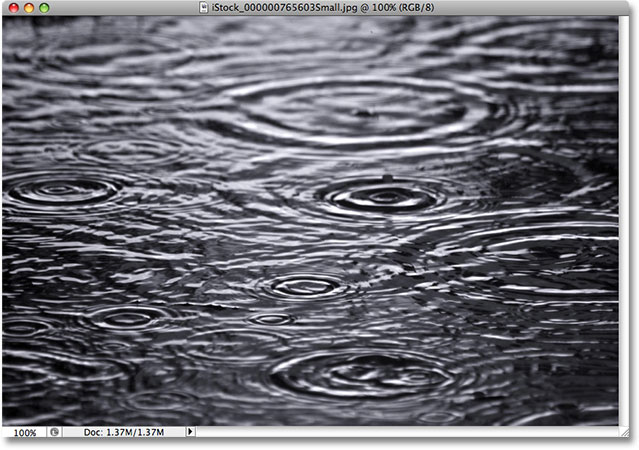
I'm going to be using a photo of some water ripples for my texture, so I'll choose a blue color for my text and type "ripples in the water" into my document:
When you're done, click the checkmark in the Options Bar to accept the type and exit out of text editing mode:

All of your text should now be on one layer directly above the Background layer in the Layers palette:
Step 4: Open The Texture Photo
Open the photo you want to use as the texture in the effect. Here's the image I'll be using:
Step 5: Copy The Photo To The Clipboard
We need to copy the image temporarily on to Photoshop's clipboard, which simply means we're copying it to the computer's memory. Go up to the Select menu at the top of the screen and choose All, or press Ctrl+A (Win) / Command+A (Mac) for the faster keyboard shortcut. Either way selects the entire image, and you'll see a selection outline appear around the edges of the photo. Then go up to the Edit menu and choose Copy, or press Ctrl+C (Win) / Command+C (Mac), to copy the image to the clipboard.
Step 6: Add A Layer Mask To The Type Layer
With the texture photo now stored temporarily in memory, switch back over to your original document (the one containing the text). Make sure the type layer is highlighted in blue in the Layers palette, which means it's the layer currently selected. If it's not selected, click on it to select it. Then click on the Layer Mask icon at the bottom of the Layers palette. It won't look like anything has happened in the document, but if you look at the type layer again, you'll see that a white layer mask thumbnail has now appeared:
Step 7: Paste The Photo Into The Layer Mask
We're going to paste our texture photo directly into the layer mask we just added. Normally, Photoshop doesn't allow us to paste an image into a layer mask, but here's the trick. Hold down your Alt (Win) / Option (Mac) key, then click on the layer mask thumbnail in the Layers palette:
You'll see your document window fill with solid white. What you're actually seeing is the layer mask itself, which is something we don't normally see when working in Photoshop. With the layer mask now visible inside the document window, go up to the Edit menu and choose Paste, or press Ctrl+V (Win) / Command+V (Mac) to paste the texture photo into the layer mask. To clear the selection outline from around the photo, go up to the Select menu and choose Deselect, or press Ctrl+D (Win) / Command+D (Mac). Since layer masks deal only with black, white and shades of gray, the texture photo will appear black and white inside the layer mask:

With the photo now pasted into the layer mask, once again hold down Alt (Win) / Option (Mac) and click on the layer mask thumbnail in the layer palette:
This exits us out of the layer mask and returns us to the normal document view mode. You'll see the texture photo now appearing inside the text:
Step 8: Apply The Threshold Adjustment To The Layer Mask
To make the image inside the text look less like a photo and more like an interesting texture, we'll use Photoshop's Threshold image adjustment. Photoshop allows us to apply some (but not all) of its image adjustments directly to layer masks, and the Threshold adjustment is one of the ones we can use. The Threshold adjustment takes all of the colors (or shades of a gray) in an image and converts them to either black or white, greatly reducing the amount of detail in the image.
You should be seeing a white highlight border appearing around the layer mask thumbnail in the Layers palette. This tells us that the layer mask is currently selected. If you don't see the highlight border around the thumbnail, click on it to select it. Then go up to the Image menu at the top of the screen, choose Adjustments, and then choose Threshold:
This brings up the Threshold dialog box and right away, you'll see a change in the appearance of your text, with some areas of solid color remaining visible and other areas now hidden from view. The actual areas that are hidden will depend entirely on the photo you're using for your texture:
You can control how much of an impact the texture photo has on the text by dragging the small slider at the bottom of the Threshold dialog box left or right. Remember, the Threshold adjustment takes everything in the image and converts it to either solid black or solid white, and on a layer mask, which is where the texture photo is sitting, areas of white reveal those parts of the layer while areas of black hide those parts of the layer. As you drag the slider towards the left, more and more of the texture photo will be forced to white by the Threshold adjustment, which means that more and more of the text will become visible. Dragging the slider towards the right will force more of the texture photo to black, which means more of the text will be hidden. Exactly where you drag the slider to will depend entirely on the photo you're using for the texture and the effect you're going for, so you'll definitely want to keep an eye on your text as you drag the slider until you've achieved the result you want. Since my text is almost unreadable at the moment, I'm going to drag my slider quite a ways over to the left to reduce the impact of the texture:
With more of my texture photo being forced to white, more of the text is now visible in the document:

Step 9: Unlink The Layer Mask From The Text Layer
If you're happy with the results of the effect, you can stop here, but if you want to resize the photo or move it around inside the text, click on the small link icon between the type layer's thumbnail and the layer mask thumbnail. This will unlink the layer mask from the text, allowing us to move our texture photo around in the layer mask without moving the text itself:
Step 10: Resize And / Or Move The Texture Photo With Free Transform
With the texture photo on the layer mask and the text no longer bound together, press Ctrl+T (Win) / Command+T (Mac) to bring up Photoshop's Free Transform box and handles around the texture photo. Drag any of the corner handles to resize it. Hold down Shift as you drag the handles to constrain the proportions of the photo if you don't want to distort its shape. Add the Alt (Win) / Option (Mac) key while dragging a handle to resize the photo from its center rather than from the corner. To move the photo around inside the text, simply click anywhere inside the Free Transform box and drag the image with your mouse:

Press Enter (Win) / Return (Mac) to exit out of the Free Transform command and you're done! Here is my final textured photo result:
Where to go next...
And there we have it! Check out our Text Effects or Photo Effects sections for more Photoshop effects tutorials!